
Web Hosting via IPFS and Pinata

In this blog, we will be discussing the web hosting technique via IPFS. So first let’s understand what IPFS mean.
IPFS stands for Interplanetary File system. It is a peer-to-peer network. It’s purpose is to store and provide access to files, websites, data, and applications. It allows users to host and receive content in a decentralized manner via peer-to-peer file sharing. This means that user-operators hold a portion of the overall data which creates a strong system of file storage and sharing. Now let’s understand the working of IPFS :
Usually, when we put a link or any URL in the browser, we technically ask the other computer for the page that we requested. But that’s not the only way we can retrieve the information, rather, if there is any replica of that page on the IPFS that we could use.
Now instead of asking only a single computer for the requested page, the IPFS will ask several other systems for the same page. And this means that you can get the page from any of the computer from IPFS.
Also keep in mind that whenever we are using IPFS, you aren’t just downloading files from someone else, your computer also helps distribute them.
There are 4 major components of IPFS:
Distributed hash table (DHT):
Block Exchanges
Merkle DAG
Self-Certifying File System
In order to understand web hosting vis IPFS, you need to install golang, you can follow the below steps:
1.Install Brew (skip if you already did)
ruby -e “$(curl — fsSLhttps://raw.githubusercontent.com/Homebrew/install/master/install)"
2. Update & Install Go
brew update && brew install golang
3. Setup Workspace It’s considered best practice to use $HOME/go location for your workspace, so let’s do that!
mkdir -p $HOME/go/{bin,src,pkg}
Now, We have created two important folders bin and src that’ll be used for GO.
4. Setup Environment : We’ll need to add to .bashrc or .zshrc (if you’re using zsh) with the following info.
(Ex: nano ~/.bashrc ) export GOPATH=$HOME/go export GOROOT=”$(brew — prefix golang)/libexec” export PATH=”$PATH:${GOPATH}/bin:${GOROOT}/bin”
reload the settings with source $HOME/.bashrc (or .zshrc )
5. Check go version:
Finally you have golang installed …
Let us understand the following steps for web hosting via IPFS:
1.Install IPFS CLI, you can use brew to install IPFS
brew install ipfs
2. You can also use below steps to install ipfs using tar file. [Recommended]
$ curl https://dist.ipfs.io/go-ipfs/v0.7.0-rc2/go-ipfs_v0.7.0-rc2_linuxamd64.tar.gz | tar xvzf —
$ cd go-ipfs ~/go-ipfs$ sudo ./install.sh Moved ./ipfs to /usr/local/bin
~/go-ipfs$ cd — $ rm -Rf go-ipfs/* (Optional)
3. Now you have ipfs and go installed then check you ipfs version. To verify your installation, type the following in your terminal:
$ ipfs version
4. Now, you need to initialize the ipfs node. You can do that by typing below command.
$ ipfs init
Here, after running the above code, you will get a hash code, something like the following.
here QmQPeNsJPyVWPFDVHb77w8G42Fvo15z4bG2X8D2GhfbSXc is your hash code.
5. The above code will create a “.ipfs” directory.
Now if you want, you can download tree to view the directories in a tree form using below command,
$ brew install tree
To view the ipfs directory in a tree form you can type below command, and you will get something like below snapshot.
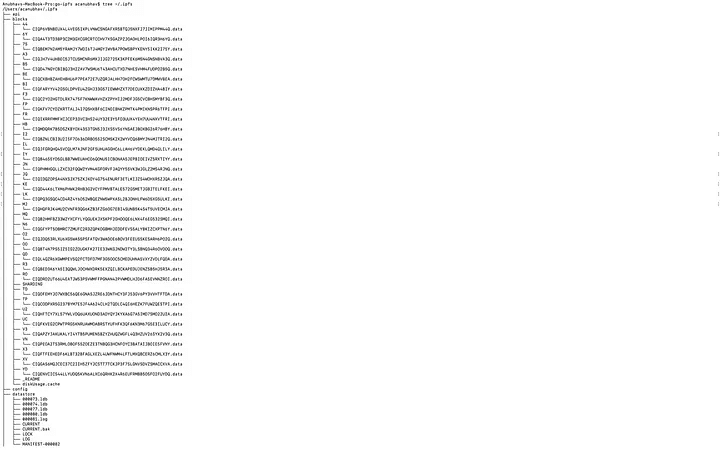
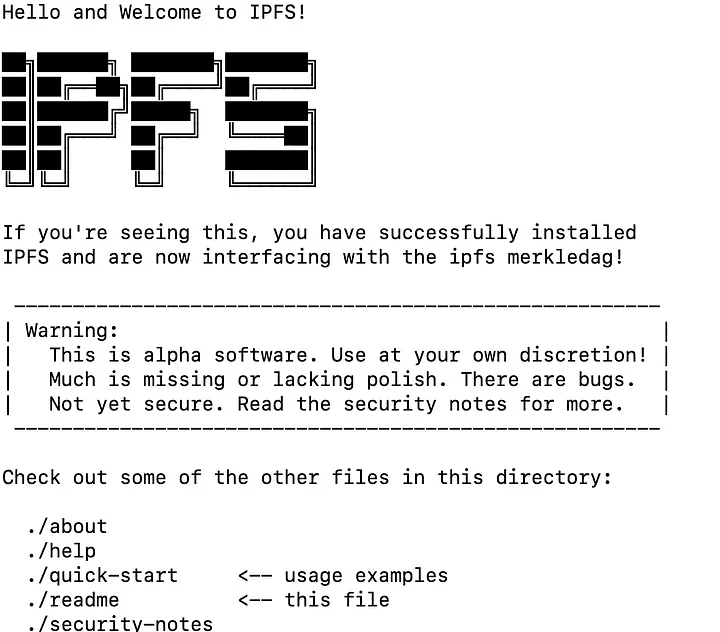
6. Now you can view the readme file stored locally inside ipfs store. To view type-in below command and you will get output like below snapshot.
$ ipfs cat /ipfs/QmQPeNsJPyVWPFDVHb77w8G42Fvo15z4bG2X8D2GhfbSXc/readme
7. If you want to explore more in IPFS like readme file, you can type below command.
$ ipfs ls /ipfs/ QmQPeNsJPyVWPFDVHb77w8G42Fvo15z4bG2X8D2GhfbSXc
8. Now, In order to make requests to the IPFS daemon from a browser you’ll need to add some HTTP headers for CORS(Cross Origin Resource Sharing). You need to type below commands.
$ ipfs config --json API.HTTPHeaders.Access-Control-Allow-Origin '["*"]'$ ipfs config --json API.HTTPHeaders.Access-Control-Allow-Methods '["PUT", "GET", "POST"]'
9. Now, here’s a time to activate daemon for sharing file using hash code.
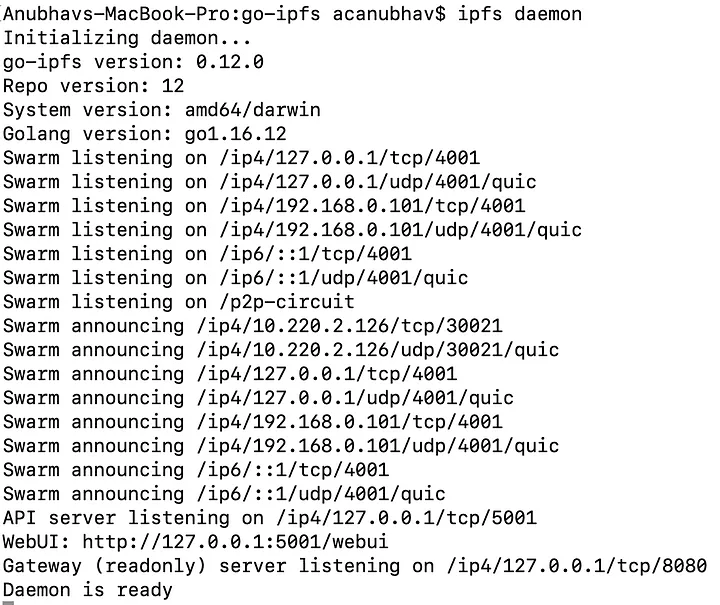
So, Let’s start the IPFS daemon…, by following command and you’ll get below snapshot.
$ ipfs daemon
10. Now, leave the IPFS daemon running in a terminal window only and spin up a new terminal session to the same directory.
Now, a time comes to share files but here we don’t have any file to share. So I am creating a simple html file for demo to share over peers.
So, let’s create “index.html” file. Below is my html file.
<!DOCTYPE html><html><head><title>IPFS Example</title></head><body>IPFS Example, by Anubhav Chaturvedi !!!<h2>Hello there, I am Anubhav Chaturvedi. </h2><h3>I am a freelancer, contractor, and consultant for Blockchain, Devops, AI and ML. </h3></body></html>
Store, the above “index.html” file in the directory, where you have ipfs.
11. Now we adding our “index.html” to IPFS. To do that below is the IPFS command and snapshot.
$ ipfs add index.html
The above code will generate a specific hash code for index.html file. You are advice to store this hash as it is very important to retrieve the file.
12. So, here at this point of stage the file has been stored.
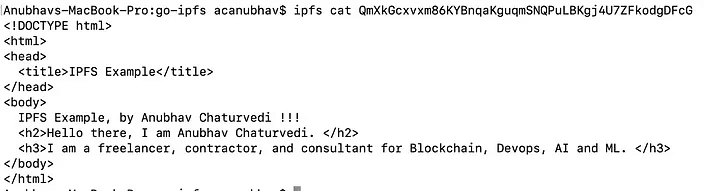
Now, we want to view our file(index.html). In order to view the file type in below command.
$ ipfs cat QmacpuLxTkUyvYwr53Q6SFMruovyLK3Ku2BJB1Ugur4oc3
and boom, you will get the exact same code what you have type in your index.html file. And all this is done using hash code securely and without latency.Below is the sample snapshot.
Now, this is done at local level to add and retrieve our file globally we are going to use pinata.cloud to interact with peers.
So, let’s create an account for pinata cloud. I already have created one.
So, let’s hop in.
13. So, as soon as you get in the account you will get a dashboard like below snapshot.
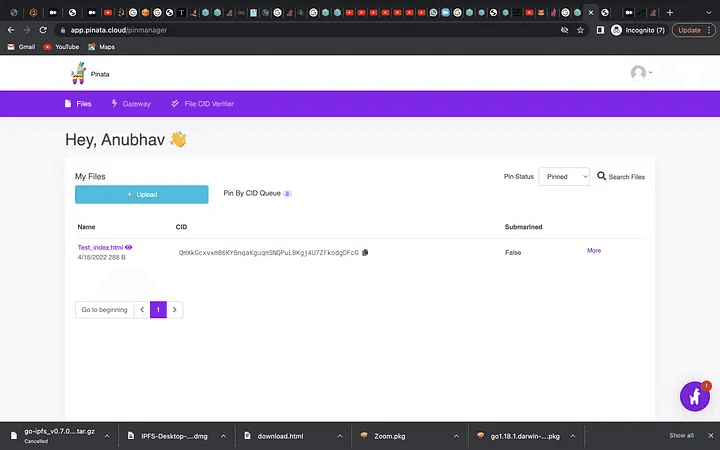
Initially, you won’t get any file on dashboard, I have one because I have added for demo previously.
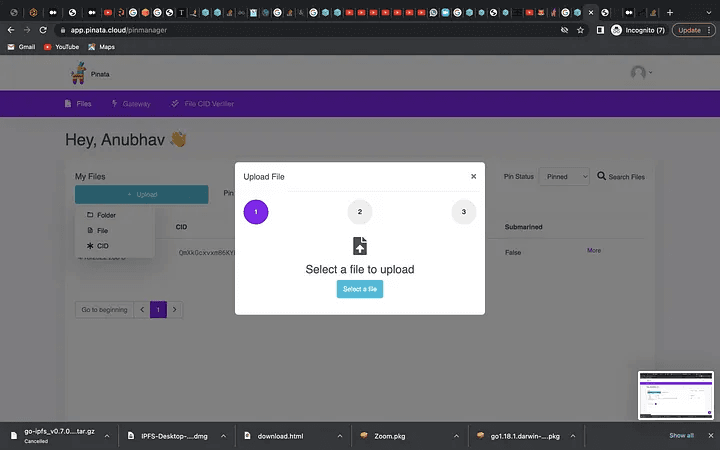
14. Now, you need to upload the “index.html” file created earlier. You need to click on UPLOAD button and then select file. Like below snapshot.

15. Now you need to select your file, like below snapshot.
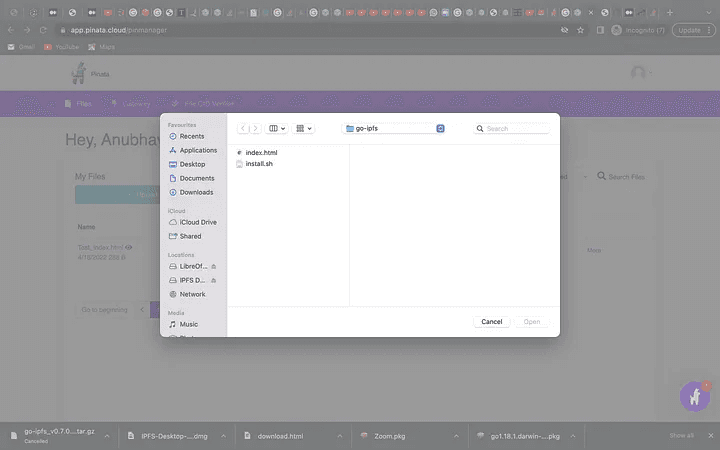
16. Now you will be getting a window to select a file. Below like a snapshot.
17. After selecting file you will get the dashboard like step 13.
18. Now you need to click on the link and you will be directed to the browser and bang!!! your website is live now, below is the sample snapshot.
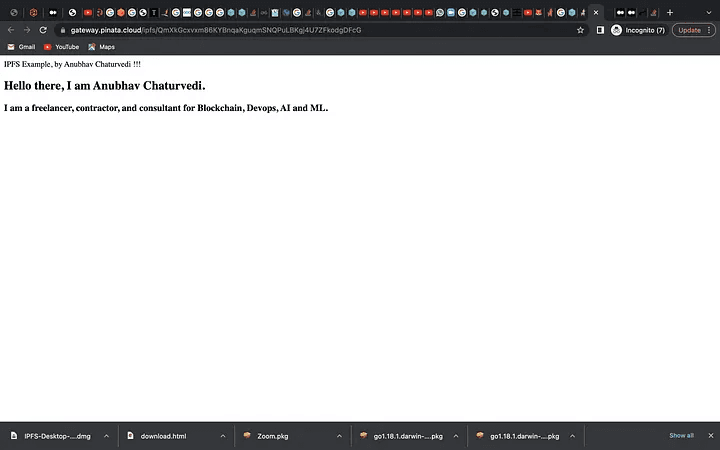
19. You can also check the same on ipfs.io, like below snapshot.
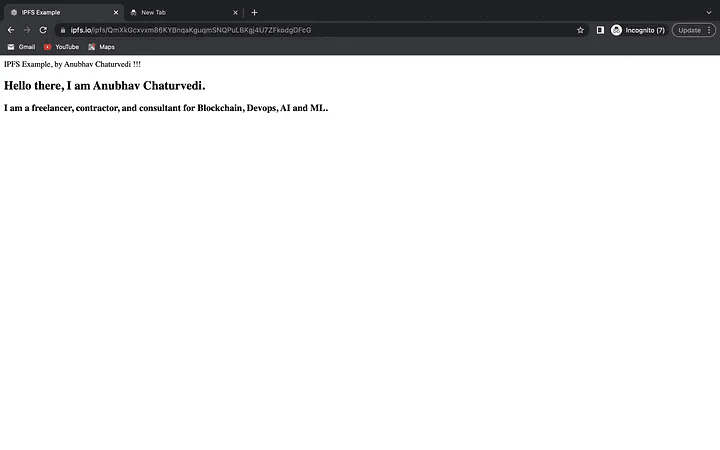
Happy Learning !!!
For any further queries or anything related to Blockchain Development, Coding, Blogging, or Tech Documentation you can DM me on Linkedin or Instagram at id=acanubhav94.
In this blog, we will be discussing the web hosting technique via IPFS. So first let’s understand what IPFS mean.
IPFS stands for Interplanetary File system. It is a peer-to-peer network. It’s purpose is to store and provide access to files, websites, data, and applications. It allows users to host and receive content in a decentralized manner via peer-to-peer file sharing. This means that user-operators hold a portion of the overall data which creates a strong system of file storage and sharing. Now let’s understand the working of IPFS :
Usually, when we put a link or any URL in the browser, we technically ask the other computer for the page that we requested. But that’s not the only way we can retrieve the information, rather, if there is any replica of that page on the IPFS that we could use.
Now instead of asking only a single computer for the requested page, the IPFS will ask several other systems for the same page. And this means that you can get the page from any of the computer from IPFS.
Also keep in mind that whenever we are using IPFS, you aren’t just downloading files from someone else, your computer also helps distribute them.
There are 4 major components of IPFS:
Distributed hash table (DHT):
Block Exchanges
Merkle DAG
Self-Certifying File System
In order to understand web hosting vis IPFS, you need to install golang, you can follow the below steps:
1.Install Brew (skip if you already did)
ruby -e “$(curl — fsSLhttps://raw.githubusercontent.com/Homebrew/install/master/install)"
2. Update & Install Go
brew update && brew install golang
3. Setup Workspace It’s considered best practice to use $HOME/go location for your workspace, so let’s do that!
mkdir -p $HOME/go/{bin,src,pkg}
Now, We have created two important folders bin and src that’ll be used for GO.
4. Setup Environment : We’ll need to add to .bashrc or .zshrc (if you’re using zsh) with the following info.
(Ex: nano ~/.bashrc ) export GOPATH=$HOME/go export GOROOT=”$(brew — prefix golang)/libexec” export PATH=”$PATH:${GOPATH}/bin:${GOROOT}/bin”
reload the settings with source $HOME/.bashrc (or .zshrc )
5. Check go version:
Finally you have golang installed …
Let us understand the following steps for web hosting via IPFS:
1.Install IPFS CLI, you can use brew to install IPFS
brew install ipfs
2. You can also use below steps to install ipfs using tar file. [Recommended]
$ curl https://dist.ipfs.io/go-ipfs/v0.7.0-rc2/go-ipfs_v0.7.0-rc2_linuxamd64.tar.gz | tar xvzf —
$ cd go-ipfs ~/go-ipfs$ sudo ./install.sh Moved ./ipfs to /usr/local/bin
~/go-ipfs$ cd — $ rm -Rf go-ipfs/* (Optional)
3. Now you have ipfs and go installed then check you ipfs version. To verify your installation, type the following in your terminal:
$ ipfs version
4. Now, you need to initialize the ipfs node. You can do that by typing below command.
$ ipfs init
Here, after running the above code, you will get a hash code, something like the following.
here QmQPeNsJPyVWPFDVHb77w8G42Fvo15z4bG2X8D2GhfbSXc is your hash code.
5. The above code will create a “.ipfs” directory.
Now if you want, you can download tree to view the directories in a tree form using below command,
$ brew install tree
To view the ipfs directory in a tree form you can type below command, and you will get something like below snapshot.
6. Now you can view the readme file stored locally inside ipfs store. To view type-in below command and you will get output like below snapshot.
$ ipfs cat /ipfs/QmQPeNsJPyVWPFDVHb77w8G42Fvo15z4bG2X8D2GhfbSXc/readme
7. If you want to explore more in IPFS like readme file, you can type below command.
$ ipfs ls /ipfs/ QmQPeNsJPyVWPFDVHb77w8G42Fvo15z4bG2X8D2GhfbSXc
8. Now, In order to make requests to the IPFS daemon from a browser you’ll need to add some HTTP headers for CORS(Cross Origin Resource Sharing). You need to type below commands.
$ ipfs config --json API.HTTPHeaders.Access-Control-Allow-Origin '["*"]'$ ipfs config --json API.HTTPHeaders.Access-Control-Allow-Methods '["PUT", "GET", "POST"]'
9. Now, here’s a time to activate daemon for sharing file using hash code.
So, Let’s start the IPFS daemon…, by following command and you’ll get below snapshot.
$ ipfs daemon
10. Now, leave the IPFS daemon running in a terminal window only and spin up a new terminal session to the same directory.
Now, a time comes to share files but here we don’t have any file to share. So I am creating a simple html file for demo to share over peers.
So, let’s create “index.html” file. Below is my html file.
<!DOCTYPE html><html><head><title>IPFS Example</title></head><body>IPFS Example, by Anubhav Chaturvedi !!!<h2>Hello there, I am Anubhav Chaturvedi. </h2><h3>I am a freelancer, contractor, and consultant for Blockchain, Devops, AI and ML. </h3></body></html>
Store, the above “index.html” file in the directory, where you have ipfs.
11. Now we adding our “index.html” to IPFS. To do that below is the IPFS command and snapshot.
$ ipfs add index.html
The above code will generate a specific hash code for index.html file. You are advice to store this hash as it is very important to retrieve the file.
12. So, here at this point of stage the file has been stored.
Now, we want to view our file(index.html). In order to view the file type in below command.
$ ipfs cat QmacpuLxTkUyvYwr53Q6SFMruovyLK3Ku2BJB1Ugur4oc3
and boom, you will get the exact same code what you have type in your index.html file. And all this is done using hash code securely and without latency.Below is the sample snapshot.
Now, this is done at local level to add and retrieve our file globally we are going to use pinata.cloud to interact with peers.
So, let’s create an account for pinata cloud. I already have created one.
So, let’s hop in.
13. So, as soon as you get in the account you will get a dashboard like below snapshot.
Initially, you won’t get any file on dashboard, I have one because I have added for demo previously.
14. Now, you need to upload the “index.html” file created earlier. You need to click on UPLOAD button and then select file. Like below snapshot.
15. Now you need to select your file, like below snapshot.
16. Now you will be getting a window to select a file. Below like a snapshot.
17. After selecting file you will get the dashboard like step 13.
18. Now you need to click on the link and you will be directed to the browser and bang!!! your website is live now, below is the sample snapshot.
19. You can also check the same on ipfs.io, like below snapshot.
Happy Learning !!!
For any further queries or anything related to Blockchain Development, Coding, Blogging, or Tech Documentation you can DM me on Linkedin or Instagram at id=acanubhav94.