Knime Deep Learning Installation
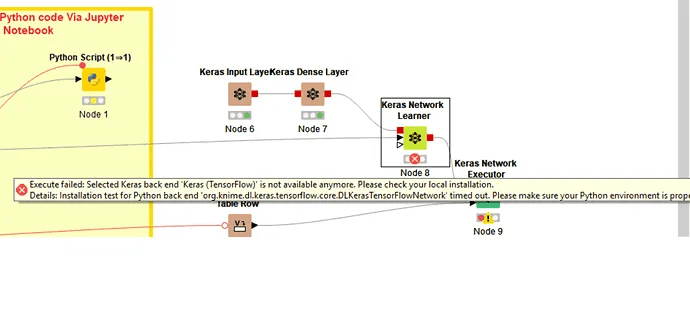
When executing the Keras Learner Network node, which is depicted below, if you see the dependency error.
Error in Keras Network Learner Node.
Tensorflow dependency error
Let’s see the solution regarding this.
Step 1: You must first install Anaconda on your computer. From the start menu, select the Anaconda prompt as shown below.
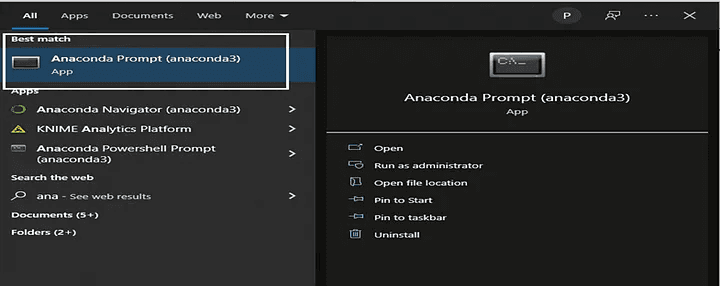
Anaconda prompt
Here, we will use the following syntax to create a new environment variable.
create -n <your environment name> python = 3.6
Here, Python version 3.6 will be used since Python versions greater than this one may cause installation problems for the TensorFlow and Keras libraries because Knime does not support them.
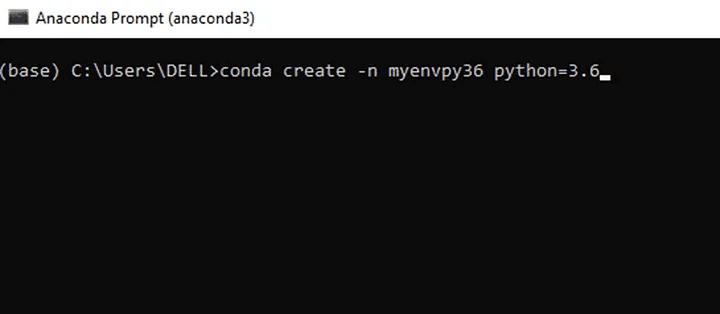
creating environment variable
Now to install the particular library in our environment created we will use the conda activate <your environment name>.
Here my environment name is myenvpy36 as shown in the below image.
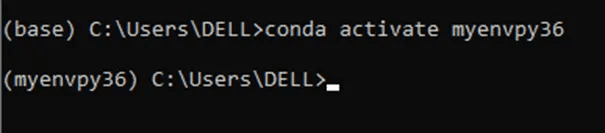
myenvpy36
Step 2: Let’s set up Tensorflow and the Keras library in the environment we’ve already built.
Note that if you just install the library using pip install TensorFlow, it will instal the higher version of tensorflow but it will not be supported in knime. We must supply the appropriate version for tensorflow and keras.
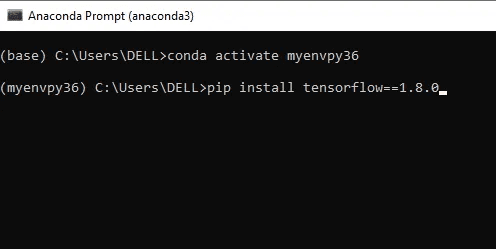
Installing TensorFlow
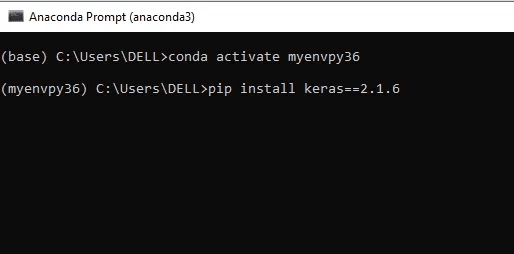
Installing Keras
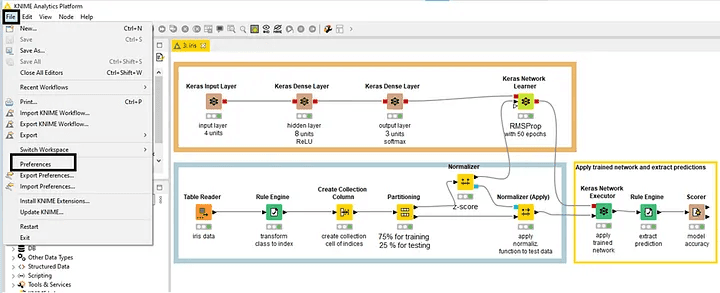
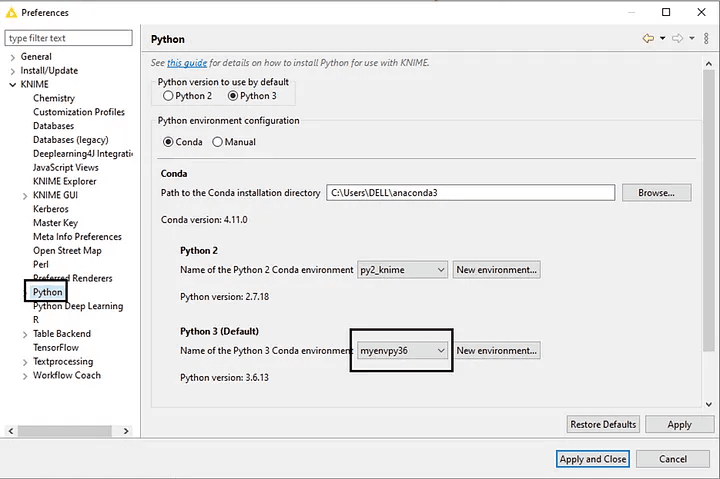
Step 3: Open knime and select the file -> preferences as shown below.
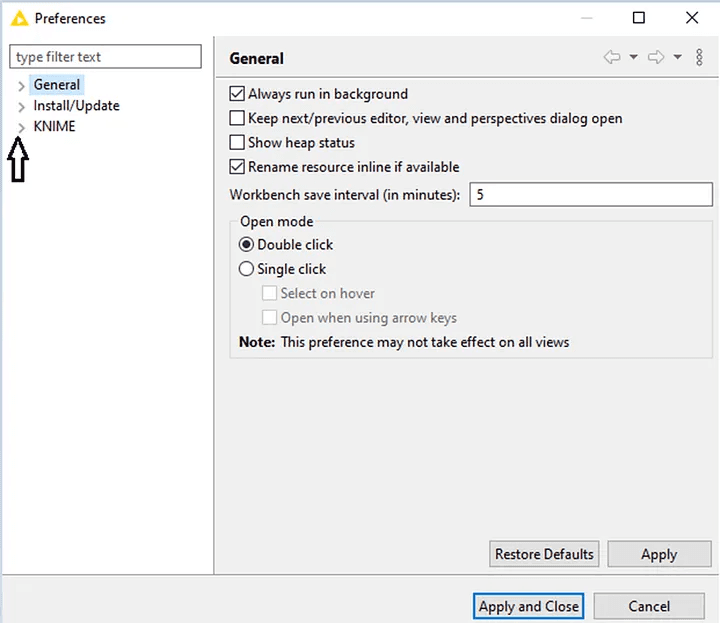
Now select the KNIME
We must choose the Python option here. Here, we must click Apply and Close after selecting the environment that we just constructed in the previous stages.
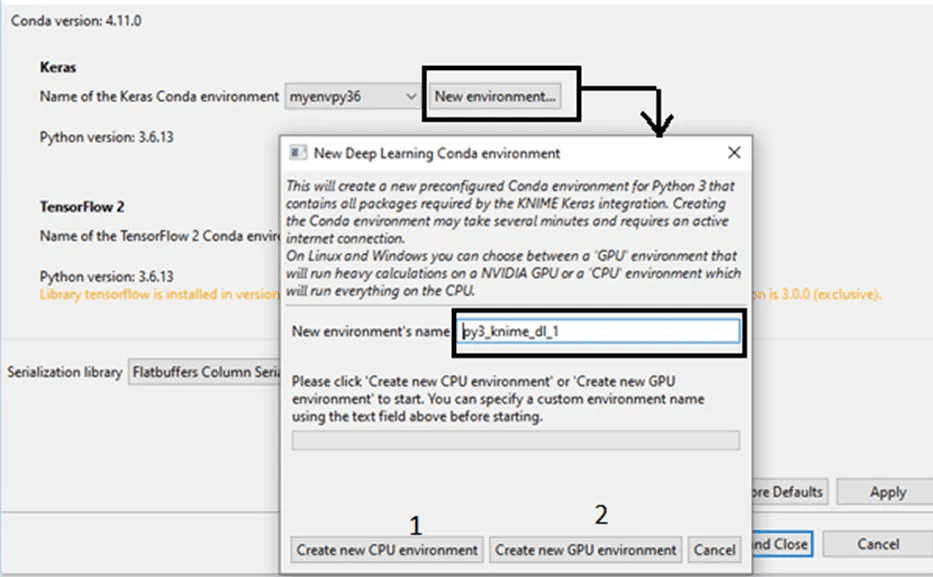
Now similarly we have to set options for Python Deep Learning as shown in the below image.
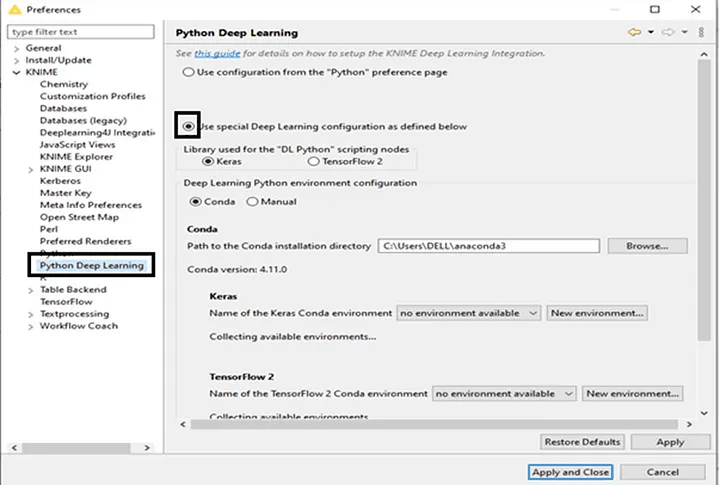
select the environment which we have created
Ignore the warning
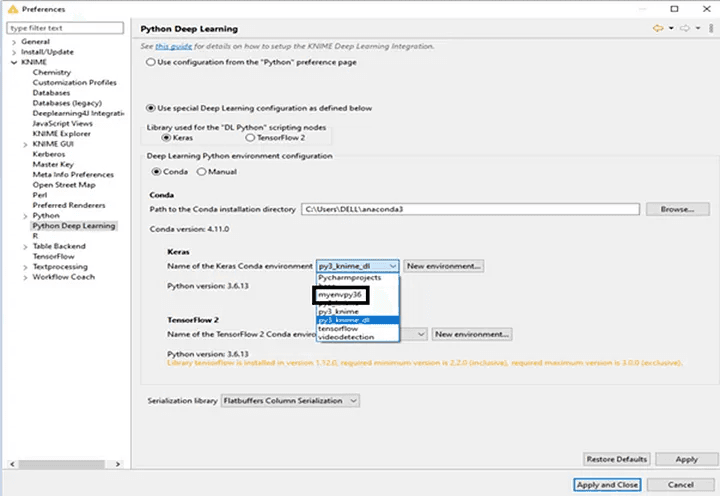
create a new environment and select the environment name as the default
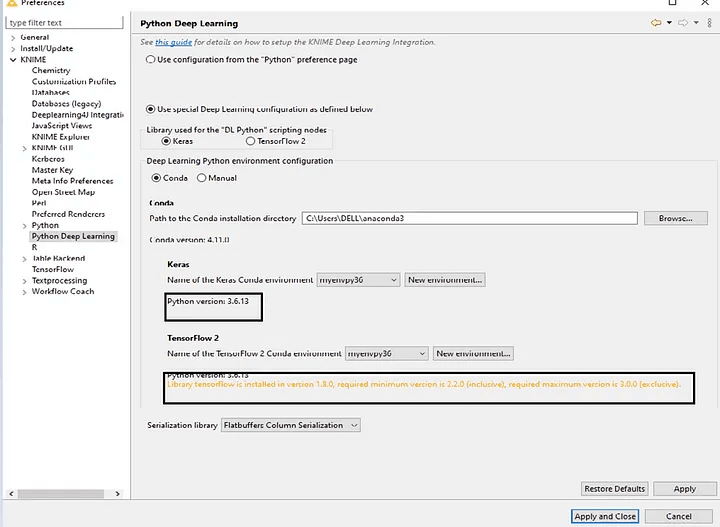
Apply the same steps to TensorFlow. After you click apply, the problem will be fixed.
I hope this article was informative and provided you with the details you required. If you have any questions while reading the blog, message me on Instagram or LinkedIn.For any kind of work related to Machine Learning , Deep Learning or Knime Development you can contact me at helpmeanubhav@gmail.com
Thank You…
When executing the Keras Learner Network node, which is depicted below, if you see the dependency error.
Error in Keras Network Learner Node.
Tensorflow dependency error
Let’s see the solution regarding this.
Step 1: You must first install Anaconda on your computer. From the start menu, select the Anaconda prompt as shown below.
Anaconda prompt
Here, we will use the following syntax to create a new environment variable.
create -n <your environment name> python = 3.6
Here, Python version 3.6 will be used since Python versions greater than this one may cause installation problems for the TensorFlow and Keras libraries because Knime does not support them.
creating environment variable
Now to install the particular library in our environment created we will use the conda activate <your environment name>.
Here my environment name is myenvpy36 as shown in the below image.
myenvpy36
Step 2: Let’s set up Tensorflow and the Keras library in the environment we’ve already built.
Note that if you just install the library using pip install TensorFlow, it will instal the higher version of tensorflow but it will not be supported in knime. We must supply the appropriate version for tensorflow and keras.
Installing TensorFlow
Installing Keras
Step 3: Open knime and select the file -> preferences as shown below.
Now select the KNIME
We must choose the Python option here. Here, we must click Apply and Close after selecting the environment that we just constructed in the previous stages.
Now similarly we have to set options for Python Deep Learning as shown in the below image.
select the environment which we have created
Ignore the warning
create a new environment and select the environment name as the default
Apply the same steps to TensorFlow. After you click apply, the problem will be fixed.
I hope this article was informative and provided you with the details you required. If you have any questions while reading the blog, message me on Instagram or LinkedIn.For any kind of work related to Machine Learning , Deep Learning or Knime Development you can contact me at helpmeanubhav@gmail.com
Thank You…