Implementing Neural Networks in Knime Workflows
On the well-known iris dataset, we will perform the neural network operation here without writing a single line of Python code. Sounds great right?
For this, we will use the Knime Analytics platform.
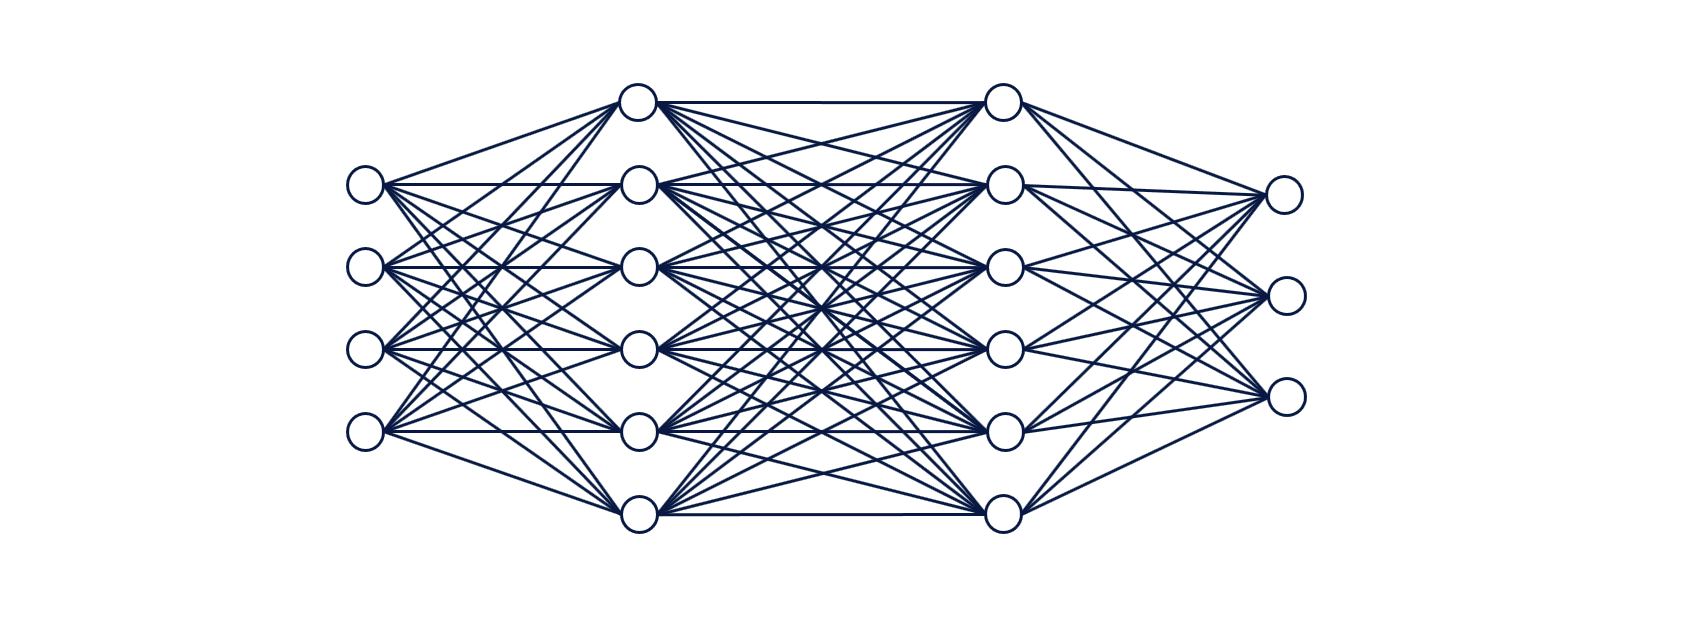
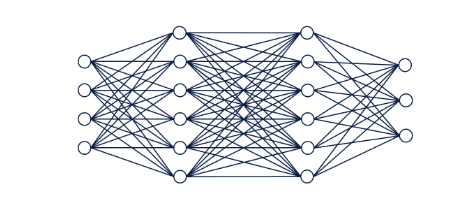
Neural Networks
The KNIME Analytics Platform is open-source data science software. KNIME, which is intuitive, open, and constantly integrating new developments, makes data science workflows and reusable components accessible to everyone.

Overview of Knime
Let’s start with the iris dataset.
We must first download the iris dataset from here. The dataset is presented in table format here. So we’ll use the Table Reader Node for this.
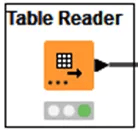
Table Reader Node.
Right-click on the node and select the configuration option.
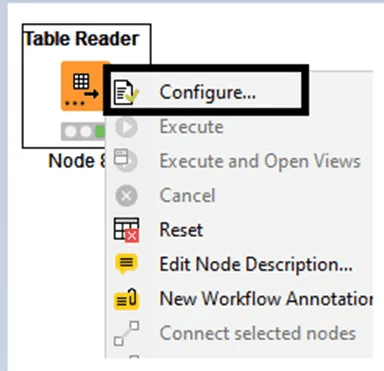
Configuration
Set the configuration shown below and navigate to the file where you saved the file. Click OK, then right-click on the node and select Execute.
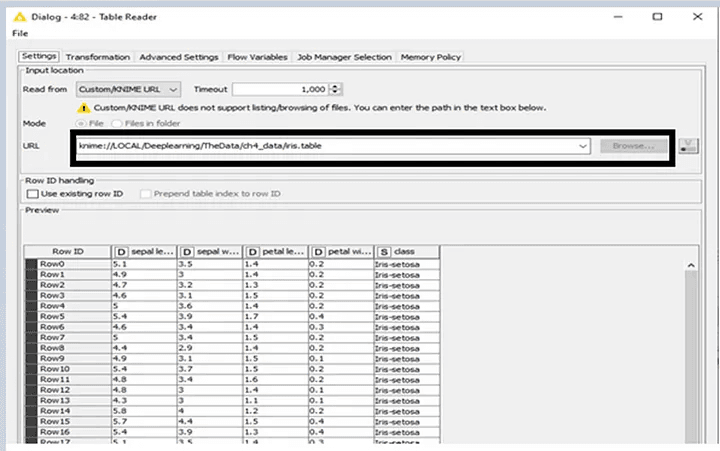
Dialog Box
We can see in the above image that the class column is a categorical variable, so we must convert it to an integer.
We will use the Rule base engine node. Right-click and configure it.
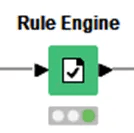
Rule Based Engine Node
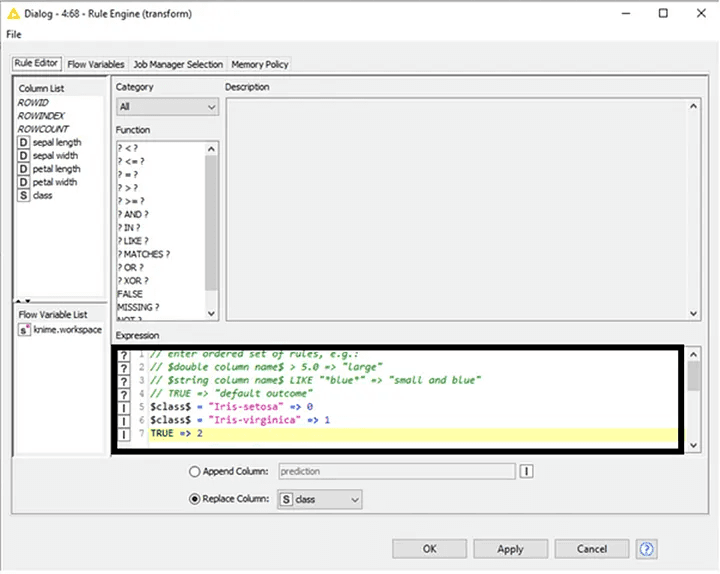
Dialog — 4:68 Rule Engine
Because there are three categorical values in the class, performing the above operation will convert the three categorical values to 0, 1, and 2 and execute it. Let us now examine the results.
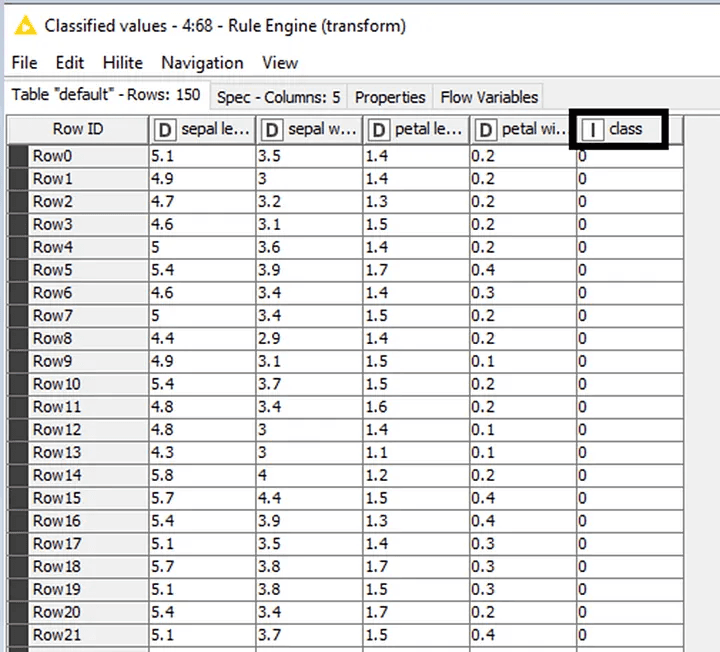
The output of the rule base engine node
Let’s convert the class column into a new class. So we’ll use create collection column for that. The cells in the new column are typed cell collections. Configure that we only need to convert the class, so we put it in the include column. This is in the new column. And then execute it.
Collection column node
Let’s configure this. We only need to convert the class, so we put it in the include column. And then execute it in the new column.
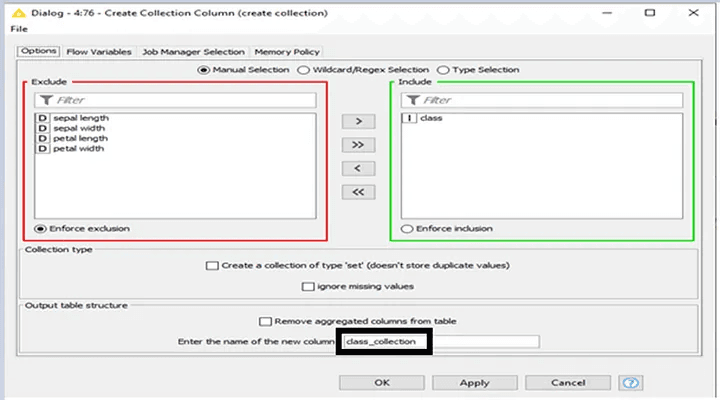
Configuration of create collection column
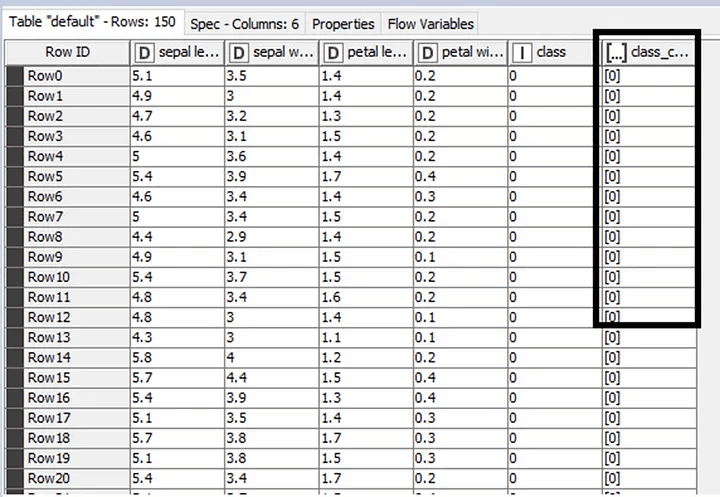
The output of creating a collection class
Let us now divide the data for training and testing. The partition node will be used in this case. Let’s set it up and split the data 75–25. And then execute it.
Partitioning node
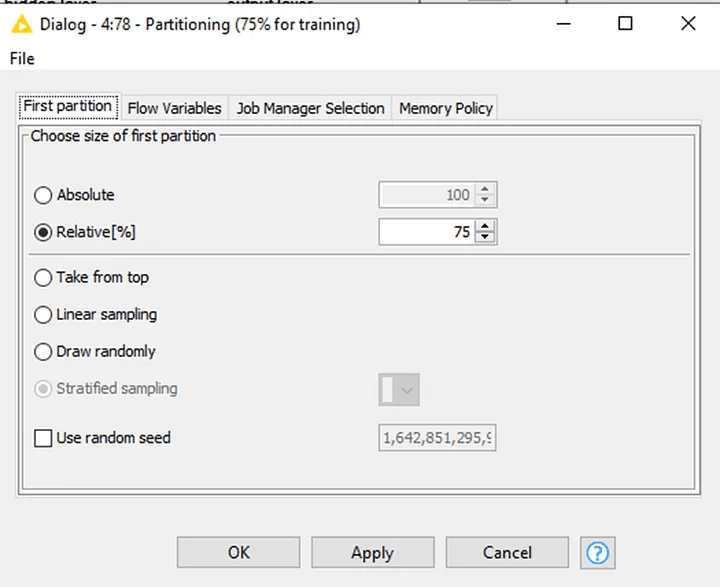
Configure the partitioning node
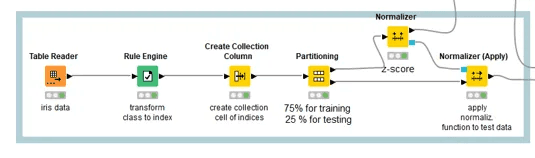
Let’s Normalize the data using the Normalizer node and configure it here we will use the z-score normalization.
Normalizer node
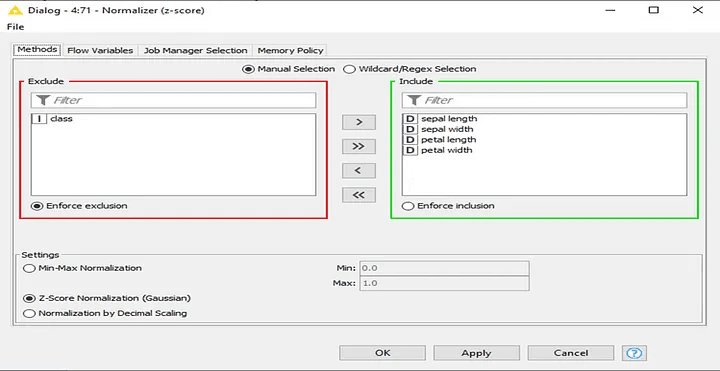
Configuring the normalization node
Z-score normalization refers to the process of normalizing every value in a dataset such that the mean of all of the values is 0 and the standard deviation is 1.
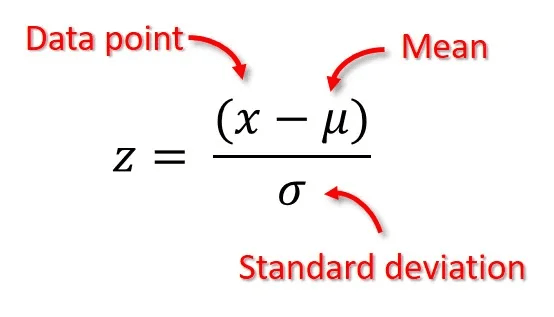
The formula for z-score normalization
Let’s see the output.
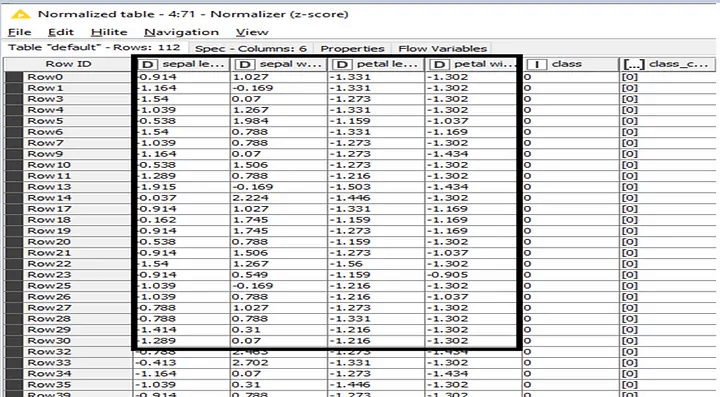
Output for z-score normalization
Normalizer(Apply) nodes standardize the input data based on the normalization parameters specified in the model input (typically coming from the Normalizer node). All columns in the input data that are contained in the model input will be applied to an affine transformation.
This node is typically used when test data must be normalized in the same manner as training data (using the “Normalizer” node). Configure and execute this node.
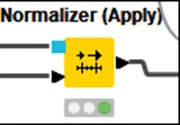
Normalizer (Apply) node
Data processing is complete
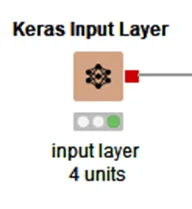
Let’s build the neural network now. So we’ll use the Keras input layer node for this. Let’s configure and run this node.
Keras input layer node
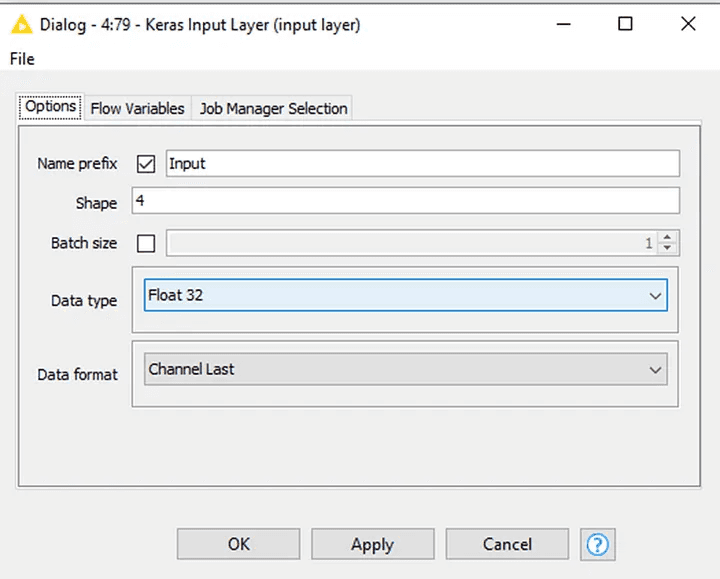
Input layer with 4 column
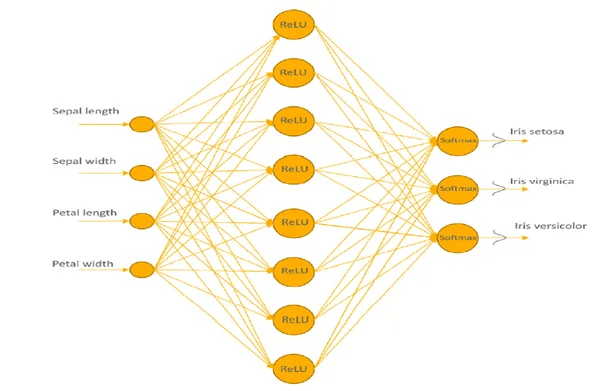
We chose size 4 because we will use four inputs to predict which class it belongs to - sepal length, sepal width, petal length, and petal width. And then execute it.
Now, we will have to create the hidden layer, so we will use the Keras dense layer node.
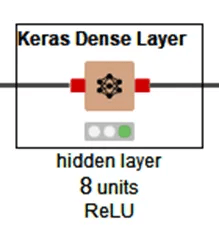
Keras dense layer (hidden layer)
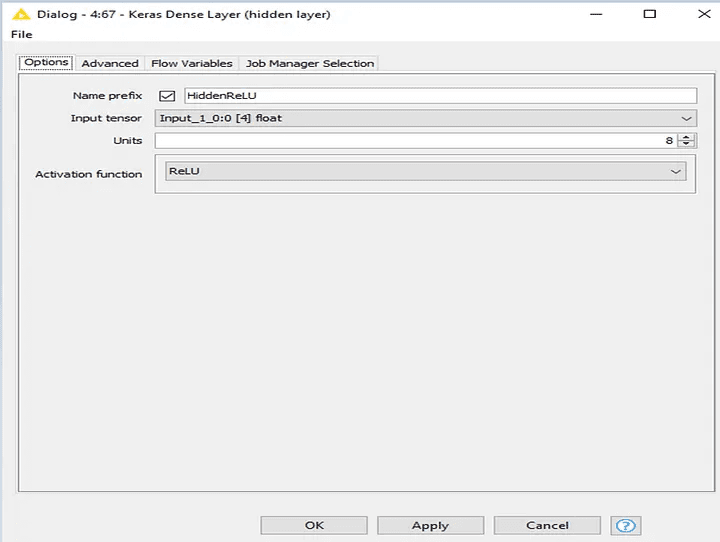
Configuration of Keras dense layer
Here we will use the ReLU activation function.
The Rectified Linear Activation function, abbreviated ReLU, is a piecewise linear function that outputs the input directly if it is positive; otherwise, it outputs zero. It has become the default activation function for many types of neural networks because it is easier to train and frequently results in better performance.
Let’s create another dense layer. Configure this node and execute this node.
Keras Dense Node
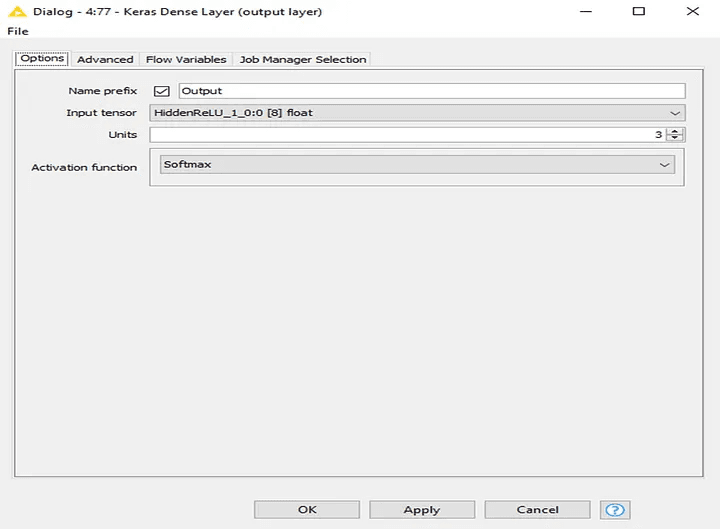
Here we will use the SoftMax function for the output layer.
The SoftMax function converts a vector of K real values to a vector of K real values that sum to one. The SoftMax transforms input values that are positive, negative, zero, or greater than one into values between 0 and 1, allowing them to be interpreted as probabilities. If one of the inputs is small or negative, the SoftMax converts it to a small probability; if an input is large, it converts it to a large probability, but it always remains between 0 and 1.
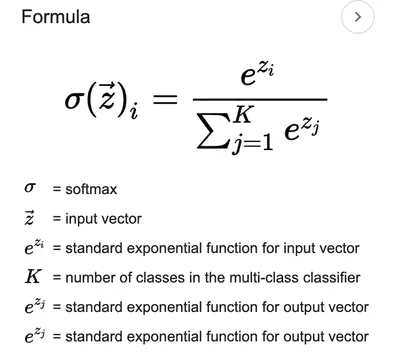
The formula for the softmax function
Neural Networks
Now let’s use a Keras deep learning network to perform supervised learning. Making use of the Keras network learner node. Let us now configure this tab.
If you find the dependency error in this node, please refer to my previous blog.
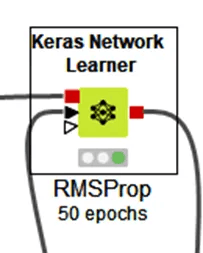
Keras Network Learner Node
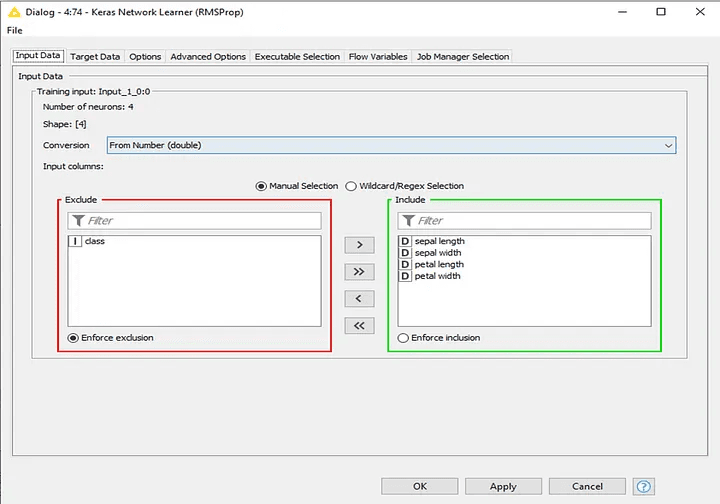
Input data
Here we exclude class because we want it as the target variable and for input class, we select the 4 parameters.

Target Data
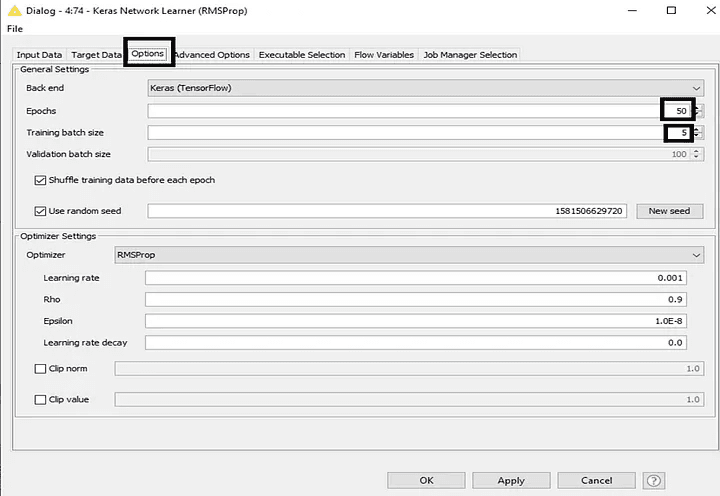
Setting the epochs, batch size, and optimizer
We can see accuracy, loss, and monitor while executing by clicking on view learning monitor.
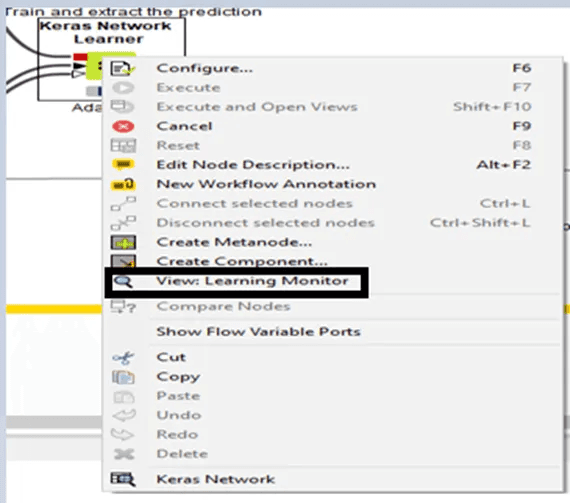
View the learning monitor option
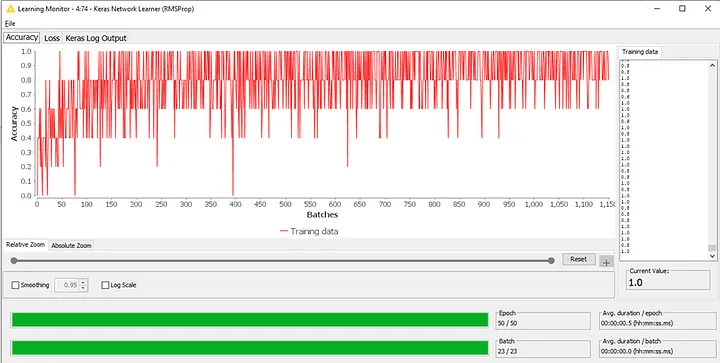
Accuracy of model
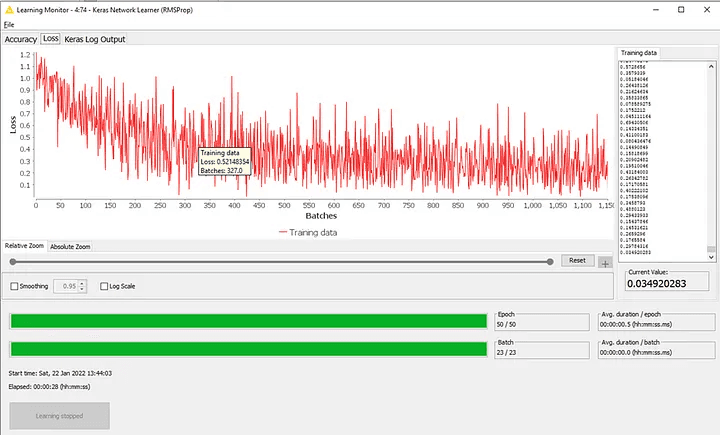
Loss of model
Let’s start by training the network and then extracting the prediction. The Keras Network executor node will be used. Configure and execute this tab.
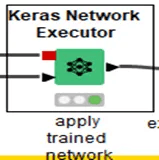
Keras Network Executor node
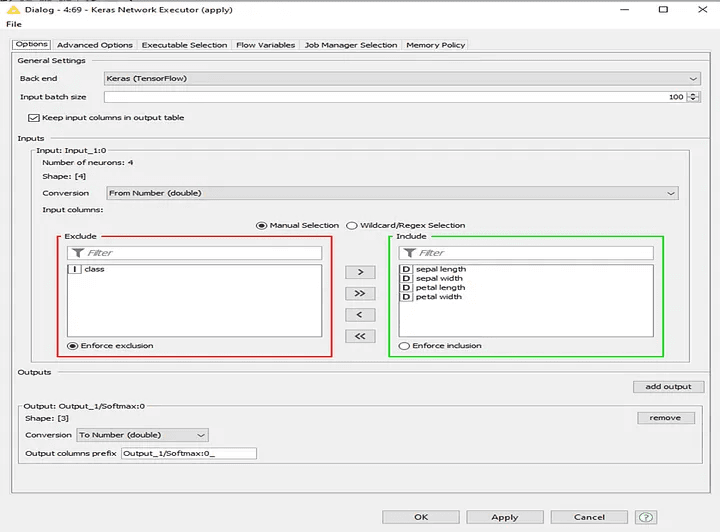
Configuration of Keras Network Executor Node
We will use a Rule-based engine node to extract the prediction. Let’s configure this node to extract the output.
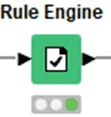
Rule base engine node
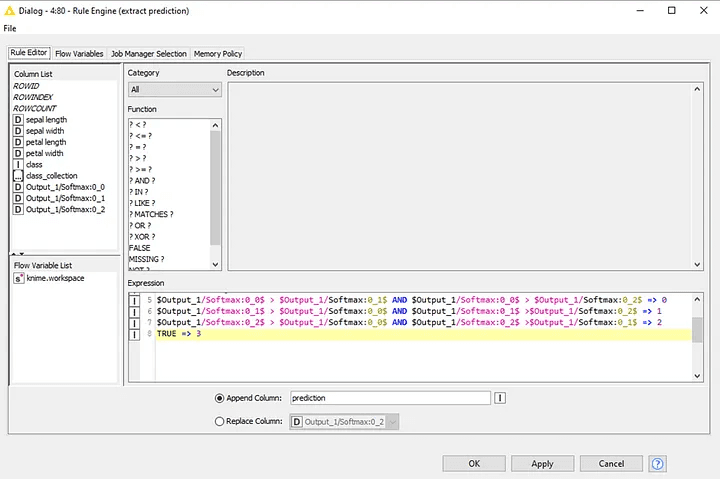
Configuration of the Rule engine node
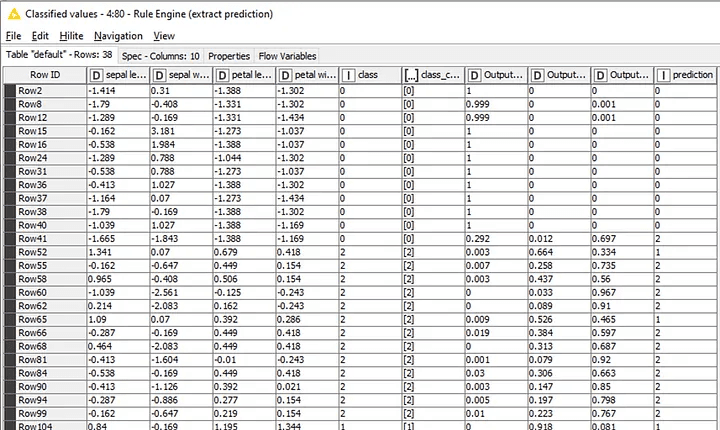
Output of Rule Engine node
The scorer node will be used to check the prediction and accuracy. Let’s configure and run this.
Scorer node
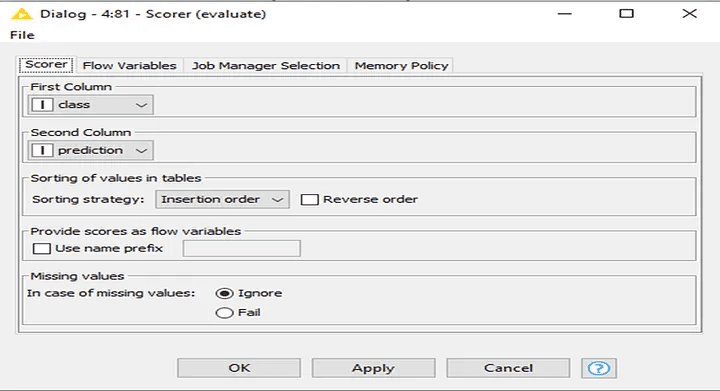
Configuration of score node
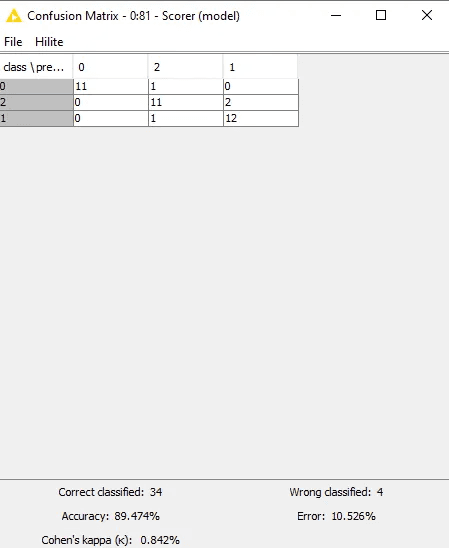
Confusion matrix
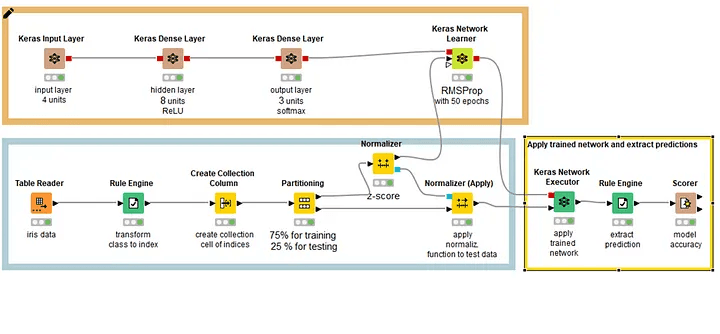
Final workflow
The image above depicts the final workflow.
Thank You!!
On the well-known iris dataset, we will perform the neural network operation here without writing a single line of Python code. Sounds great right?
For this, we will use the Knime Analytics platform.
Neural Networks
The KNIME Analytics Platform is open-source data science software. KNIME, which is intuitive, open, and constantly integrating new developments, makes data science workflows and reusable components accessible to everyone.
Overview of Knime
Let’s start with the iris dataset.
We must first download the iris dataset from here. The dataset is presented in table format here. So we’ll use the Table Reader Node for this.
Table Reader Node.
Right-click on the node and select the configuration option.
Configuration
Set the configuration shown below and navigate to the file where you saved the file. Click OK, then right-click on the node and select Execute.
Dialog Box
We can see in the above image that the class column is a categorical variable, so we must convert it to an integer.
We will use the Rule base engine node. Right-click and configure it.
Rule Based Engine Node
Dialog — 4:68 Rule Engine
Because there are three categorical values in the class, performing the above operation will convert the three categorical values to 0, 1, and 2 and execute it. Let us now examine the results.
The output of the rule base engine node
Let’s convert the class column into a new class. So we’ll use create collection column for that. The cells in the new column are typed cell collections. Configure that we only need to convert the class, so we put it in the include column. This is in the new column. And then execute it.
Collection column node
Let’s configure this. We only need to convert the class, so we put it in the include column. And then execute it in the new column.
Configuration of create collection column
The output of creating a collection class
Let us now divide the data for training and testing. The partition node will be used in this case. Let’s set it up and split the data 75–25. And then execute it.
Partitioning node
Configure the partitioning node
Let’s Normalize the data using the Normalizer node and configure it here we will use the z-score normalization.
Normalizer node
Configuring the normalization node
Z-score normalization refers to the process of normalizing every value in a dataset such that the mean of all of the values is 0 and the standard deviation is 1.
The formula for z-score normalization
Let’s see the output.
Output for z-score normalization
Normalizer(Apply) nodes standardize the input data based on the normalization parameters specified in the model input (typically coming from the Normalizer node). All columns in the input data that are contained in the model input will be applied to an affine transformation.
This node is typically used when test data must be normalized in the same manner as training data (using the “Normalizer” node). Configure and execute this node.
Normalizer (Apply) node
Data processing is complete
Let’s build the neural network now. So we’ll use the Keras input layer node for this. Let’s configure and run this node.
Keras input layer node
Input layer with 4 column
We chose size 4 because we will use four inputs to predict which class it belongs to - sepal length, sepal width, petal length, and petal width. And then execute it.
Now, we will have to create the hidden layer, so we will use the Keras dense layer node.
Keras dense layer (hidden layer)
Configuration of Keras dense layer
Here we will use the ReLU activation function.
The Rectified Linear Activation function, abbreviated ReLU, is a piecewise linear function that outputs the input directly if it is positive; otherwise, it outputs zero. It has become the default activation function for many types of neural networks because it is easier to train and frequently results in better performance.
Let’s create another dense layer. Configure this node and execute this node.
Keras Dense Node
Here we will use the SoftMax function for the output layer.
The SoftMax function converts a vector of K real values to a vector of K real values that sum to one. The SoftMax transforms input values that are positive, negative, zero, or greater than one into values between 0 and 1, allowing them to be interpreted as probabilities. If one of the inputs is small or negative, the SoftMax converts it to a small probability; if an input is large, it converts it to a large probability, but it always remains between 0 and 1.
The formula for the softmax function
Neural Networks
Now let’s use a Keras deep learning network to perform supervised learning. Making use of the Keras network learner node. Let us now configure this tab.
If you find the dependency error in this node, please refer to my previous blog.
Keras Network Learner Node
Input data
Here we exclude class because we want it as the target variable and for input class, we select the 4 parameters.
Target Data
Setting the epochs, batch size, and optimizer
We can see accuracy, loss, and monitor while executing by clicking on view learning monitor.
View the learning monitor option
Accuracy of model
Loss of model
Let’s start by training the network and then extracting the prediction. The Keras Network executor node will be used. Configure and execute this tab.
Keras Network Executor node
Configuration of Keras Network Executor Node
We will use a Rule-based engine node to extract the prediction. Let’s configure this node to extract the output.
Rule base engine node
Configuration of the Rule engine node
Output of Rule Engine node
The scorer node will be used to check the prediction and accuracy. Let’s configure and run this.
Scorer node
Configuration of score node
Confusion matrix
Final workflow
The image above depicts the final workflow.
Thank You!!