
Using 150 GB of Free P2P Cloud Storage on Blockchain based Storj.io

is a decentralized object storage network where data is encrypted client-side, broken into pieces, erasure en-coded (for fast and reliable retrieval ) , and spread across a network of fault-tolerant nodes.
This guide was created primarily for non-native developers or people who want to test a local network in a step-by-step, hand-held manner.
Step 1: To use the DCS feature, you must first create a Storj account. If you already have an account , you are good to go. If not, let’s make one using https://www.storj.io/.
Below is the sample snapshot you will get from the above link.
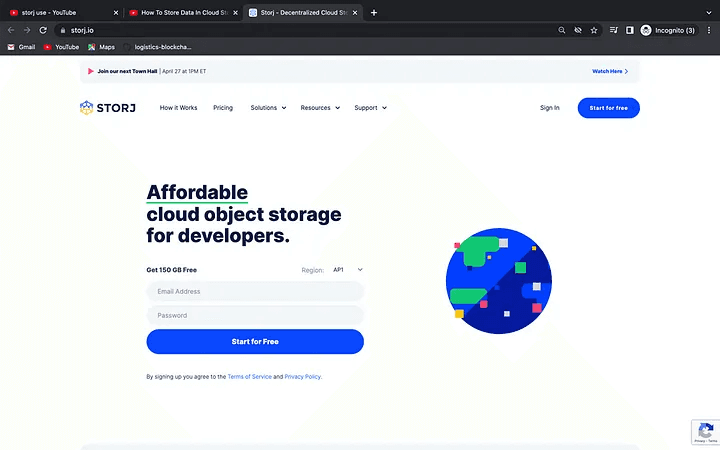
Step 1
Step 2: Next, you can click the Start for free button. In order to create an account, you must provide the requested information. Then press the Sign up button. You will see the image below.
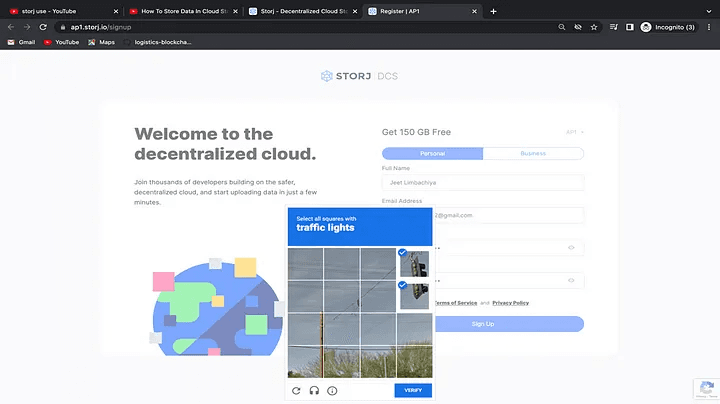
Step 2
Step 3: You must verify and confirm your email address here before proceeding to the login page. The sample snapshot is shown below.
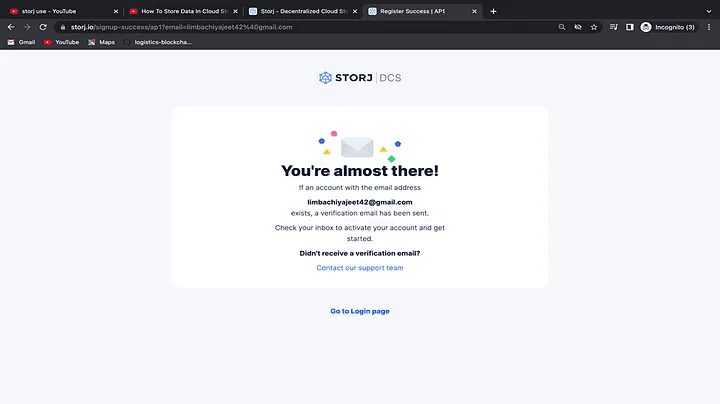
Step 3
Step 4: Now you must log in using the credentials you provided when you signed up. And board the Storj DCS.
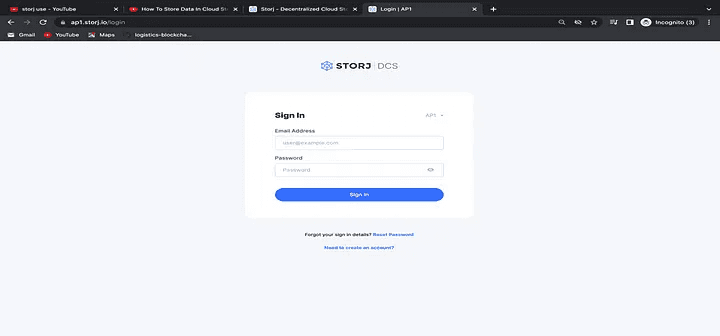
Step 4
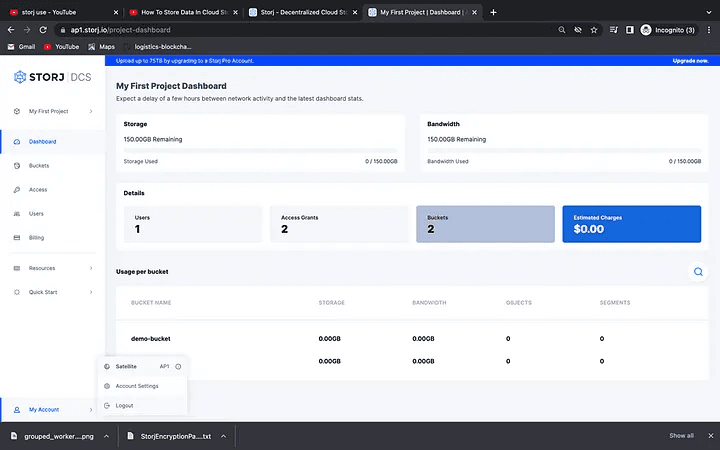
Step 5: Boom!!! You will get your dashboard like the below snapshot.
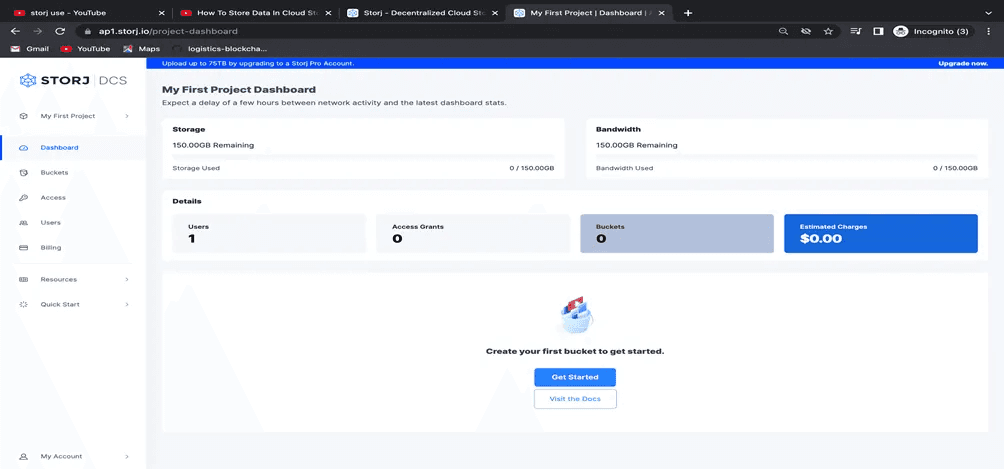
Step 5
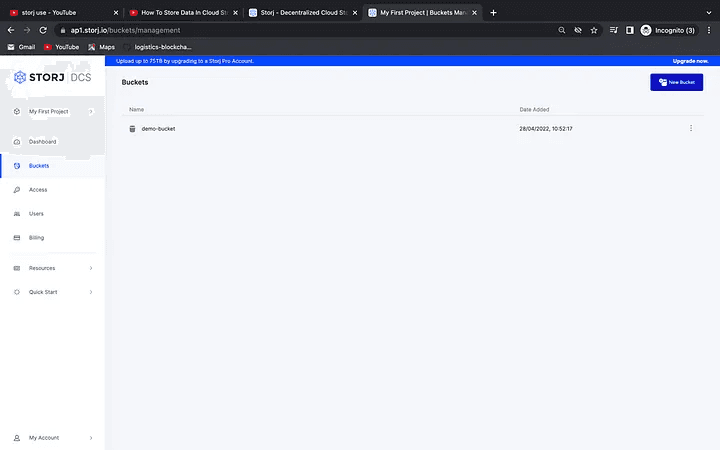
Step 6: To store your files, click Bucket in the left panel, then New Bucket, and name your bucket. You will initially be given a default bucket. However, it is preferable to start from scratch. The sample snapshots are shown below.
Step 6
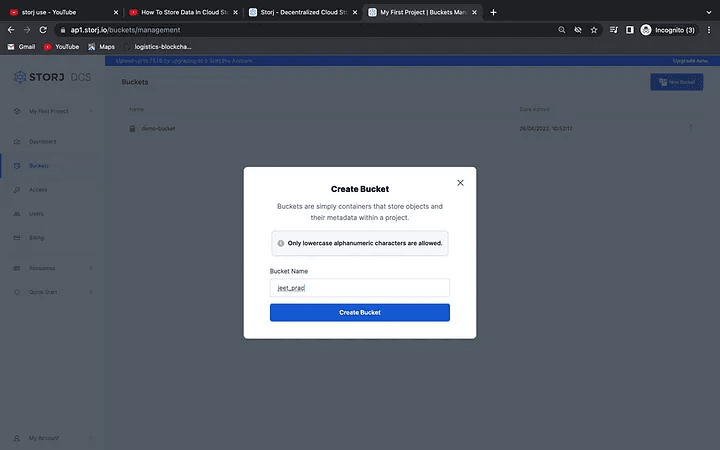
Step 6
Step 7: When you click Create bucket, you will be able to see your newly created bucket in the dashboard.
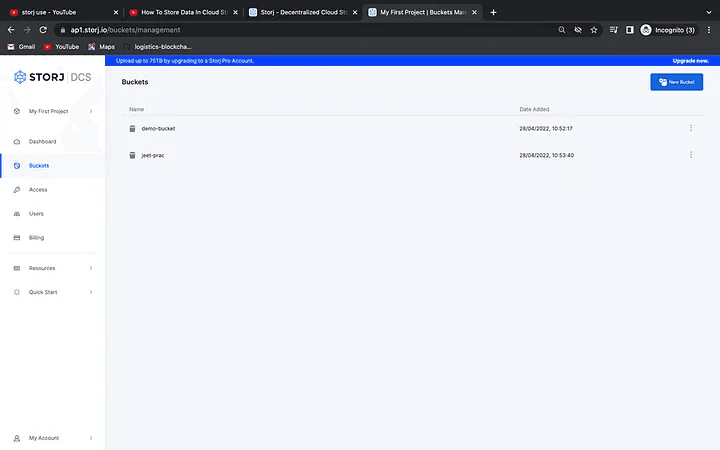
Step 7
Step 8: Now , to must enter your bucket, just click on the bucket, in my case jeet-prac, and you will be prompted to enter an encryption key for your bucket. Consider the image below.
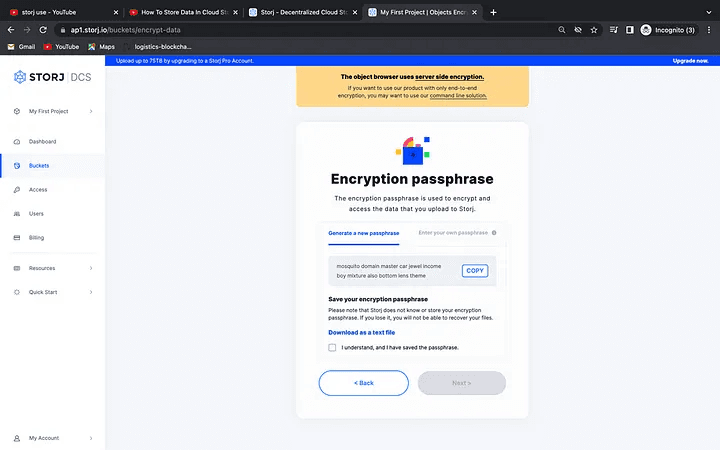
Step 8
Step 9: Here, you must click on Generate a new pass and save the file as a text file somewhere safe. Then click Next, and you’ll see that you’re inside your bucket, as shown in the image below.

Step 9
Step 10: Now you can upload your file to the folder within your bucket. Select your file from the upload dropdown menu. As soon as you select your file, you will see that it is uploading to your bucket, as shown in the screenshot below.
Step 10
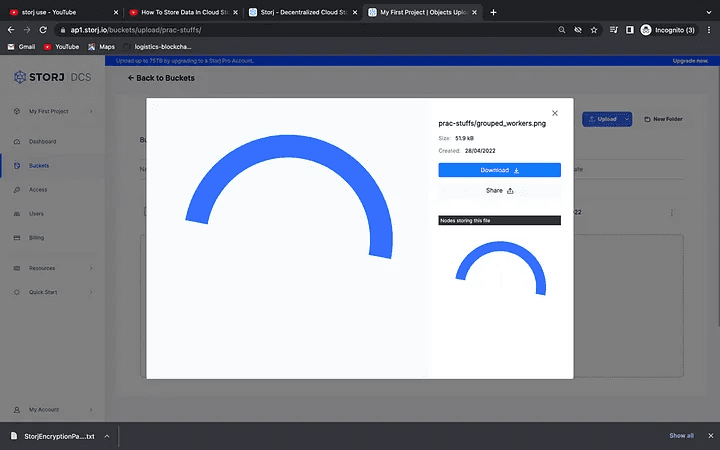
Step 11: You will also be able to see the file (grouped workers.png) as shown in the snapshot.

Step 11
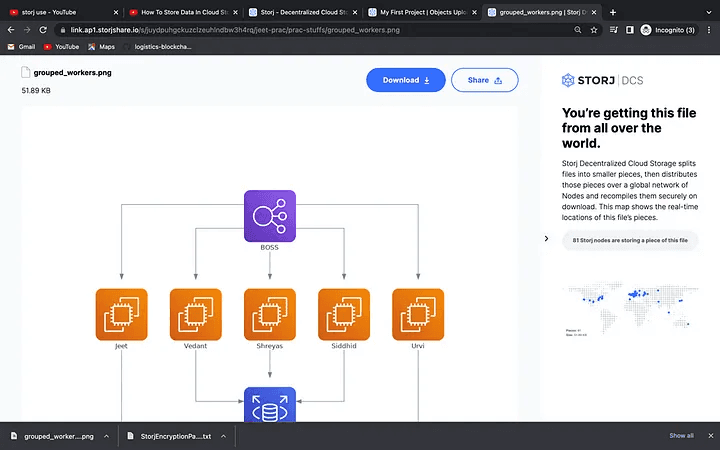
Step 12: To view the file, click on it and you will be able to see it. This demonstrates that you can download your file and that it is divided into a number of nodes and stored in various locations around the world, making your file the most secure.
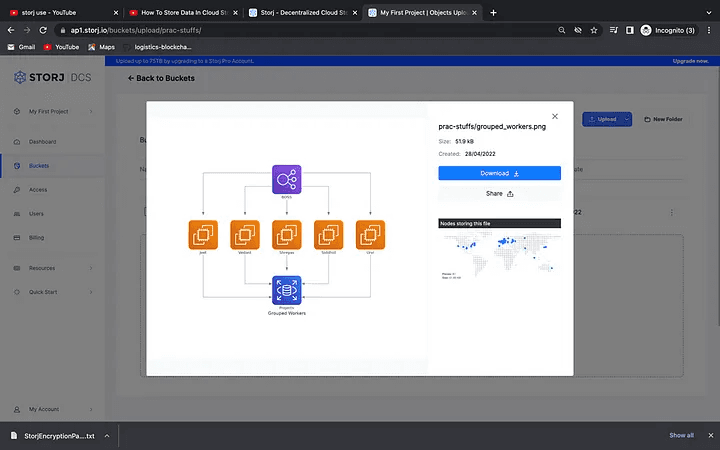
Step 12
Step 13: You can also share your file with others by copying the provided link. Consider the image below.
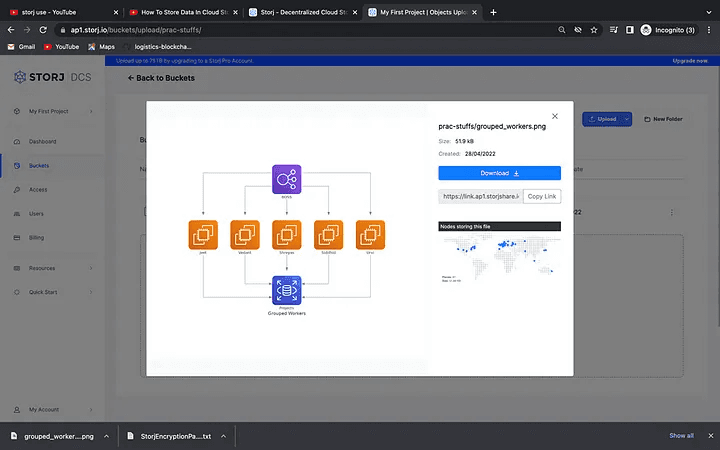
Step 13
Step 14: When you select the link and paste it into a new tab, your file will be divided into How many nodes around the world, as shown in the screenshot below.
Step 14
Step 15: If you want to upload more files and folders, repeat the process described above, or log out as shown in the screenshot below.
Step 15
So there you have it, this is how Storj testing works.
Stay tuned for the upcoming post. Thank You !!!
Happy Learning !!!
For any further queries or anything related to Blockchain Development, Coding, Blogging, or Tech Documentation you can DM me on Linkedin or Instagram at id=acanubhav94.
is a decentralized object storage network where data is encrypted client-side, broken into pieces, erasure en-coded (for fast and reliable retrieval ) , and spread across a network of fault-tolerant nodes.
This guide was created primarily for non-native developers or people who want to test a local network in a step-by-step, hand-held manner.
Step 1: To use the DCS feature, you must first create a Storj account. If you already have an account , you are good to go. If not, let’s make one using https://www.storj.io/.
Below is the sample snapshot you will get from the above link.
Step 1
Step 2: Next, you can click the Start for free button. In order to create an account, you must provide the requested information. Then press the Sign up button. You will see the image below.
Step 2
Step 3: You must verify and confirm your email address here before proceeding to the login page. The sample snapshot is shown below.
Step 3
Step 4: Now you must log in using the credentials you provided when you signed up. And board the Storj DCS.
Step 4
Step 5: Boom!!! You will get your dashboard like the below snapshot.
Step 5
Step 6: To store your files, click Bucket in the left panel, then New Bucket, and name your bucket. You will initially be given a default bucket. However, it is preferable to start from scratch. The sample snapshots are shown below.
Step 6
Step 6
Step 7: When you click Create bucket, you will be able to see your newly created bucket in the dashboard.
Step 7
Step 8: Now , to must enter your bucket, just click on the bucket, in my case jeet-prac, and you will be prompted to enter an encryption key for your bucket. Consider the image below.
Step 8
Step 9: Here, you must click on Generate a new pass and save the file as a text file somewhere safe. Then click Next, and you’ll see that you’re inside your bucket, as shown in the image below.
Step 9
Step 10: Now you can upload your file to the folder within your bucket. Select your file from the upload dropdown menu. As soon as you select your file, you will see that it is uploading to your bucket, as shown in the screenshot below.
Step 10
Step 11: You will also be able to see the file (grouped workers.png) as shown in the snapshot.
Step 11
Step 12: To view the file, click on it and you will be able to see it. This demonstrates that you can download your file and that it is divided into a number of nodes and stored in various locations around the world, making your file the most secure.
Step 12
Step 13: You can also share your file with others by copying the provided link. Consider the image below.
Step 13
Step 14: When you select the link and paste it into a new tab, your file will be divided into How many nodes around the world, as shown in the screenshot below.
Step 14
Step 15: If you want to upload more files and folders, repeat the process described above, or log out as shown in the screenshot below.
Step 15
So there you have it, this is how Storj testing works.
Stay tuned for the upcoming post. Thank You !!!
Happy Learning !!!
For any further queries or anything related to Blockchain Development, Coding, Blogging, or Tech Documentation you can DM me on Linkedin or Instagram at id=acanubhav94.