MLOps Pipeline via Jenkins and Hyperparameter Optimization
Let’s set up a pipeline on the AWS cloud using Jenkins and Docker. Additionally, we will employ hyperparameter tuning, which is a parameter whose value is used to regulate the learning process.
What is Jenkins?
The most well-known free automation server is Jenkins. The automation of the software development processes is done with Jenkins.
Benefits of Jenkins include:
It is written in Java, and thus you can run it on all platforms.
It has lots of plugins, which can help you solve almost any problem you can imagine.
Helps developers to integrate code changes and always produce stable software build.
Installing Jenkins Manually
The installation procedure is easy to understand. It includes simple actions like:
Java installation.
Adding official Jenkins repositories to your package manager.
Package installation.
Initial Jenkins configuration.
Let’s implement them one by one.
Step 1: Java installation
To be able to run Jenkins, you need to install Java first.
Step 1: Update the apt package index using this:
$ sudo apt updateStep 2: Next, install the default Java OpenJDK package using this:
$ sudo apt install openjdk-8-jreStep 3: Verify the installation using this command:
$ java -versionStep 4: By the time of this article writing, Jenkins is using the Java 8 version. If you see another version, switch to the correct one:
$ sudo update-alternatives — config javaStep 5: Add Jenkins repository
By default, Jenkins is not included in the Ubuntu repositories, and you need to add it.
First, we need to import the repository key:
$ wget -q -O — https://pkg.jenkins.io/debian-stable/jenkins.io.key | sudo apt-key add -Step 6: The next step is to append the repository address to the server’s repositories list:
$ sudo sh -c ‘echo deb https://pkg.jenkins.io/debian-stable binary/ > \
/etc/apt/sources.list.d/jenkins.list’
Step 7: Once that is done, we need to update the information about the software, which we can use from the new repository:
$ sudo apt-get updateStep 8: Jenkins Package Installation
Since we have the repository up to date, let’s run the following command:
$ sudo apt-get -y install jenkinsStep 9: Running this command will prompt you to confirm the download and installation.
By default, Jenkins starts after the installation process. If not, use the following command to do it manually:
$ sudo systemctl start jenkinsStep 10: Let's check the Jenkins service status:
$ sudo systemctl status jenkinsBy default, Jenkins runs on port 8080.
Step 11: So this can be done by enabling a security group and inbound 8080 port for TCP connection on AWS.
Then copy your AWS Instance IPV4:
ubuntu@IP.regrion_name.compute.amazonaws.com:8080This command results in opening the Jenkins docker container on port 8080.
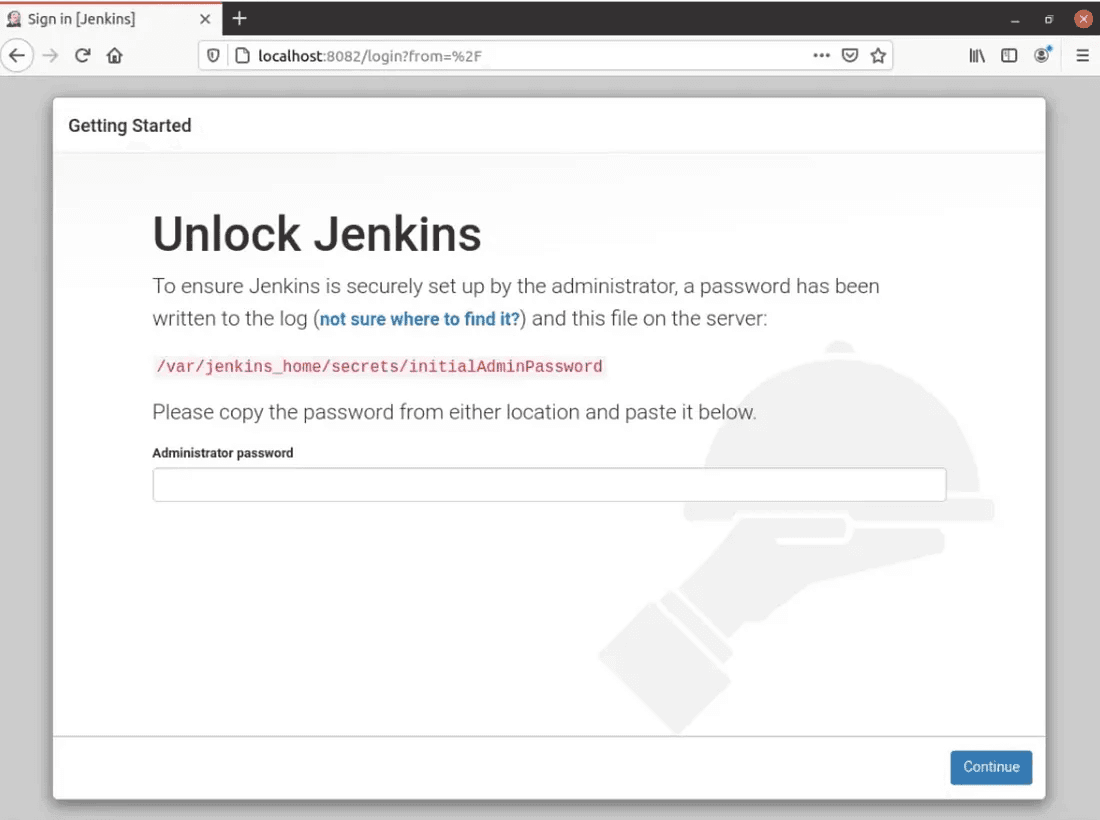
The initial password is available here:
$ sudo cat /var/lib/jenkins/secrets/initialAdminPassword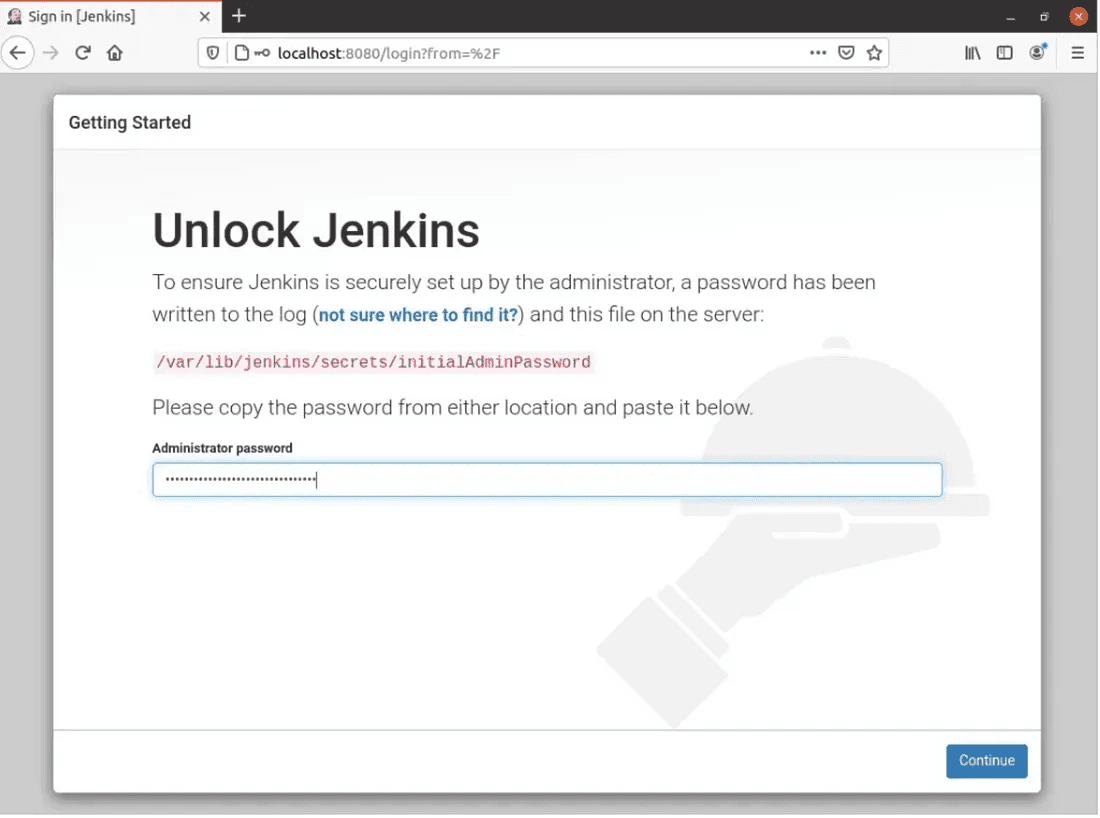
Jenkins Plugins
At the next screen, you will be required to choose plugins for initial installation. If you do not know which plugins to set up yet, use the “Install suggested plugins” option.
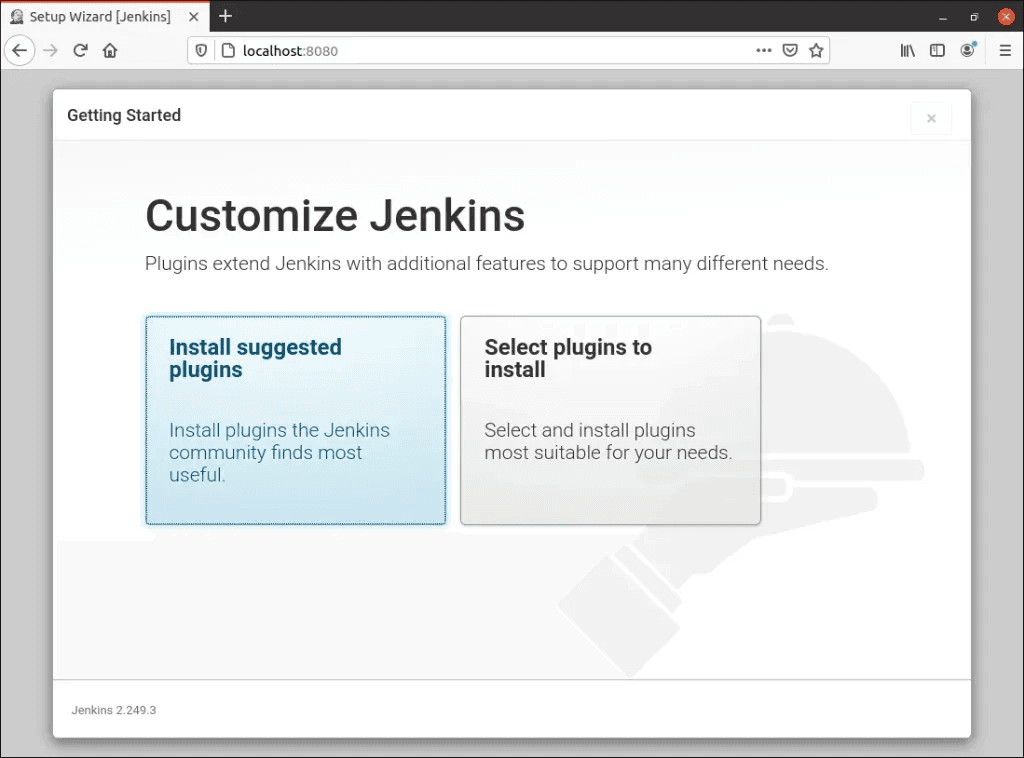
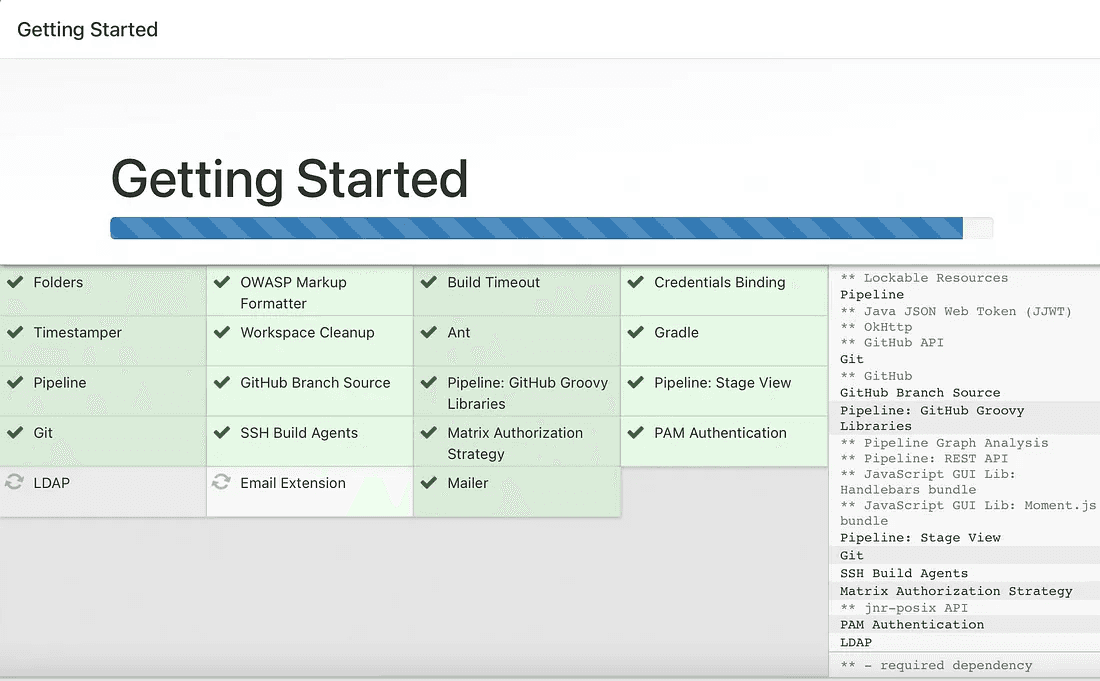
The screen that will appear once you click Install Suggested Plugins is shown below.
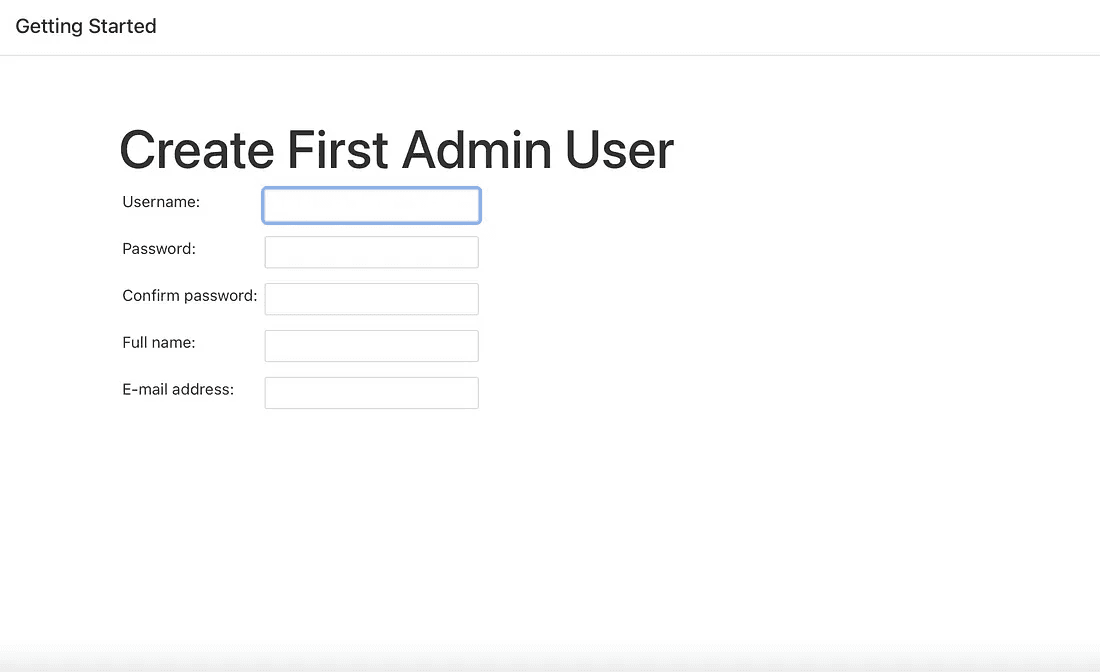
After successfully entering the user details, you will be directed to the instance configuration page to confirm the URL for the Jenkins instance.
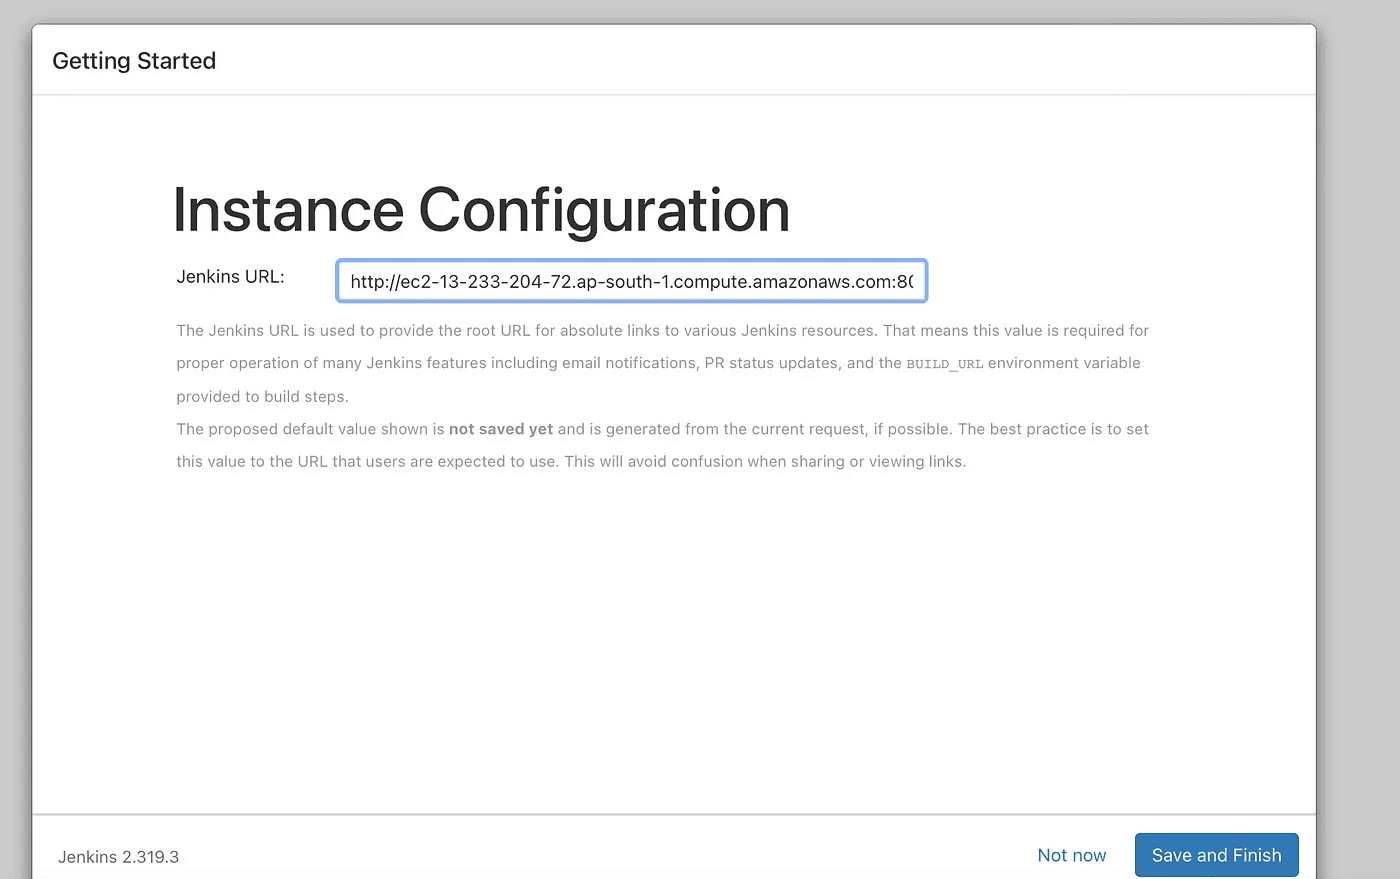
Thereafter clicking on the save and finish buttons. The below screen will appear.
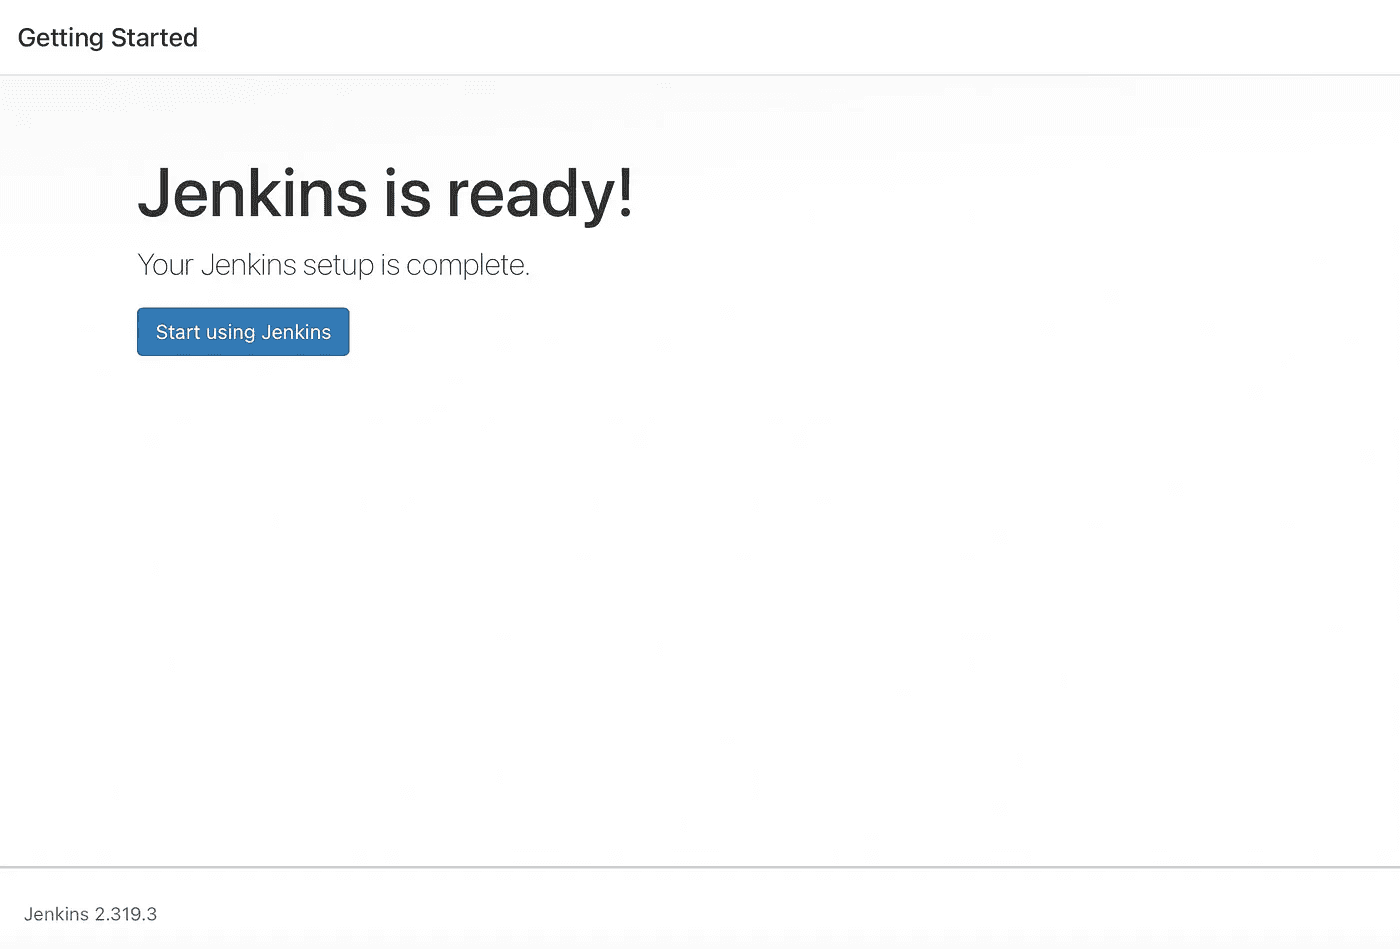
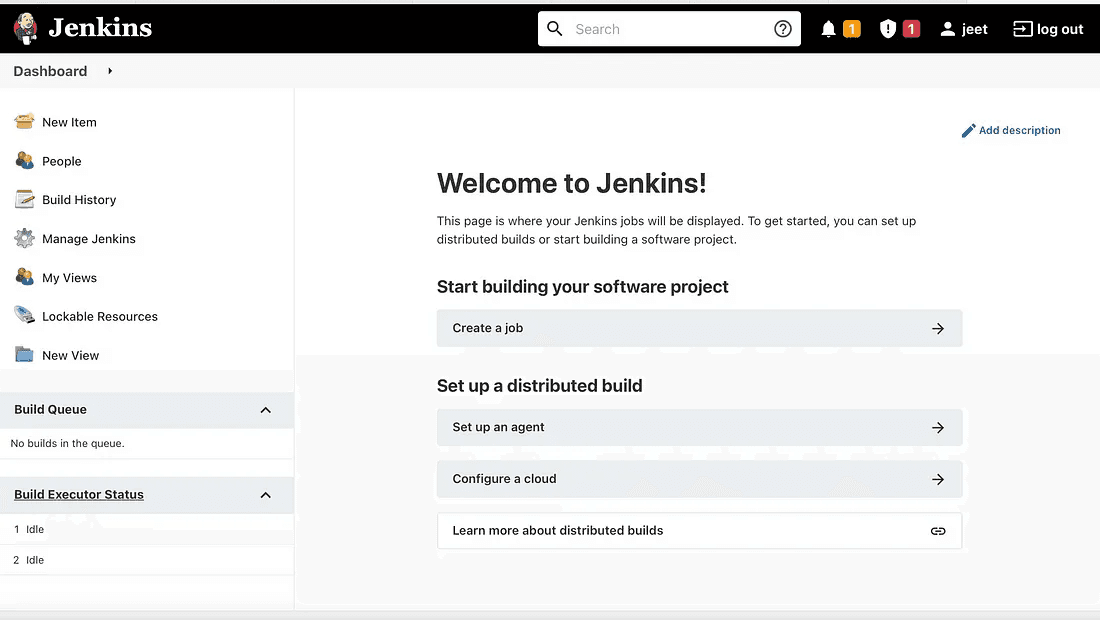
To access the Jenkins main dashboard, click the “Start using Jenkins” button. This action will bring you to the main Jenkins interface.
Because Docker has code dependencies, you must have it installed in order to execute the MLOps pipeline in Jenkins. The official Docker documentation contains a detailed description of the entire installation procedure, so we won’t repeat everything here.
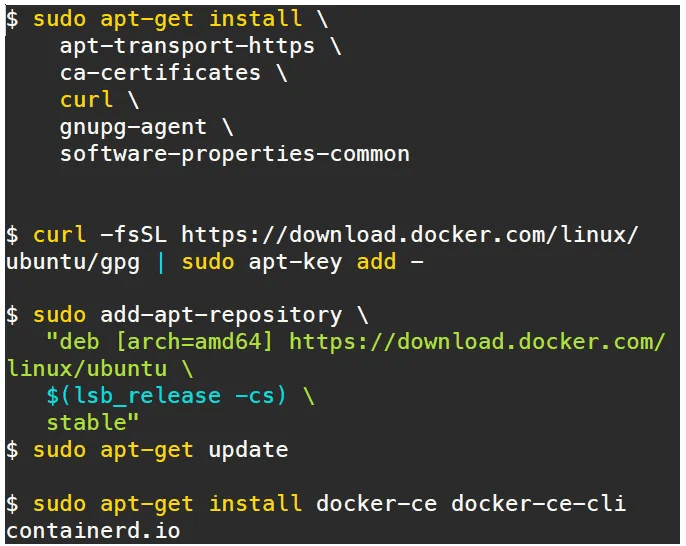
Install the docker by running the code in ubuntu
The following commands can be used to launch a Docker container after Docker has been successfully installed. We will create the following configurations to enable Jenkins to function without the root user:
$ sudo visudio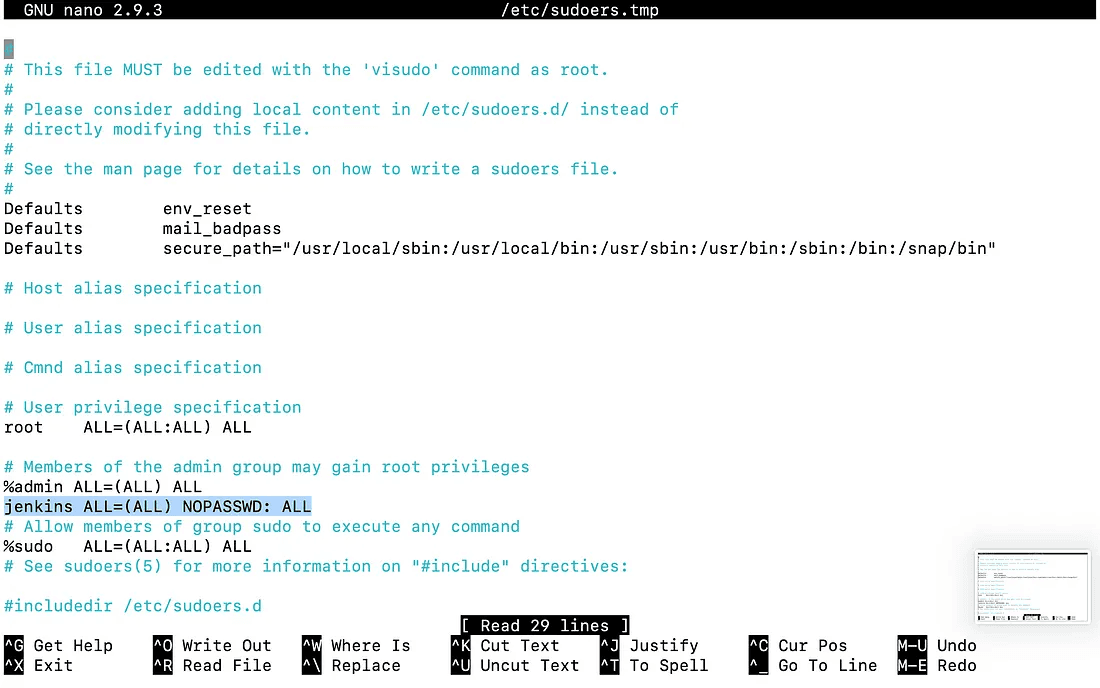
$ sudo vi /etc/default/jenkins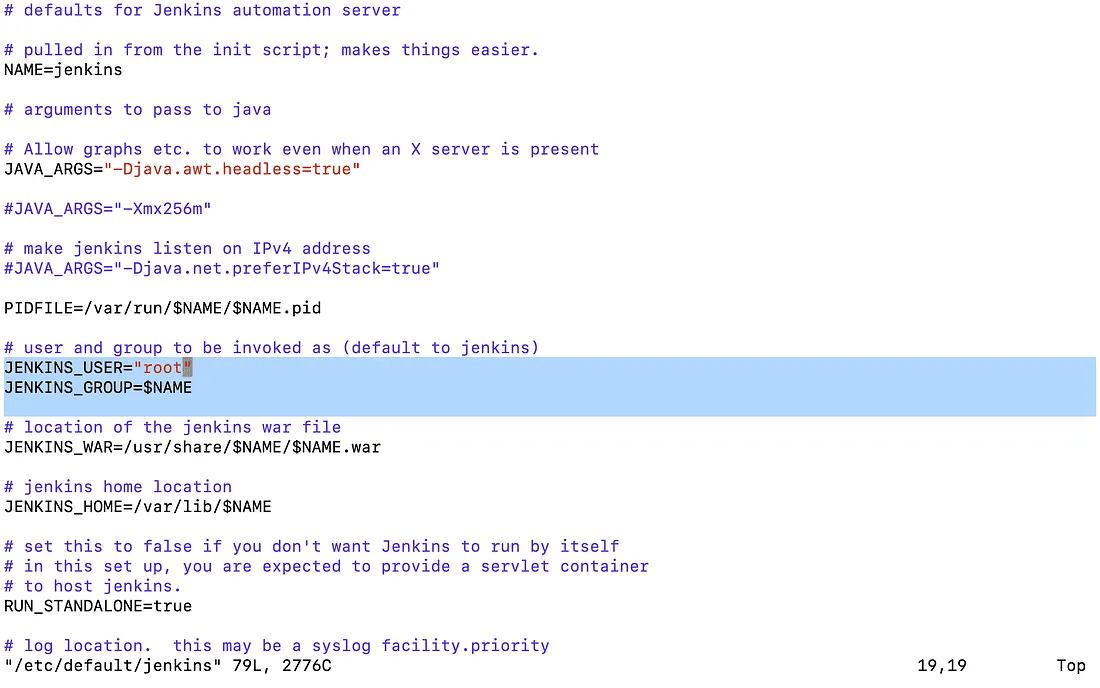
$ sudo service jenkins restartNow we should get into the EC2 instance and pull the GitHub repository of our Machine Learning project.
$ git clone https://github.com/aniforverizon/MLOPS-Pipeline-Jenkins.gitThen apply the following commands.
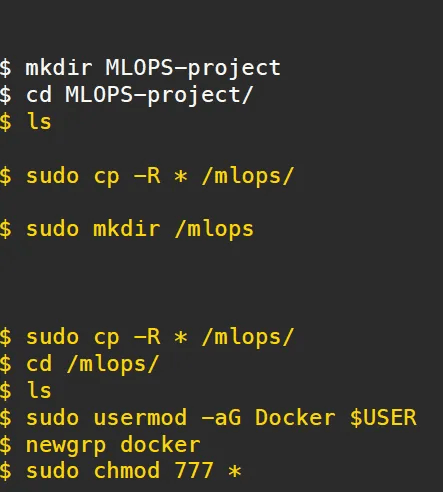
Using Dockerfile, we will first construct a container image that includes Python as well as all the additional libraries required for ML/DL code to run.
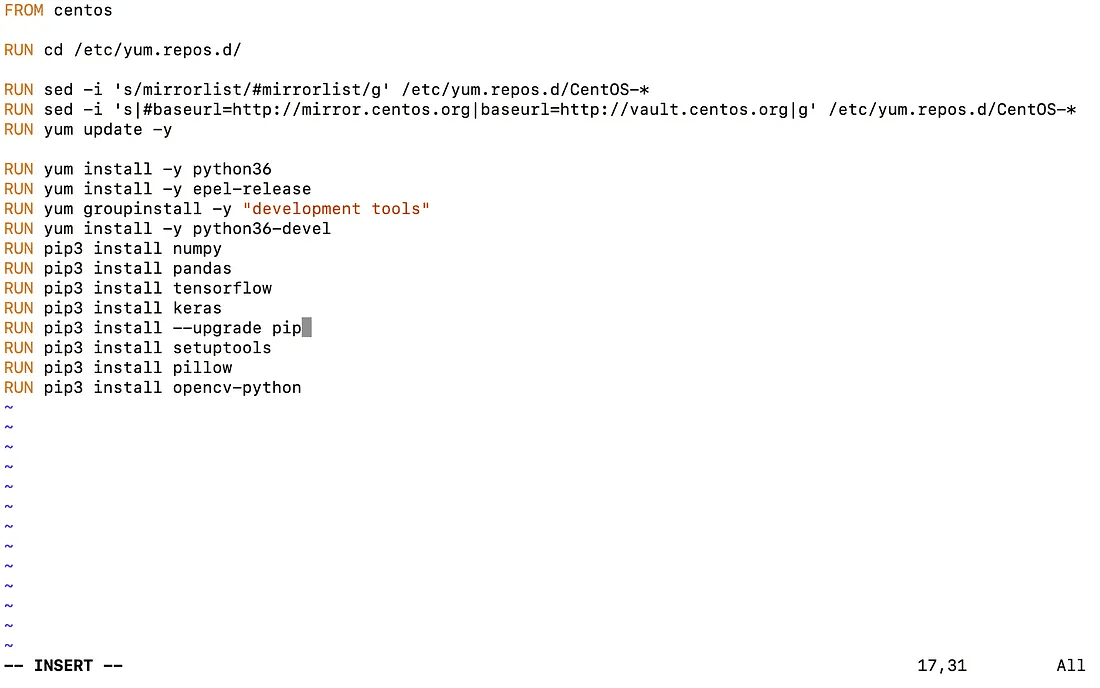
Now build this docker file with a new image name. so we run this command on ubuntu:18.04 “ docker build -t your_imagename:your_tagname .”
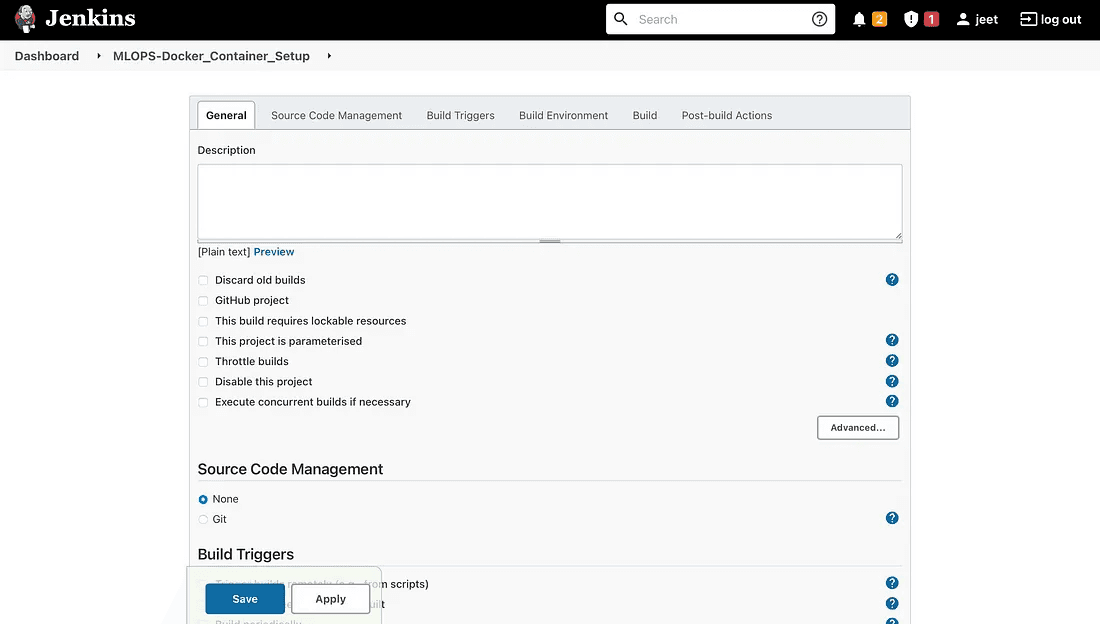
Thereafter go to the Jenkins dashboard and click on “New Items” then the below screen will be prompted.
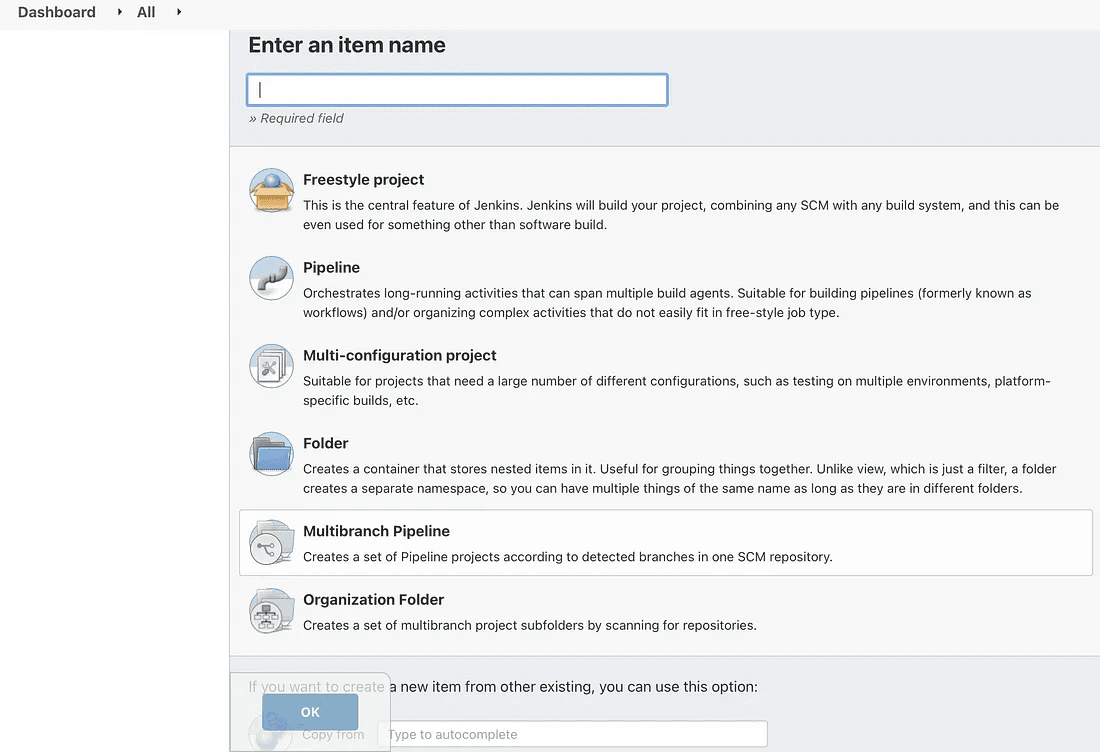
Here, type the job’s name and click on Freestyle project before clicking OK. You must now use Jenkins to run a Docker container.
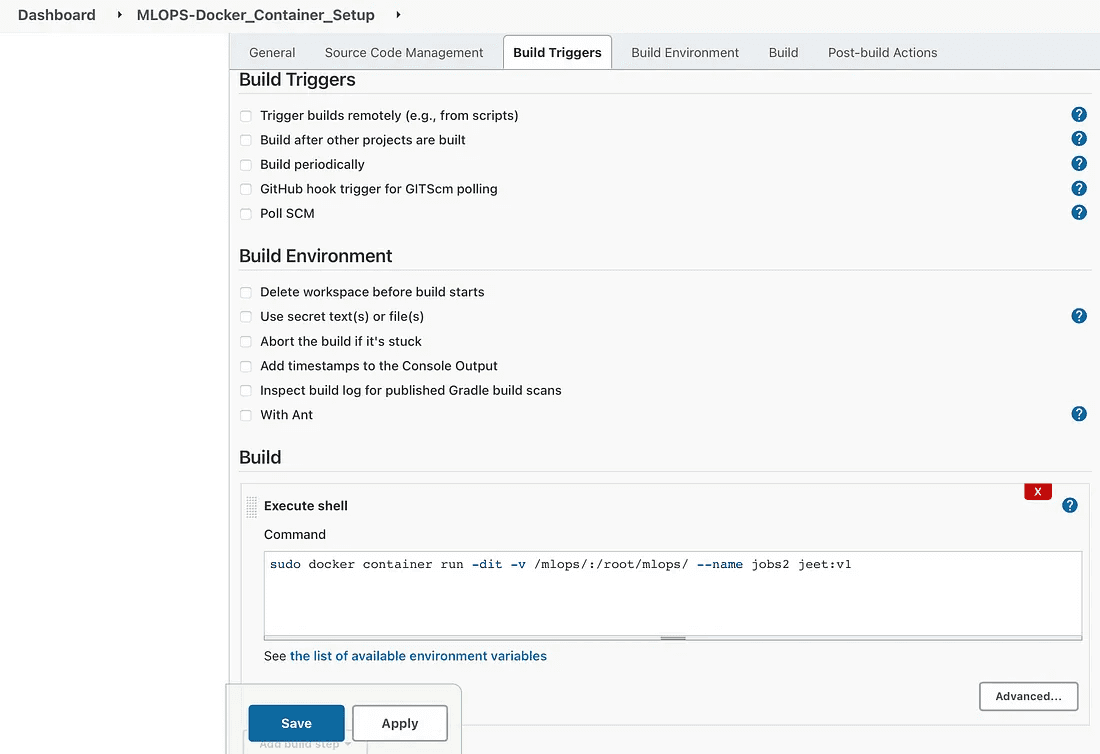
JOB 1:
To deploy code and begin training, Jenkins should immediately launch the appropriate container on preinstalled libraries. The method is outlined below. Enter the command to execute the container by going to the Build Environment and choosing “Execute shell.”
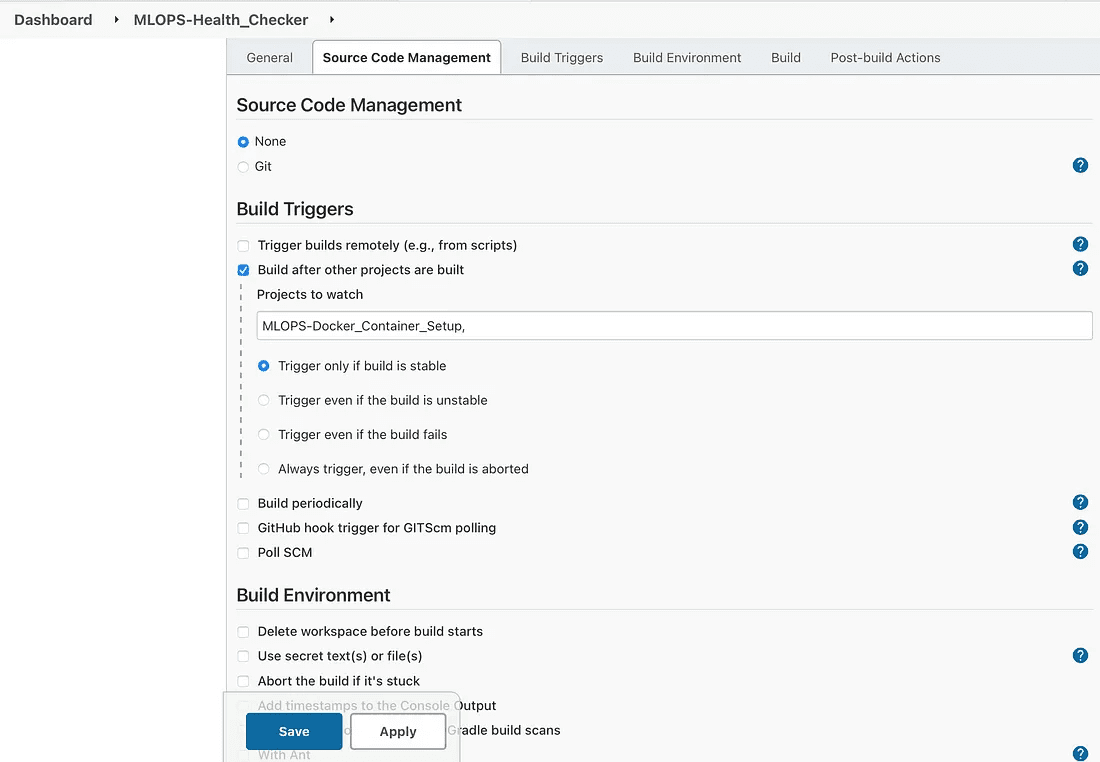
JOB 2:
This task will verify the container’s health and restart it if necessary if it has been halted for any reason. To repeat this process, create a new item called (MLOPSDocker_Container_Setup) that checks the status of the container from Job 1.
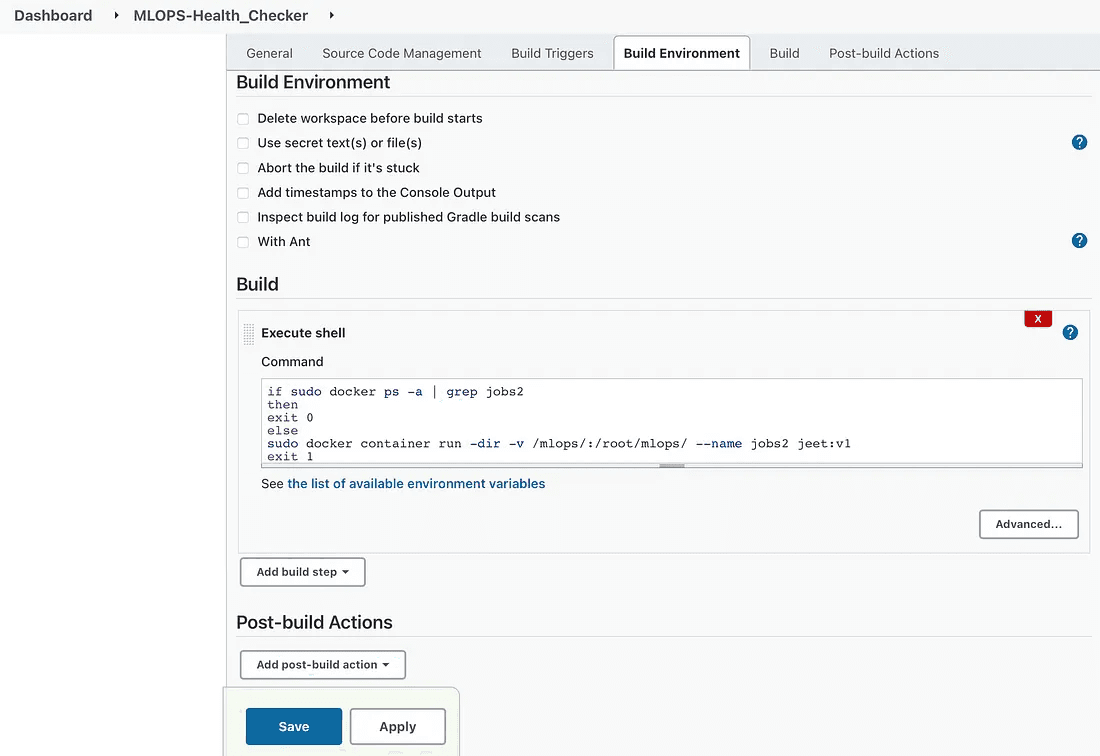
if sudo docker ps -a | grep job2
then
exit 0
else
sudo docker container run -dir -v /mlops/:/root/mlops/--name job2 jeet:v1
exit 1
fi
fi
JOB 3 :
If and only if the docker container is in running mode, this job will begin the machine learning model training.

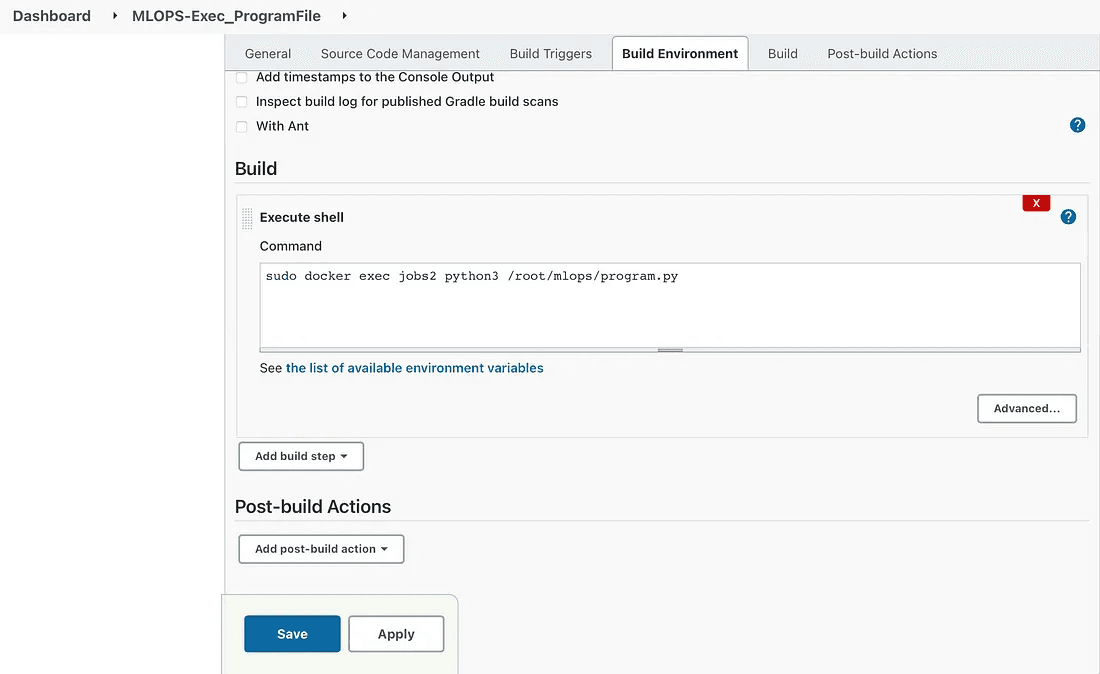
Execute the command in job3
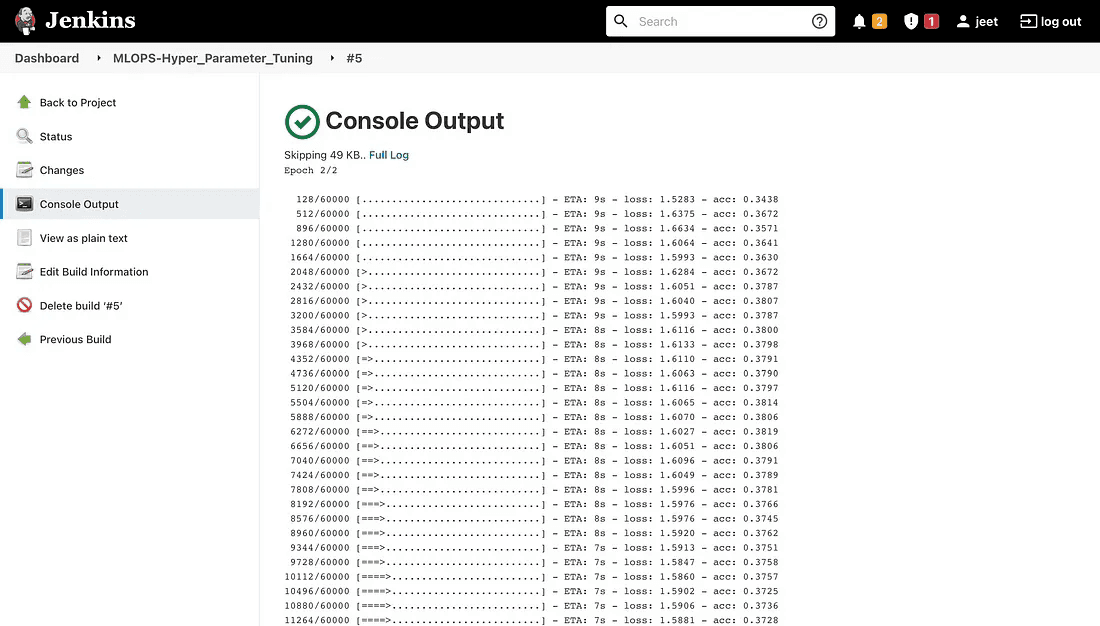
We can check the output for the training process by the following process.
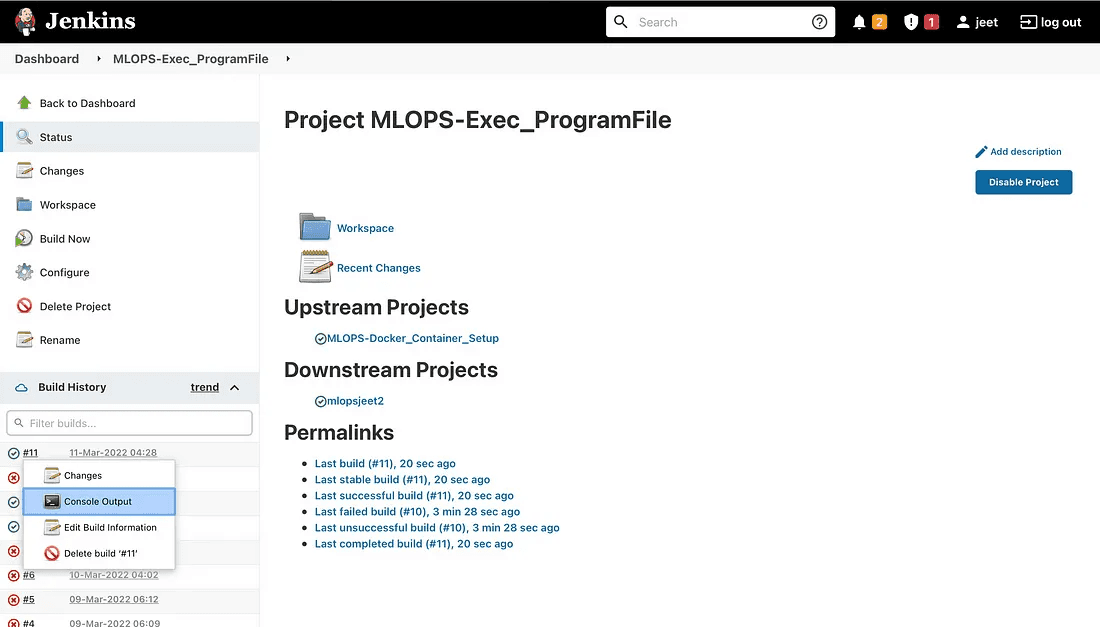
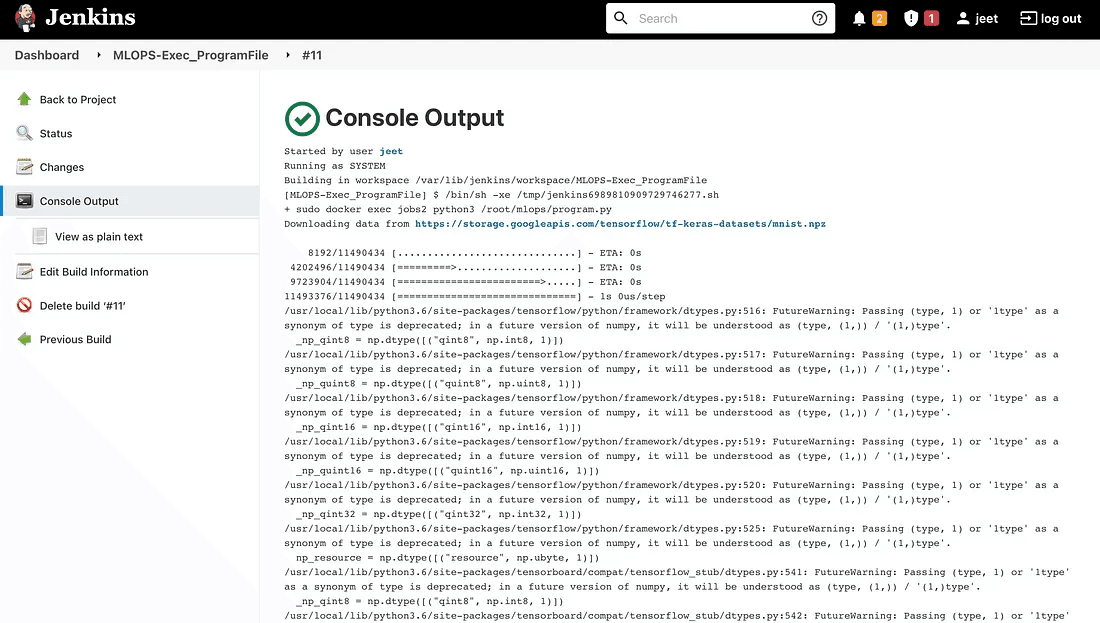
output
Once the training process is done then here comes the mailing service into the picture.
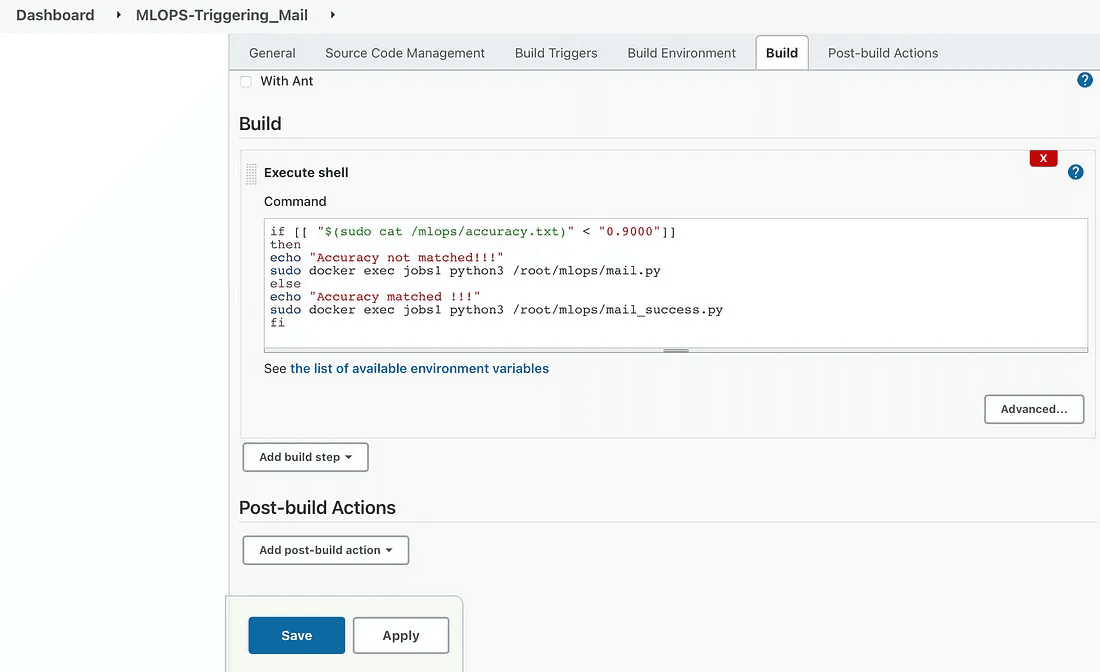
JOB 4:
This task will cause the mail regarding the accuracy of your model to be sent. It will assess the model’s accuracy; if it falls below 90%, it will notify the developer via email that the accuracy is lower than expected. Next, it will start the task of tuning the hyperparameters. Additionally, it is based on a prior job.
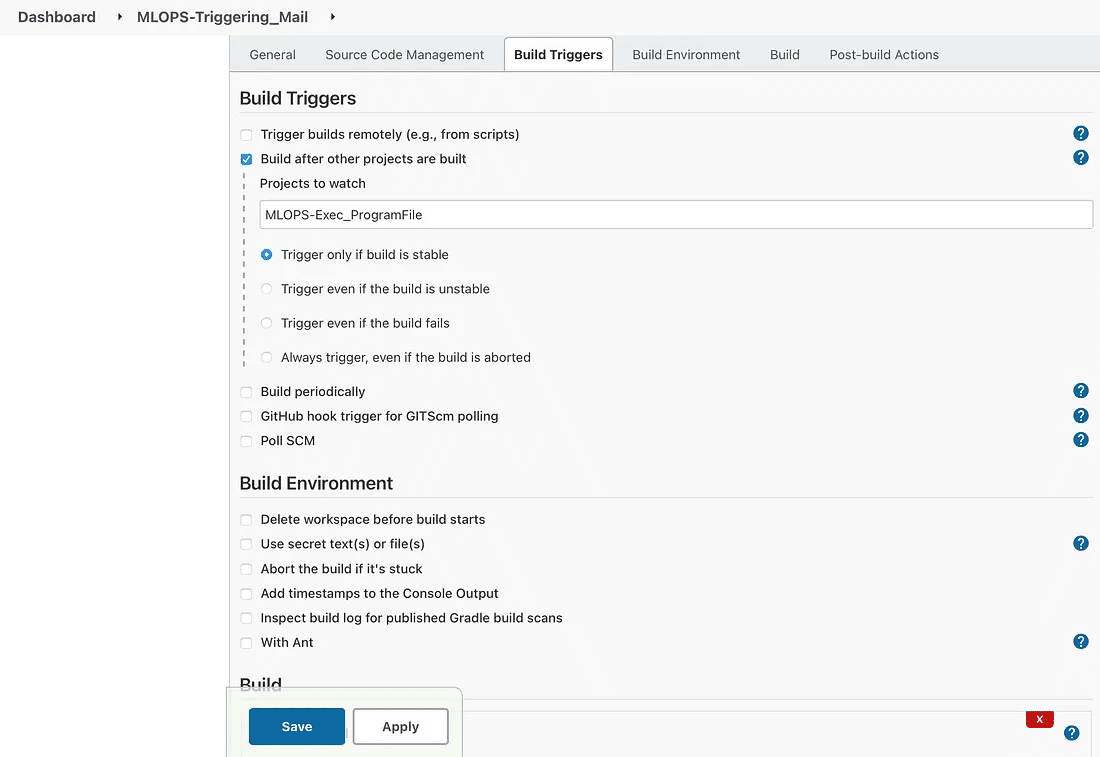
configuration for job4
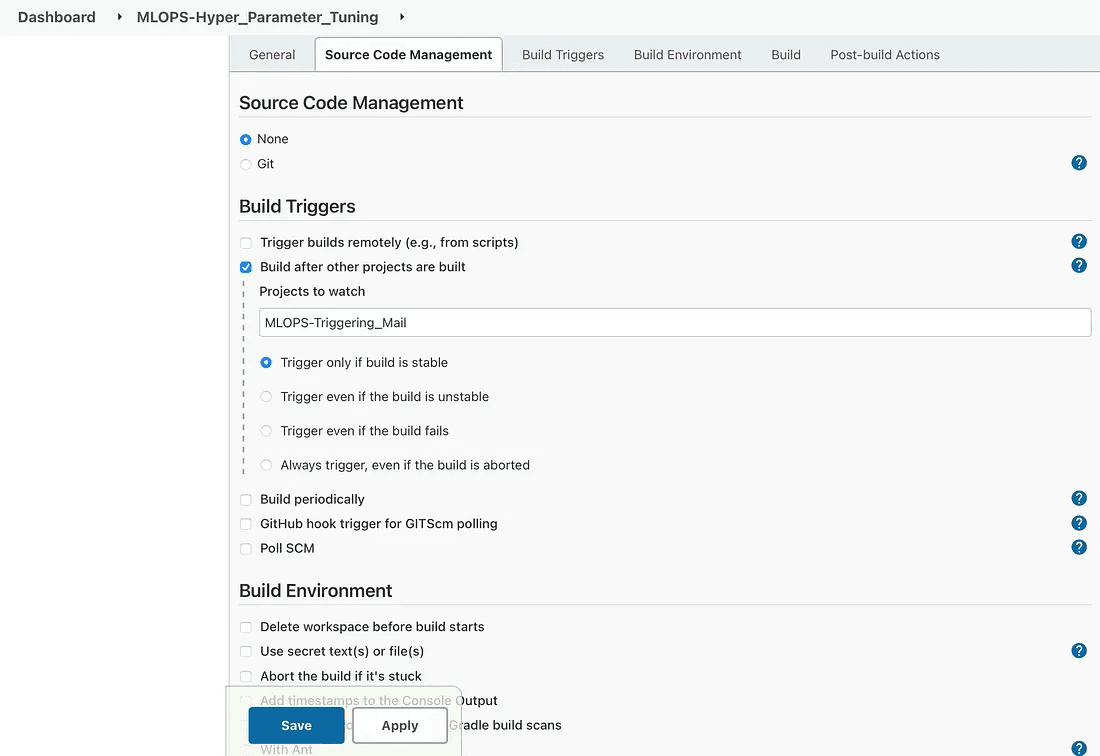
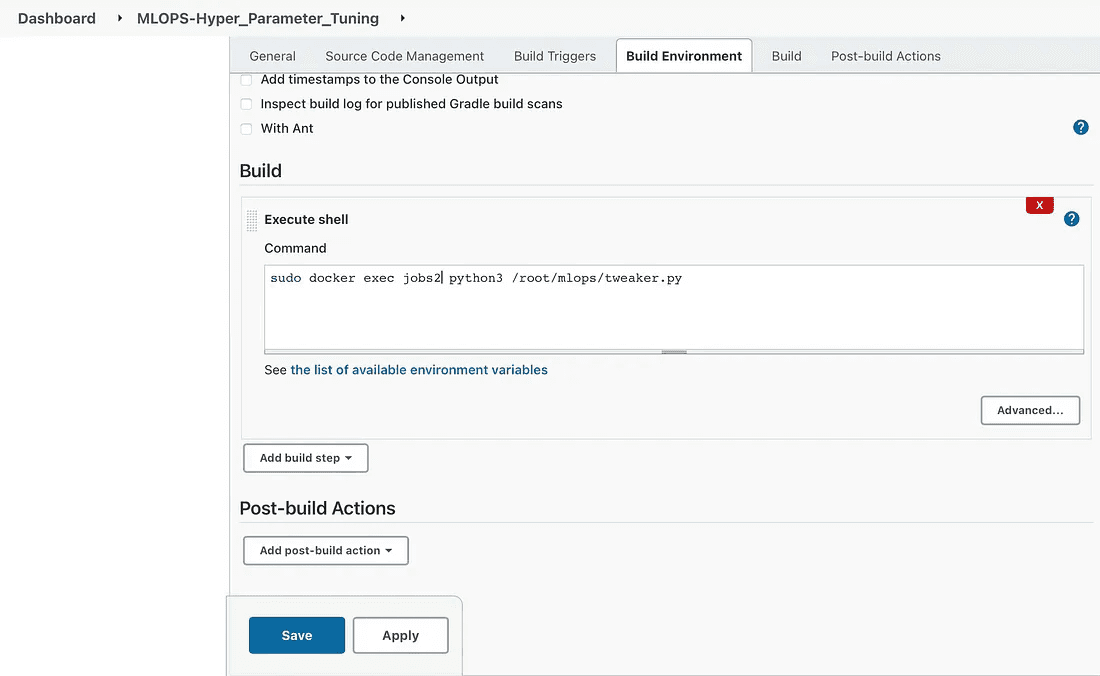
JOB 5 :
This job will be responsible for hyperparameter tuning of the model and will make changes in the code in order to achieve the required accuracy. Then send the mail to the developer regarding the accuracy.
Hyper Parameters are those parameters that are assigned before the building of the model like the number of filters, size of the filter, number of neurons, number of epochs, etc.
The same kind of machine learning model can require different constraints, weights, or learning rates to generalize different data patterns. These measures are called hyperparameters and have to be tuned so that the model can optimally solve the machine-learning problem. So to deal with this problem we can automate it where the hyperparameters will change and will make the accuracy of the model to the desire of the developer. So, instead of manually tuning our Hyperparameters, We are giving this job to Jenkins for Automation. Workflow of Process or we say in terms of Jenkins automation jobs.
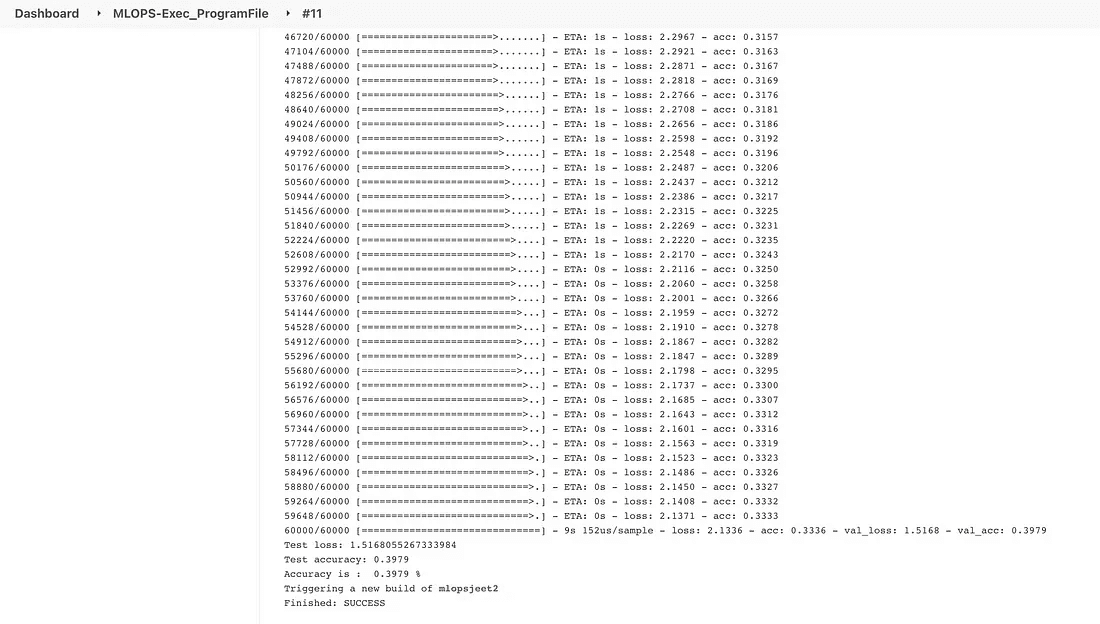
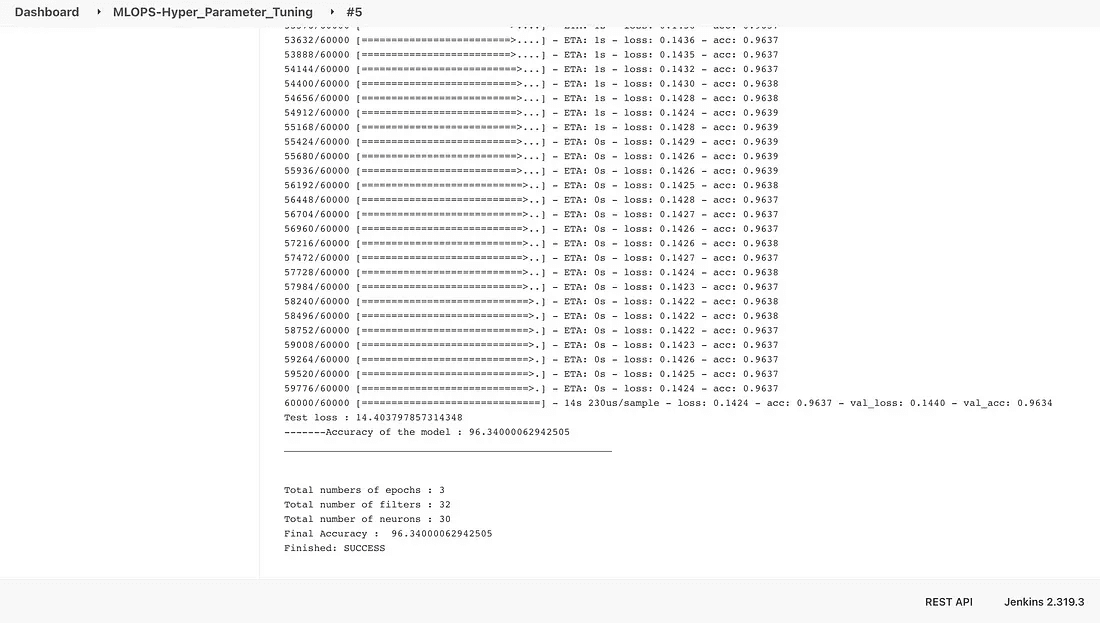
To check the accuracy of the tuned model we can check the below process.
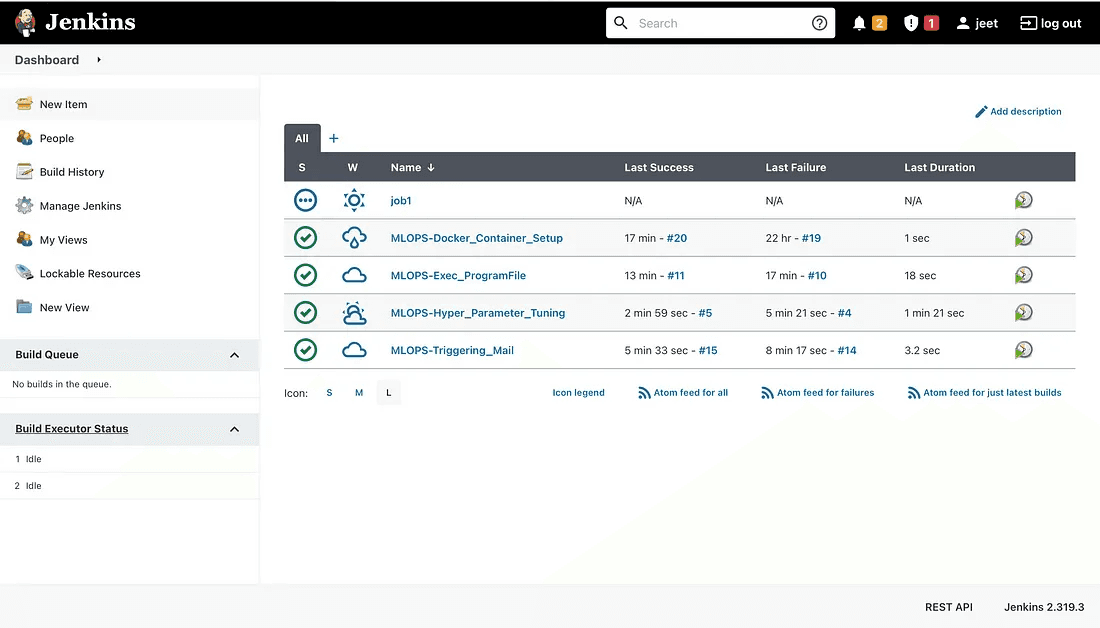
Once the pipeline is done then you will get the below-related dashboard.
I hope this article was informative and provided you with the details you required. If you have any questions while reading the blog, message me on Instagram or LinkedIn. Special credits to my team interns: Jeet, Kishan and Krisha.
Thank You…
Let’s set up a pipeline on the AWS cloud using Jenkins and Docker. Additionally, we will employ hyperparameter tuning, which is a parameter whose value is used to regulate the learning process.
What is Jenkins?
The most well-known free automation server is Jenkins. The automation of the software development processes is done with Jenkins.
Benefits of Jenkins include:
It is written in Java, and thus you can run it on all platforms.
It has lots of plugins, which can help you solve almost any problem you can imagine.
Helps developers to integrate code changes and always produce stable software build.
Installing Jenkins Manually
The installation procedure is easy to understand. It includes simple actions like:
Java installation.
Adding official Jenkins repositories to your package manager.
Package installation.
Initial Jenkins configuration.
Let’s implement them one by one.
Step 1: Java installation
To be able to run Jenkins, you need to install Java first.
Step 1: Update the apt package index using this:
$ sudo apt updateStep 2: Next, install the default Java OpenJDK package using this:
$ sudo apt install openjdk-8-jreStep 3: Verify the installation using this command:
$ java -versionStep 4: By the time of this article writing, Jenkins is using the Java 8 version. If you see another version, switch to the correct one:
$ sudo update-alternatives — config javaStep 5: Add Jenkins repository
By default, Jenkins is not included in the Ubuntu repositories, and you need to add it.
First, we need to import the repository key:
$ wget -q -O — https://pkg.jenkins.io/debian-stable/jenkins.io.key | sudo apt-key add -Step 6: The next step is to append the repository address to the server’s repositories list:
$ sudo sh -c ‘echo deb https://pkg.jenkins.io/debian-stable binary/ > \
/etc/apt/sources.list.d/jenkins.list’
Step 7: Once that is done, we need to update the information about the software, which we can use from the new repository:
$ sudo apt-get updateStep 8: Jenkins Package Installation
Since we have the repository up to date, let’s run the following command:
$ sudo apt-get -y install jenkinsStep 9: Running this command will prompt you to confirm the download and installation.
By default, Jenkins starts after the installation process. If not, use the following command to do it manually:
$ sudo systemctl start jenkinsStep 10: Let's check the Jenkins service status:
$ sudo systemctl status jenkinsBy default, Jenkins runs on port 8080.
Step 11: So this can be done by enabling a security group and inbound 8080 port for TCP connection on AWS.
Then copy your AWS Instance IPV4:
ubuntu@IP.regrion_name.compute.amazonaws.com:8080This command results in opening the Jenkins docker container on port 8080.
The initial password is available here:
$ sudo cat /var/lib/jenkins/secrets/initialAdminPasswordJenkins Plugins
At the next screen, you will be required to choose plugins for initial installation. If you do not know which plugins to set up yet, use the “Install suggested plugins” option.
The screen that will appear once you click Install Suggested Plugins is shown below.
After successfully entering the user details, you will be directed to the instance configuration page to confirm the URL for the Jenkins instance.
Thereafter clicking on the save and finish buttons. The below screen will appear.
To access the Jenkins main dashboard, click the “Start using Jenkins” button. This action will bring you to the main Jenkins interface.
Because Docker has code dependencies, you must have it installed in order to execute the MLOps pipeline in Jenkins. The official Docker documentation contains a detailed description of the entire installation procedure, so we won’t repeat everything here.
Install the docker by running the code in ubuntu
The following commands can be used to launch a Docker container after Docker has been successfully installed. We will create the following configurations to enable Jenkins to function without the root user:
$ sudo visudio$ sudo vi /etc/default/jenkins$ sudo service jenkins restartNow we should get into the EC2 instance and pull the GitHub repository of our Machine Learning project.
$ git clone https://github.com/aniforverizon/MLOPS-Pipeline-Jenkins.gitThen apply the following commands.
Using Dockerfile, we will first construct a container image that includes Python as well as all the additional libraries required for ML/DL code to run.
Now build this docker file with a new image name. so we run this command on ubuntu:18.04 “ docker build -t your_imagename:your_tagname .”
Thereafter go to the Jenkins dashboard and click on “New Items” then the below screen will be prompted.
Here, type the job’s name and click on Freestyle project before clicking OK. You must now use Jenkins to run a Docker container.
JOB 1:
To deploy code and begin training, Jenkins should immediately launch the appropriate container on preinstalled libraries. The method is outlined below. Enter the command to execute the container by going to the Build Environment and choosing “Execute shell.”
JOB 2:
This task will verify the container’s health and restart it if necessary if it has been halted for any reason. To repeat this process, create a new item called (MLOPSDocker_Container_Setup) that checks the status of the container from Job 1.
if sudo docker ps -a | grep job2
then
exit 0
else
sudo docker container run -dir -v /mlops/:/root/mlops/--name job2 jeet:v1
exit 1
fi
fi
JOB 3 :
If and only if the docker container is in running mode, this job will begin the machine learning model training.
Execute the command in job3
We can check the output for the training process by the following process.
output
Once the training process is done then here comes the mailing service into the picture.
JOB 4:
This task will cause the mail regarding the accuracy of your model to be sent. It will assess the model’s accuracy; if it falls below 90%, it will notify the developer via email that the accuracy is lower than expected. Next, it will start the task of tuning the hyperparameters. Additionally, it is based on a prior job.
configuration for job4
JOB 5 :
This job will be responsible for hyperparameter tuning of the model and will make changes in the code in order to achieve the required accuracy. Then send the mail to the developer regarding the accuracy.
Hyper Parameters are those parameters that are assigned before the building of the model like the number of filters, size of the filter, number of neurons, number of epochs, etc.
The same kind of machine learning model can require different constraints, weights, or learning rates to generalize different data patterns. These measures are called hyperparameters and have to be tuned so that the model can optimally solve the machine-learning problem. So to deal with this problem we can automate it where the hyperparameters will change and will make the accuracy of the model to the desire of the developer. So, instead of manually tuning our Hyperparameters, We are giving this job to Jenkins for Automation. Workflow of Process or we say in terms of Jenkins automation jobs.
To check the accuracy of the tuned model we can check the below process.
Once the pipeline is done then you will get the below-related dashboard.
I hope this article was informative and provided you with the details you required. If you have any questions while reading the blog, message me on Instagram or LinkedIn. Special credits to my team interns: Jeet, Kishan and Krisha.
Thank You…