
Hosting a custom mailbox to send Mail on cloudfare
This article discusses using HTML code to trigger a mailbox to send mail. To set up HTML code to start, go to our most recent tutorial.
The benefit of adopting this approach is that the mail, from which you must send the letter, will be double-verified.

Let’s start by performing the steps;
Step 1: The first step is to add a contact form code to the HTML page or template where you wish to modify the trigger for sending email via mailbox. The contact form example code is provided below.
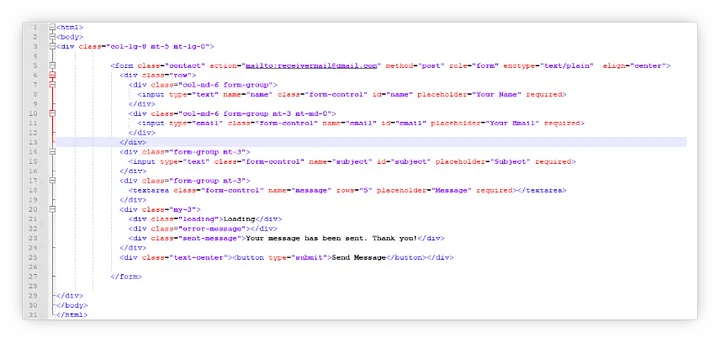
Code
Step 2: Verify the HTML file’s functionality in the browser. To accomplish this, double-click the HTML file, and your usual browser will open.
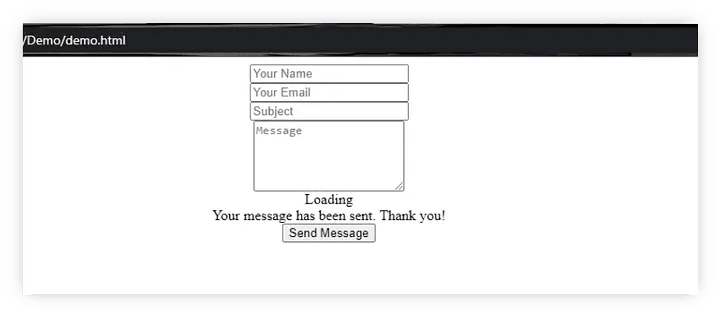
HTML form
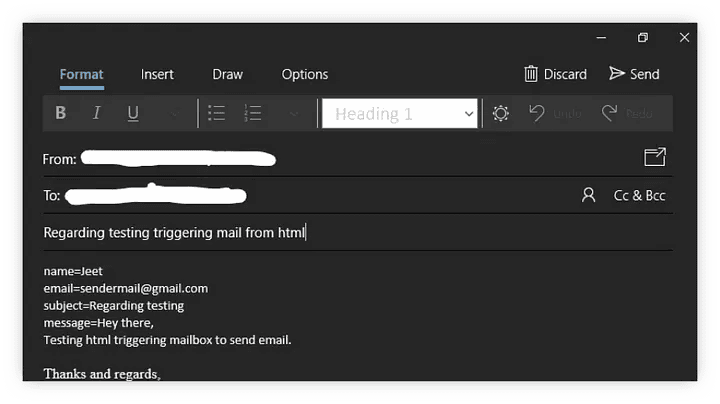
Step 3: To activate the mailbox, provide the necessary information in the required space.Step 4: Now you need to click on send message button to tell the mailbox to get activated and send mail.
As soon as you click the button your default mailbox is prompted like below.
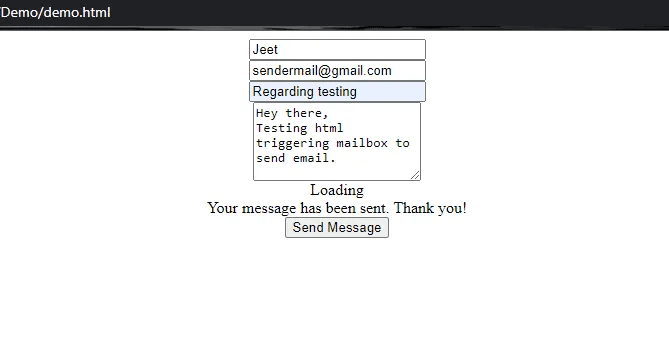
Form
Step 4: Now you need to click on send message button to tell the mailbox to get activated and send mail.
As soon as you click the button your default mailbox is prompted like below.
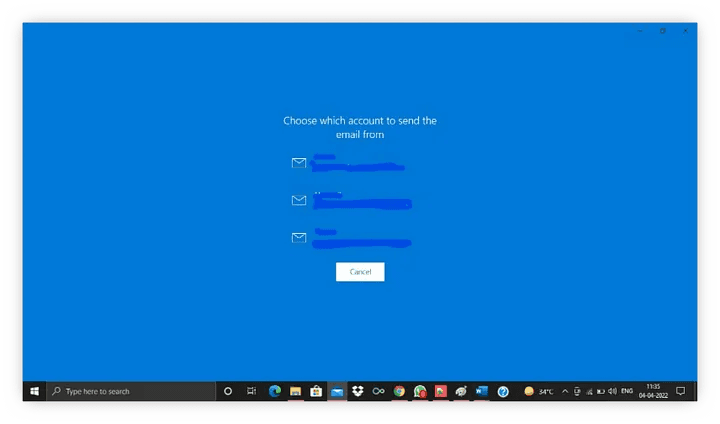
MailBox
Step 5: Here you need to again select the email id from which you want to send your message. After selecting your mail id you will automatically get the exact details that you have typed in your contact form in the browser. At first, time if you will not get the exact message details try the same thing the second time you will get it. Below is a sample you will see.
Select your Email ID
Step 6: Send the mail after validating the information. I am getting mail on my mobile device, thus the sample for the same is below. And the receiver can receive your mail.
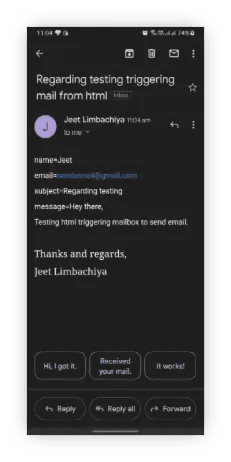
Received Mail
At this point, your system and no other system can access your project because it is functioning locally. We must deploy our project to the Cloudflare hosting infrastructure in order to make it available to everyone. Hostinger, Heroku, and many other platforms can host our static or dynamic HTML and CSS website, however, as a demonstration of utilizing Cloudflare, we are deploying our project to cloudflare.
Step 7: Create a Cloudflare account if you don’t already have one. You must sign in to Cloudflare since I’m presuming you have an account there.
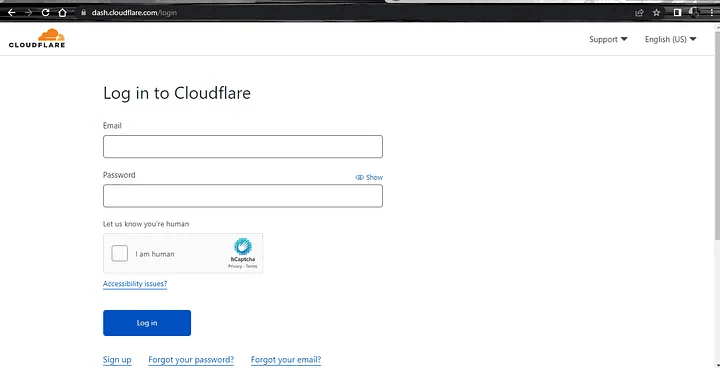
Create Cloudflare account
Step 8: Enter your login information to access the dashboard.
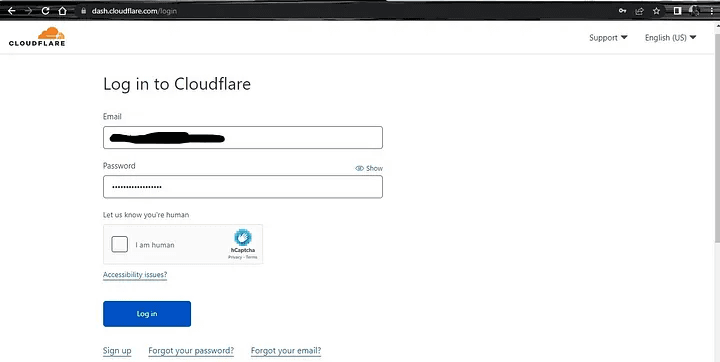
Login Page
Step 9: If you have enabled two-factor authentication for your account, the window below will appear.
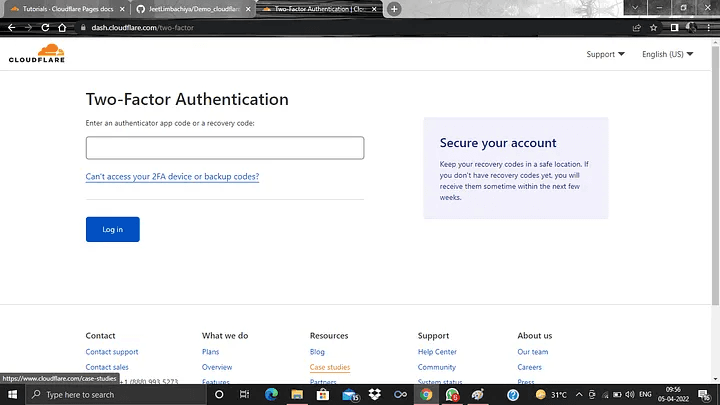
Two-Factor Authentication
Step 10: After that, you may access the Cloudflare dashboard.
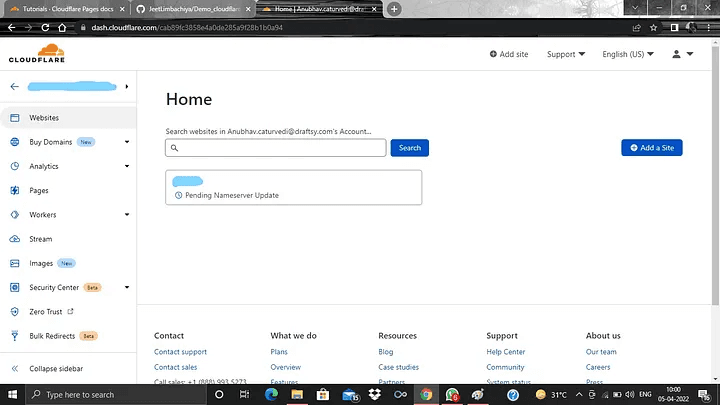
Cloudflare Dashboard
Step 11: Go to the pages section on the left navigation panel now.
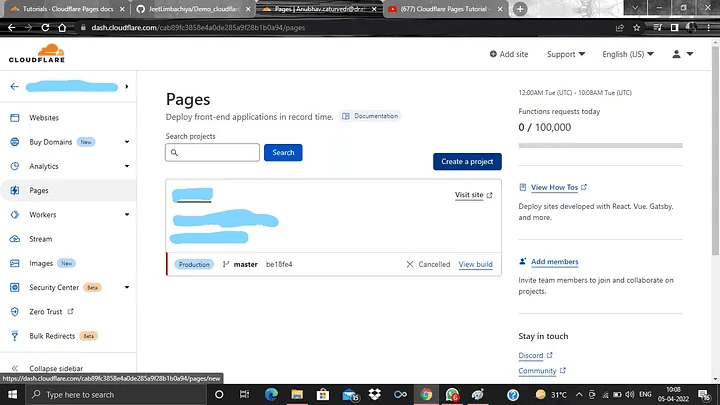
Pages Section
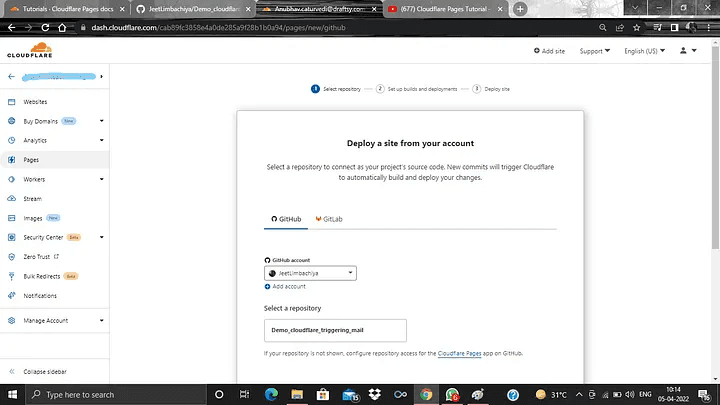
Step 12: From there, use the “Create a Project” option to start a new project. and link to the project repository on Github.
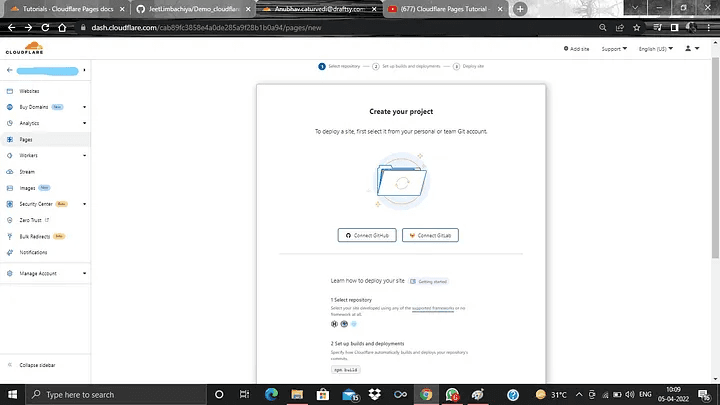
Create Project
Step 13: After that, you must provide Cloudflare permission to utilize your GitHub project. The sample screenshot that will be requested is shown below. The “Install and Authorize” button must be clicked.
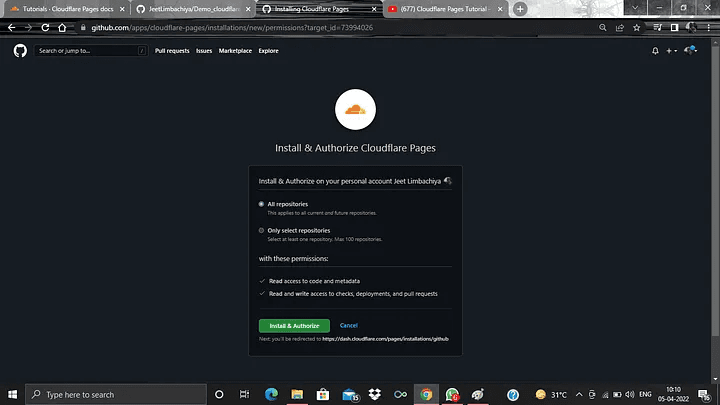
Permit to install and authorize
Step 14: Then, you will see that your Github project is connected to Cloudflare.
Connected to cloudflare
Step 15: At this point, you must configure the build and deployment commands. In the build settings, you must choose “None” for the Framework preset and then click “save and deploy.” You will observe that your project’s deployment to Cloudflare ought to have started.
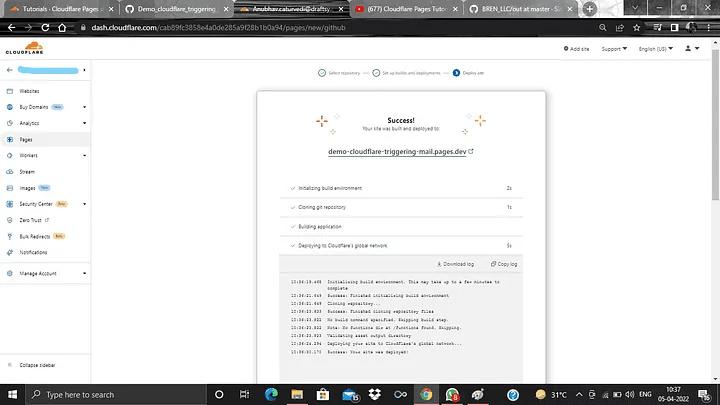
Deployment Started
Step 16: At this point, you will see the project’s link at the top. You must click on the link to determine whether your project is accessible to everyone.
As soon as you click the send message button below, a popup with a sample photo appears. You just need to click the “send anyhow” button once, so don’t worry.
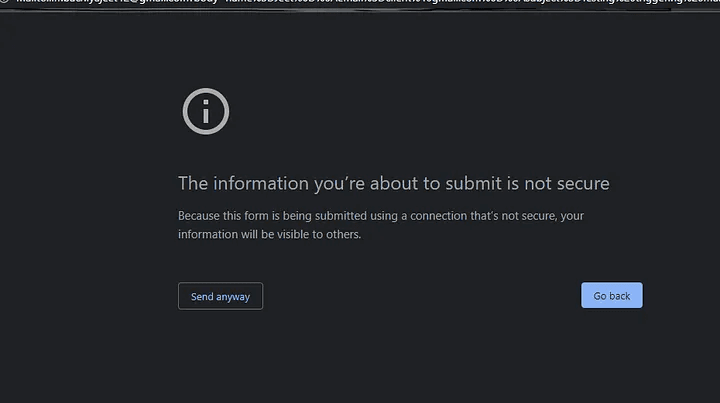
Click on Send Anyway
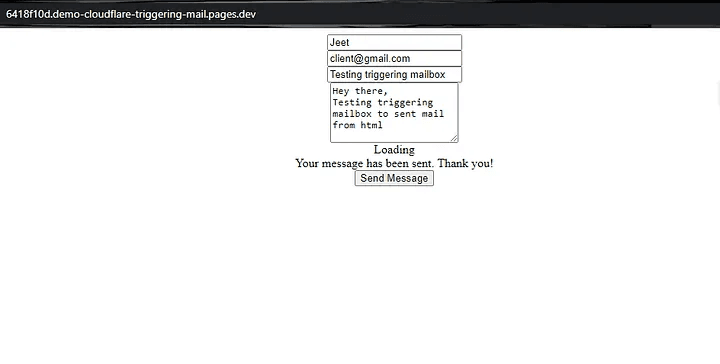
You may now use the same procedures that you did while testing your project locally.
I hope this article was informative and provided you with the details you required. If you have any questions while reading the blog, message me on Instagram or LinkedIn.For any kind of work related to Web Development you can contact me at helpmeanubhav@gmail.com
Thank You…
This article discusses using HTML code to trigger a mailbox to send mail. To set up HTML code to start, go to our most recent tutorial.
The benefit of adopting this approach is that the mail, from which you must send the letter, will be double-verified.
Let’s start by performing the steps;
Step 1: The first step is to add a contact form code to the HTML page or template where you wish to modify the trigger for sending email via mailbox. The contact form example code is provided below.
Code
Step 2: Verify the HTML file’s functionality in the browser. To accomplish this, double-click the HTML file, and your usual browser will open.
HTML form
Step 3: To activate the mailbox, provide the necessary information in the required space.Step 4: Now you need to click on send message button to tell the mailbox to get activated and send mail.
As soon as you click the button your default mailbox is prompted like below.
Form
Step 4: Now you need to click on send message button to tell the mailbox to get activated and send mail.
As soon as you click the button your default mailbox is prompted like below.
MailBox
Step 5: Here you need to again select the email id from which you want to send your message. After selecting your mail id you will automatically get the exact details that you have typed in your contact form in the browser. At first, time if you will not get the exact message details try the same thing the second time you will get it. Below is a sample you will see.
Select your Email ID
Step 6: Send the mail after validating the information. I am getting mail on my mobile device, thus the sample for the same is below. And the receiver can receive your mail.
Received Mail
At this point, your system and no other system can access your project because it is functioning locally. We must deploy our project to the Cloudflare hosting infrastructure in order to make it available to everyone. Hostinger, Heroku, and many other platforms can host our static or dynamic HTML and CSS website, however, as a demonstration of utilizing Cloudflare, we are deploying our project to cloudflare.
Step 7: Create a Cloudflare account if you don’t already have one. You must sign in to Cloudflare since I’m presuming you have an account there.
Create Cloudflare account
Step 8: Enter your login information to access the dashboard.
Login Page
Step 9: If you have enabled two-factor authentication for your account, the window below will appear.
Two-Factor Authentication
Step 10: After that, you may access the Cloudflare dashboard.
Cloudflare Dashboard
Step 11: Go to the pages section on the left navigation panel now.
Pages Section
Step 12: From there, use the “Create a Project” option to start a new project. and link to the project repository on Github.
Create Project
Step 13: After that, you must provide Cloudflare permission to utilize your GitHub project. The sample screenshot that will be requested is shown below. The “Install and Authorize” button must be clicked.
Permit to install and authorize
Step 14: Then, you will see that your Github project is connected to Cloudflare.
Connected to cloudflare
Step 15: At this point, you must configure the build and deployment commands. In the build settings, you must choose “None” for the Framework preset and then click “save and deploy.” You will observe that your project’s deployment to Cloudflare ought to have started.
Deployment Started
Step 16: At this point, you will see the project’s link at the top. You must click on the link to determine whether your project is accessible to everyone.
As soon as you click the send message button below, a popup with a sample photo appears. You just need to click the “send anyhow” button once, so don’t worry.
Click on Send Anyway
You may now use the same procedures that you did while testing your project locally.
I hope this article was informative and provided you with the details you required. If you have any questions while reading the blog, message me on Instagram or LinkedIn.For any kind of work related to Web Development you can contact me at helpmeanubhav@gmail.com
Thank You…