Building a Banking application via Smart Contract based upon Ethereum Blockchain
Open remix IDE from the link https://remix.ethereum.org/
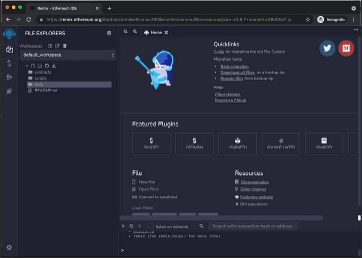
The home page of remix IDE will look like this.
Initially, there are many files and folders by default created by remix IDE there are useful for adding dependencies and more scripts for different purposes, Although they are not required here we can delete those files and create a new blank file.

Make sure that the file extension is .sol, it's the extension for smart contracts written in solidity language.
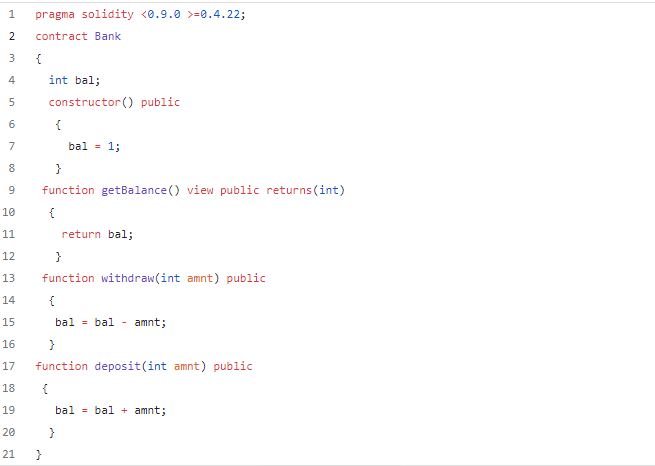
You can write the smart contract code in this created file.

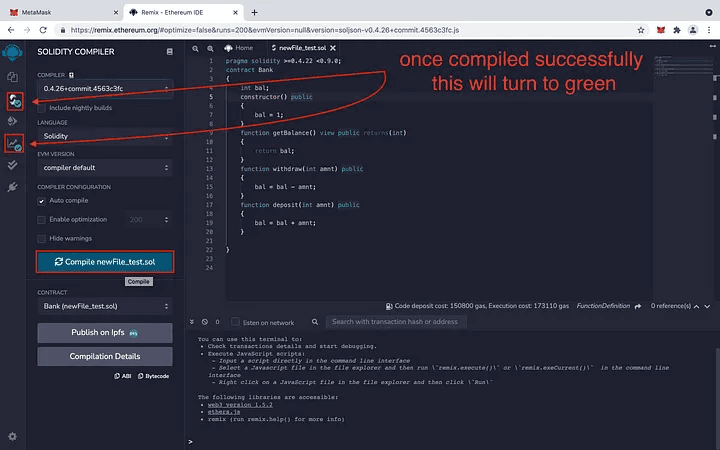
NOTE: To compile the contract you have to first select proper compiler. Here we have selected 0.4.26 version.


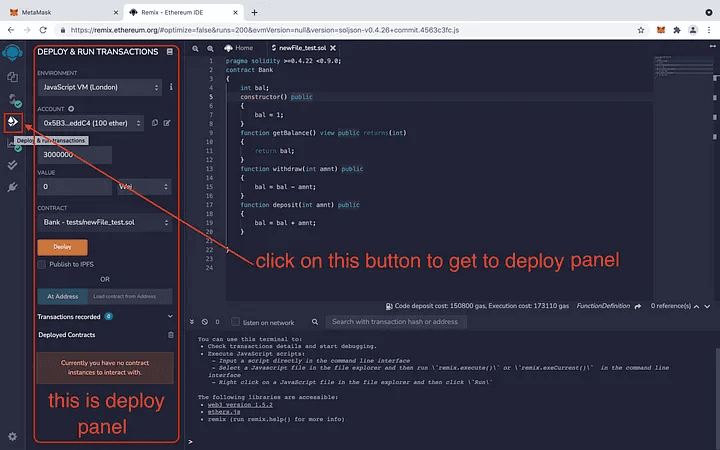
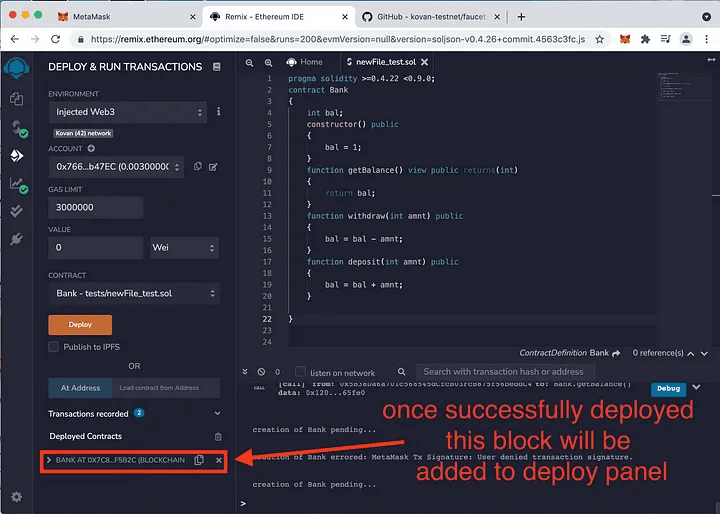
Compile the code and then deploy it to the network.
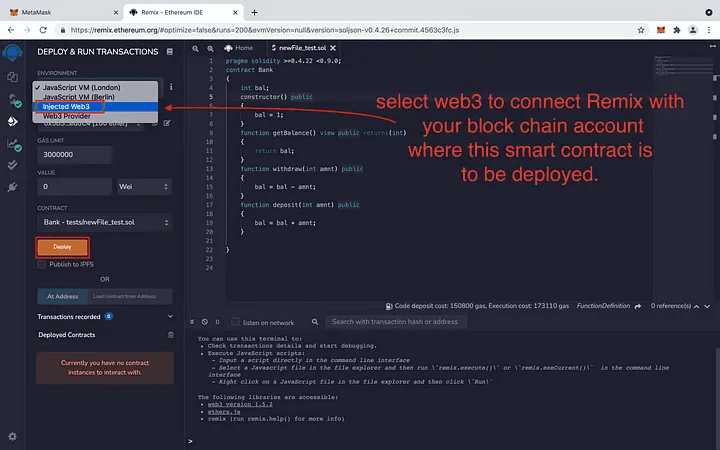
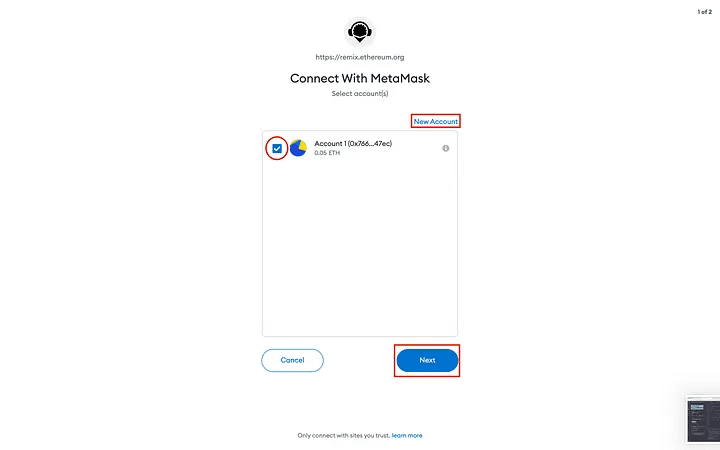
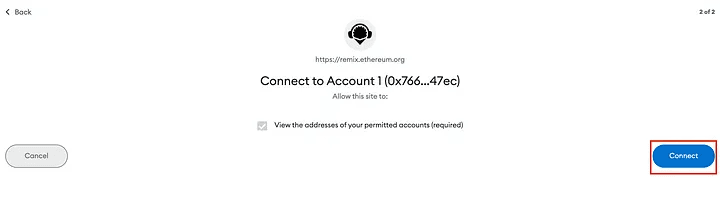
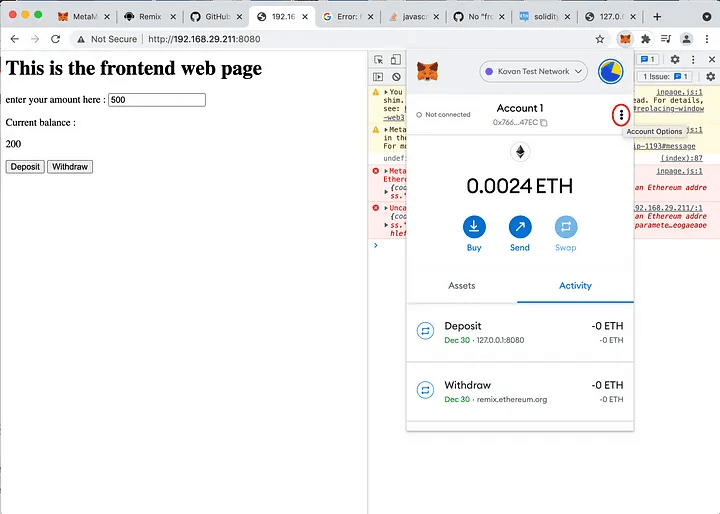
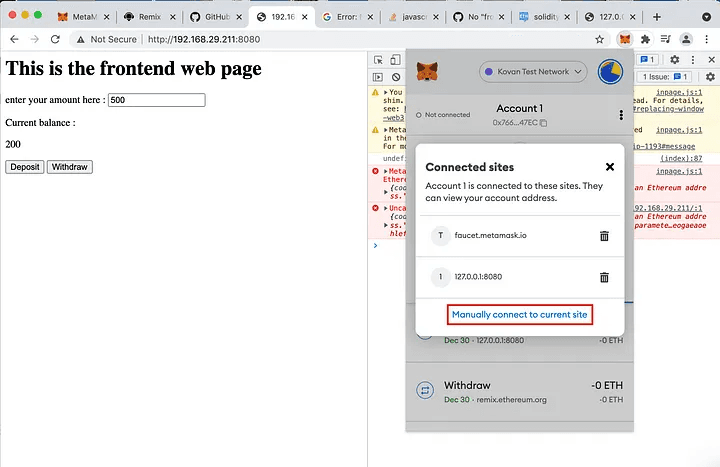
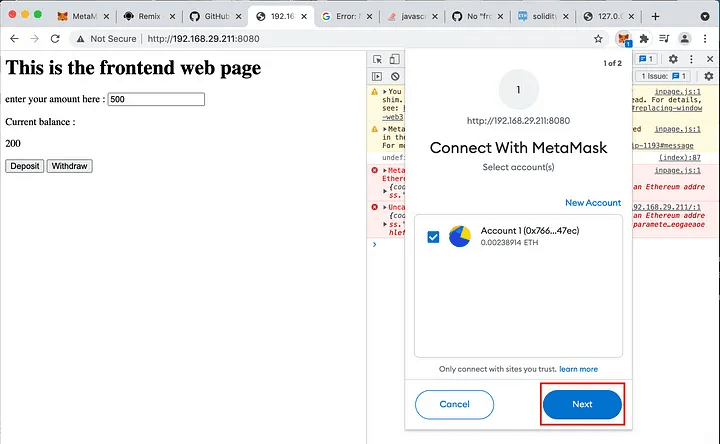
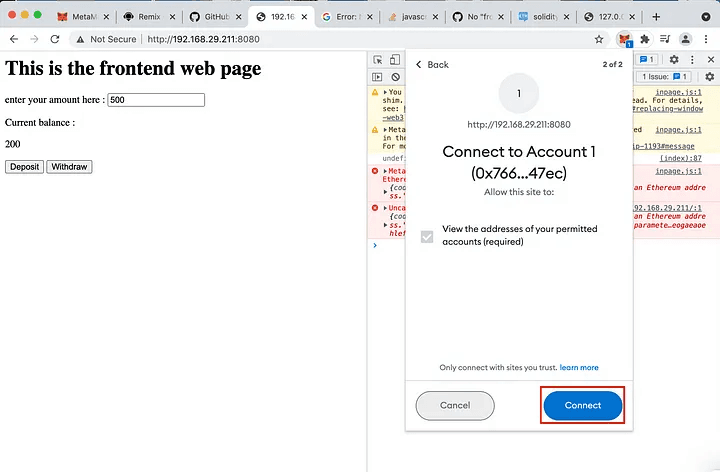
After selecting web3 to inject in the deployment tab the following few steps will take you through the process of connecting your blockchain account (i.e. meta mask account to the remix page)
Your account can be linked to any website in two easy steps using the addon for meta mask, which will also provide an automatic redirect. If not, we must manually add it, as will be demonstrated later.
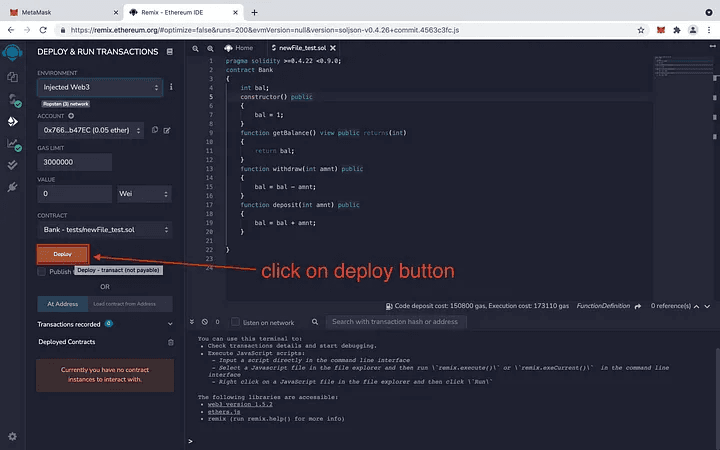
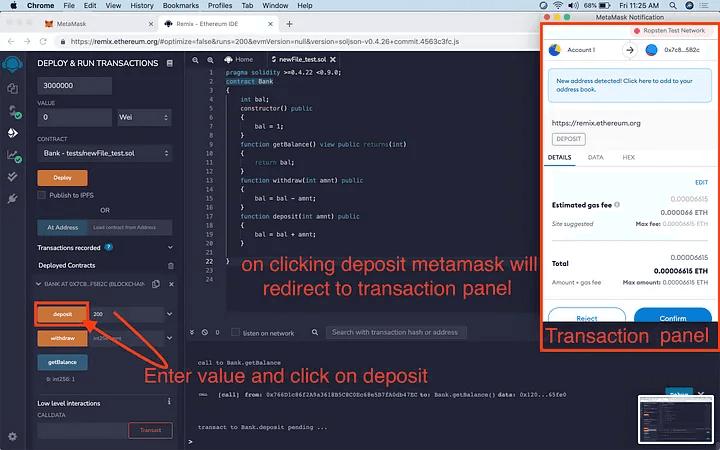
When you click the deploy button, you will be redirected to a page where you may conduct a transaction to deploy the smart contract on the network of your choice.
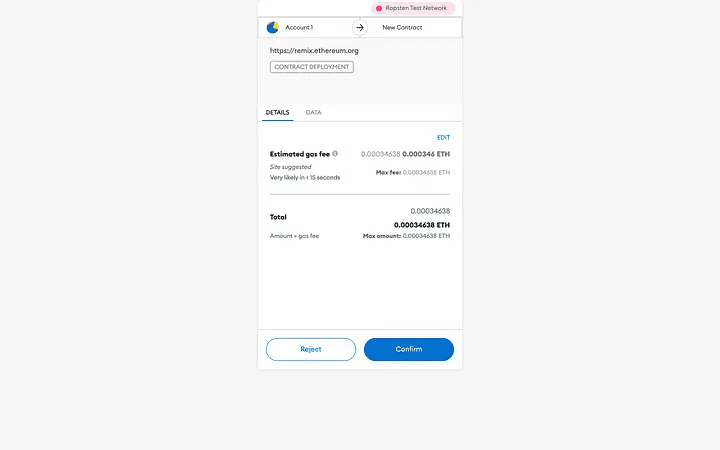
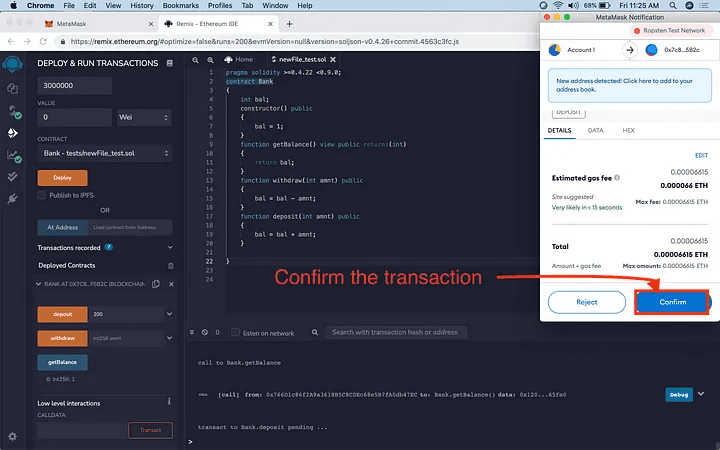
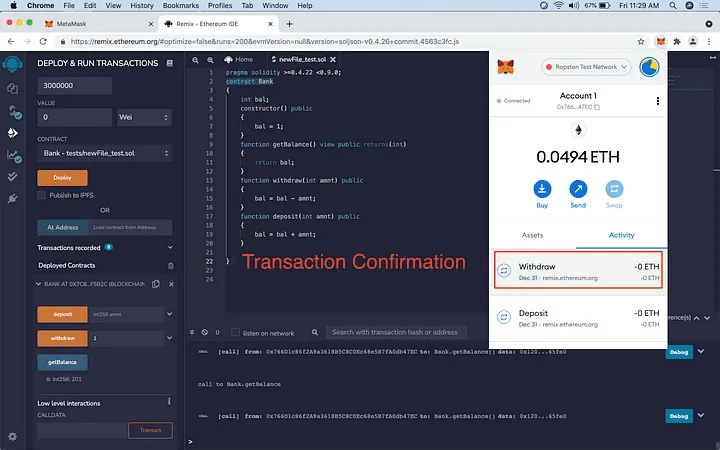
confirm the transaction to deploy the smart contract.

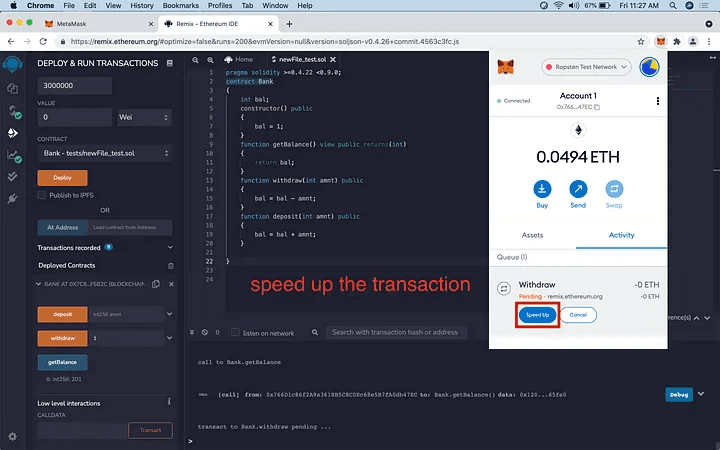
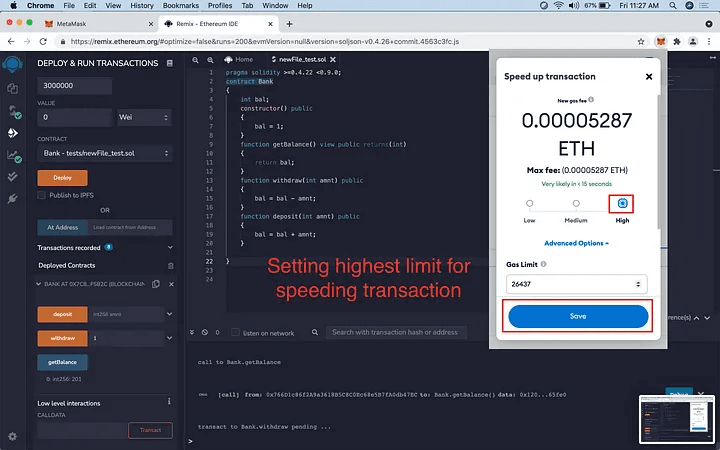
For transactions, it takes some time to mine the block, which is why the deployment is in the pending state. If necessary, you can accelerate the process by using a few extra ethers.
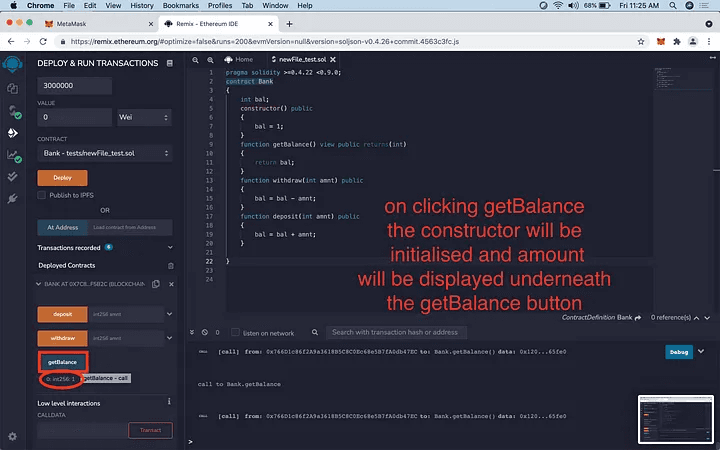
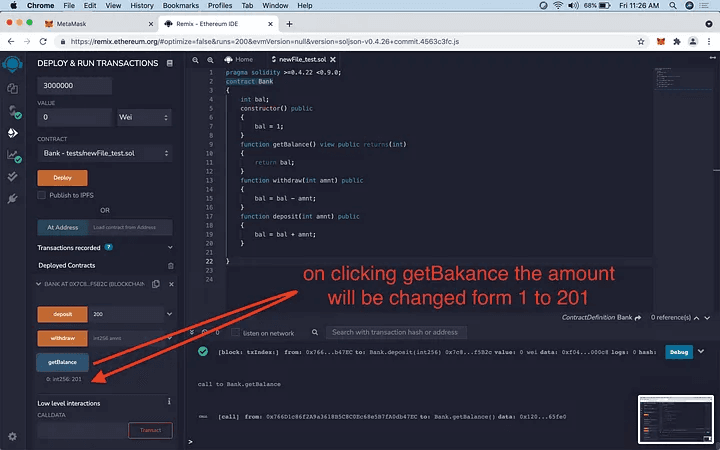
Let's test the deployed contract if it is working or not. To do so, follow the steps below:

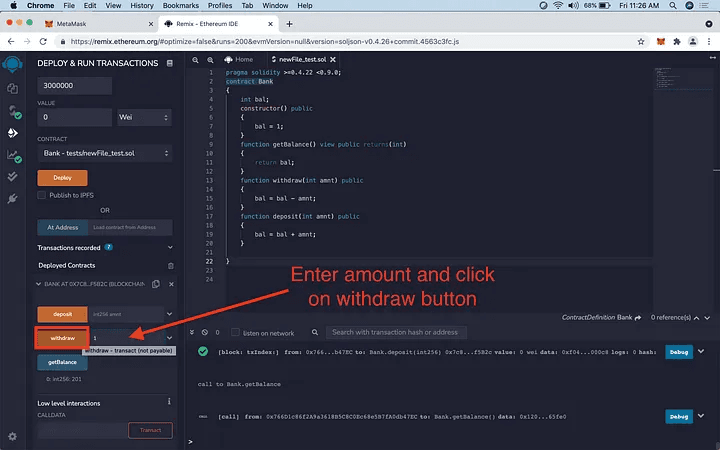


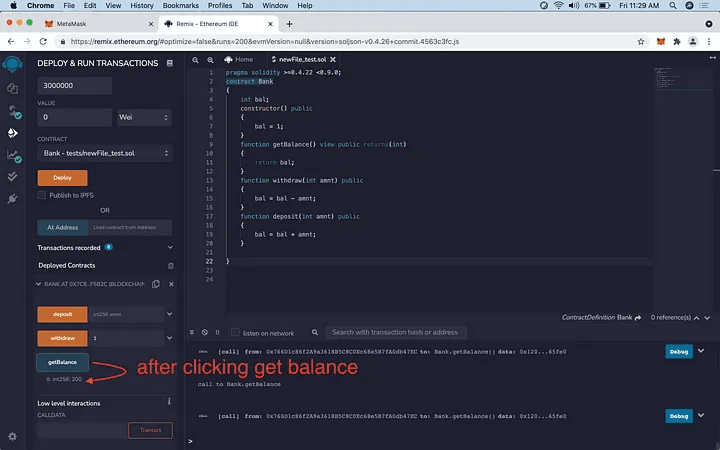
It is obvious that the 1 was taken out of the prior amount of 201, resulting in the displayed amount changing to 200.
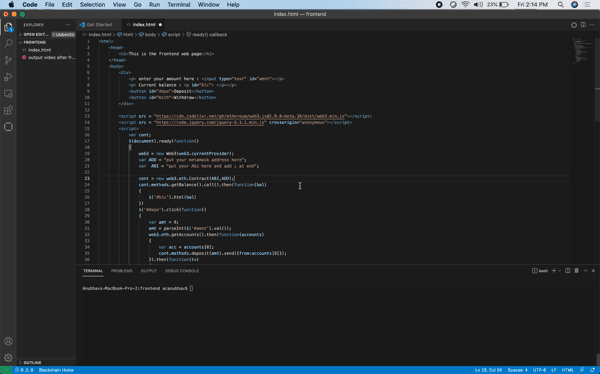
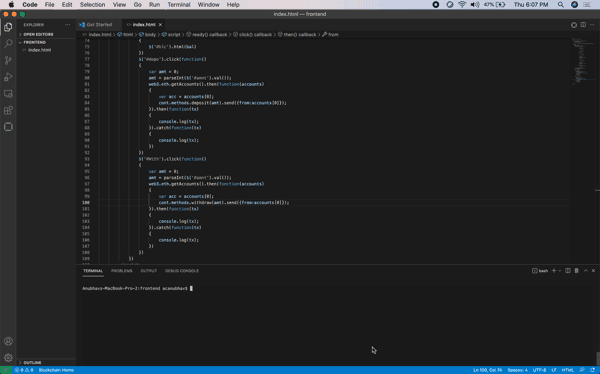
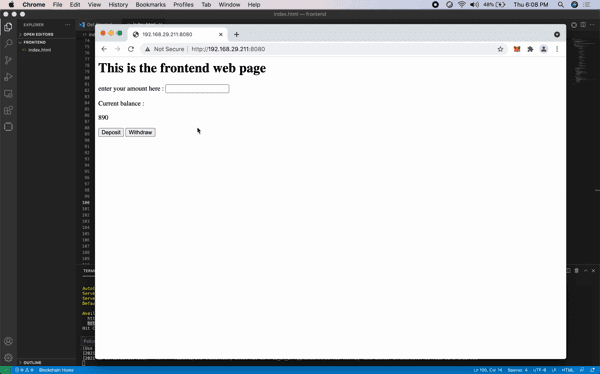
Create a straightforward web page in HTML for the front end now, then use mini JS and web3 small JS to link the front end to the smart contract and do some transactions using our web app.
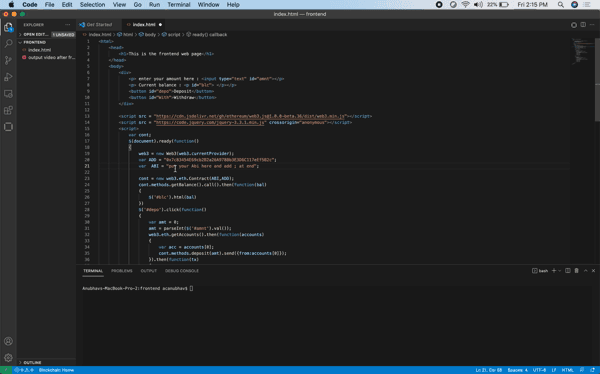
NOTE: Make sure to change the ABI and Address in the code as they vary from machine to machine and account to account.
To change ABI and Address follow the gif presented below.
Editing ADD(address part of the front end)
Editing the ABI part of the front end
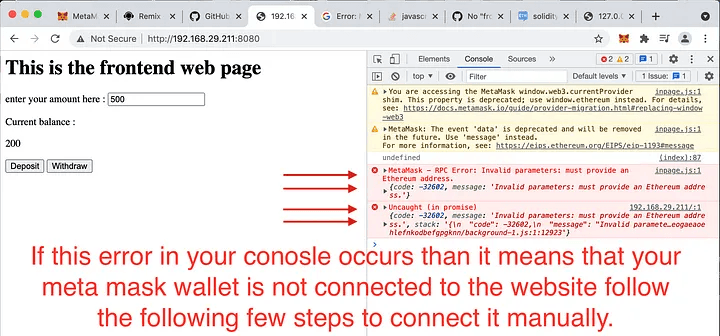
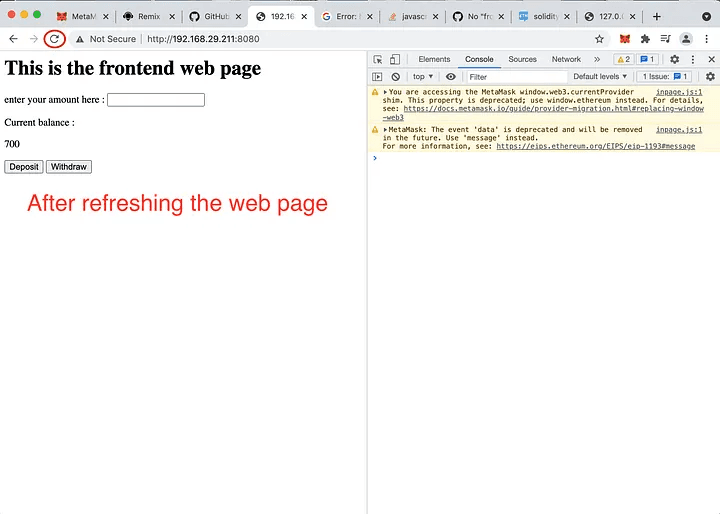
Error for meta mask not being connected to the website or localhost.

part 1 of output initiating HTTP-server
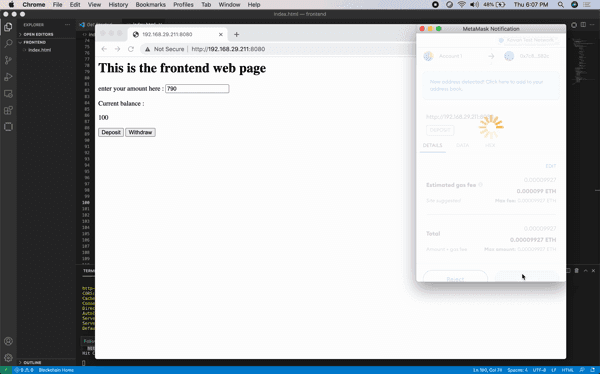
part 2 of output depositing some amount
part 3 of output withdrawing some amount
I hope this article was informative and provided you with the details you required. If you have any questions while reading the blog, message me on Instagram or LinkedIn.For any kind of work related to DeFi , Smart Contract Development ,Blockchain Development you can contact me at helpmeanubhav@gmail.com
Thank You…
Open remix IDE from the link https://remix.ethereum.org/
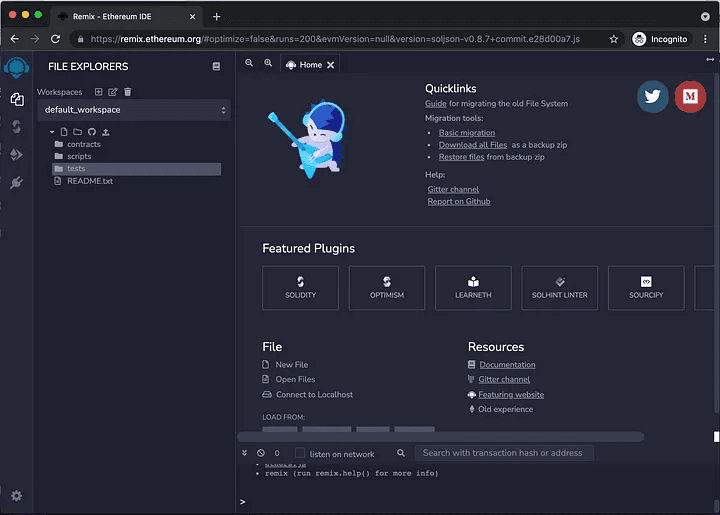
The home page of remix IDE will look like this.
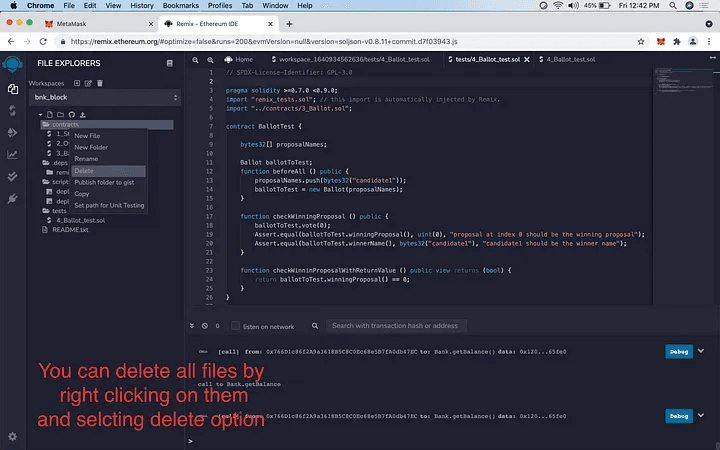
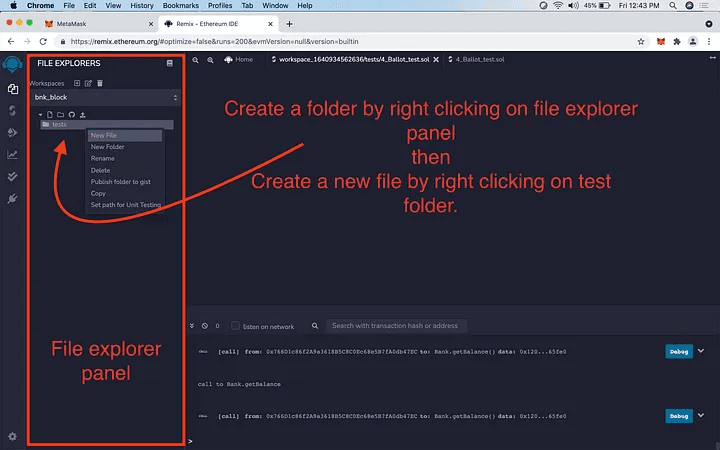
Initially, there are many files and folders by default created by remix IDE there are useful for adding dependencies and more scripts for different purposes, Although they are not required here we can delete those files and create a new blank file.
Make sure that the file extension is .sol, it's the extension for smart contracts written in solidity language.
You can write the smart contract code in this created file.
NOTE: To compile the contract you have to first select proper compiler. Here we have selected 0.4.26 version.
Compile the code and then deploy it to the network.
After selecting web3 to inject in the deployment tab the following few steps will take you through the process of connecting your blockchain account (i.e. meta mask account to the remix page)
Your account can be linked to any website in two easy steps using the addon for meta mask, which will also provide an automatic redirect. If not, we must manually add it, as will be demonstrated later.
When you click the deploy button, you will be redirected to a page where you may conduct a transaction to deploy the smart contract on the network of your choice.
confirm the transaction to deploy the smart contract.
For transactions, it takes some time to mine the block, which is why the deployment is in the pending state. If necessary, you can accelerate the process by using a few extra ethers.
Let's test the deployed contract if it is working or not. To do so, follow the steps below:
It is obvious that the 1 was taken out of the prior amount of 201, resulting in the displayed amount changing to 200.
Create a straightforward web page in HTML for the front end now, then use mini JS and web3 small JS to link the front end to the smart contract and do some transactions using our web app.
NOTE: Make sure to change the ABI and Address in the code as they vary from machine to machine and account to account.
To change ABI and Address follow the gif presented below.
Editing ADD(address part of the front end)
Editing the ABI part of the front end
Error for meta mask not being connected to the website or localhost.
part 1 of output initiating HTTP-server
part 2 of output depositing some amount
part 3 of output withdrawing some amount
I hope this article was informative and provided you with the details you required. If you have any questions while reading the blog, message me on Instagram or LinkedIn.For any kind of work related to DeFi , Smart Contract Development ,Blockchain Development you can contact me at helpmeanubhav@gmail.com
Thank You…
Open remix IDE from the link https://remix.ethereum.org/
The home page of remix IDE will look like this.
Initially, there are many files and folders by default created by remix IDE there are useful for adding dependencies and more scripts for different purposes, Although they are not required here we can delete those files and create a new blank file.
Make sure that the file extension is .sol, it's the extension for smart contracts written in solidity language.
You can write the smart contract code in this created file.
NOTE: To compile the contract you have to first select proper compiler. Here we have selected 0.4.26 version.
Compile the code and then deploy it to the network.
After selecting web3 to inject in the deployment tab the following few steps will take you through the process of connecting your blockchain account (i.e. meta mask account to the remix page)
Your account can be linked to any website in two easy steps using the addon for meta mask, which will also provide an automatic redirect. If not, we must manually add it, as will be demonstrated later.
When you click the deploy button, you will be redirected to a page where you may conduct a transaction to deploy the smart contract on the network of your choice.
confirm the transaction to deploy the smart contract.
For transactions, it takes some time to mine the block, which is why the deployment is in the pending state. If necessary, you can accelerate the process by using a few extra ethers.
Let's test the deployed contract if it is working or not. To do so, follow the steps below:
It is obvious that the 1 was taken out of the prior amount of 201, resulting in the displayed amount changing to 200.
Create a straightforward web page in HTML for the front end now, then use mini JS and web3 small JS to link the front end to the smart contract and do some transactions using our web app.
NOTE: Make sure to change the ABI and Address in the code as they vary from machine to machine and account to account.
To change ABI and Address follow the gif presented below.
Editing ADD(address part of the front end)
Editing the ABI part of the front end
Error for meta mask not being connected to the website or localhost.
part 1 of output initiating HTTP-server
part 2 of output depositing some amount
part 3 of output withdrawing some amount
I hope this article was informative and provided you with the details you required. If you have any questions while reading the blog, message me on Instagram or LinkedIn.For any kind of work related to DeFi , Smart Contract Development ,Blockchain Development you can contact me at helpmeanubhav@gmail.com
Thank You…